Manually taking meeting minutes is time-consuming, prone to errors, and can easily distract participants from the core discussion. Thankfully, Microsoft Teams has a feature that makes that process easy. With its built-in transcription feature, you can automatically capture everything that’s said during a meeting, complete with timestamps and speaker labels.
In this guide, we’ll walk you through how to enable and download a meeting transcription in Teams so you can focus on the discussion while Teams handles the note-taking.

How to Automatically Transcribe Meetings in Microsoft Teams
Step 1: Start the Microsoft Teams Meeting
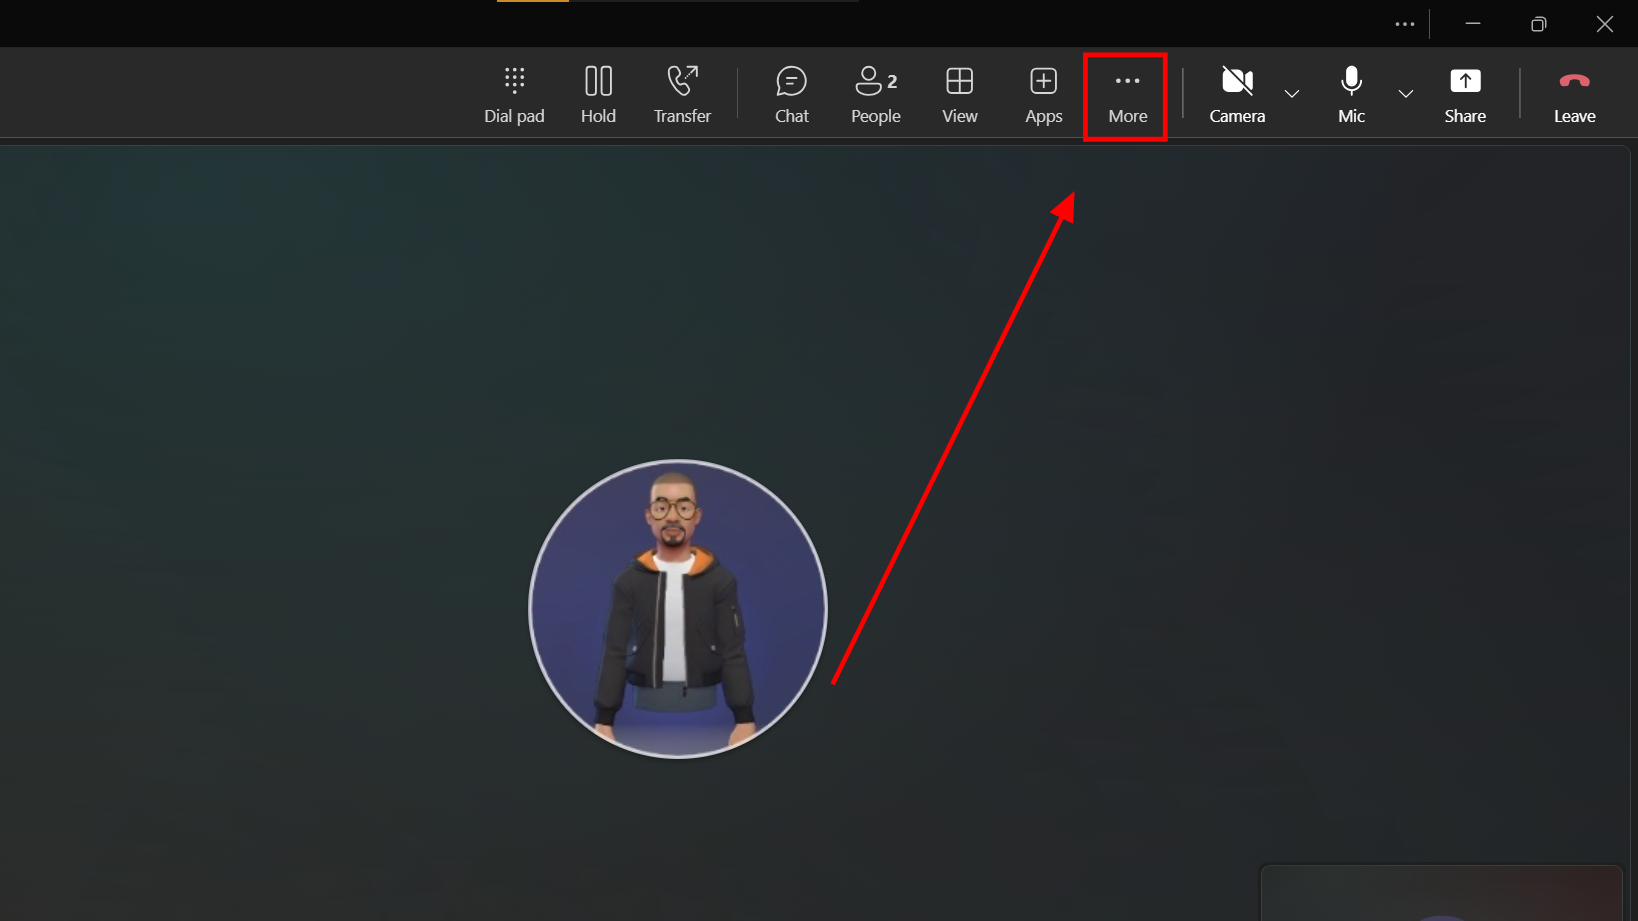
Step 2: In the meeting controls at the top of the window, click 'More'
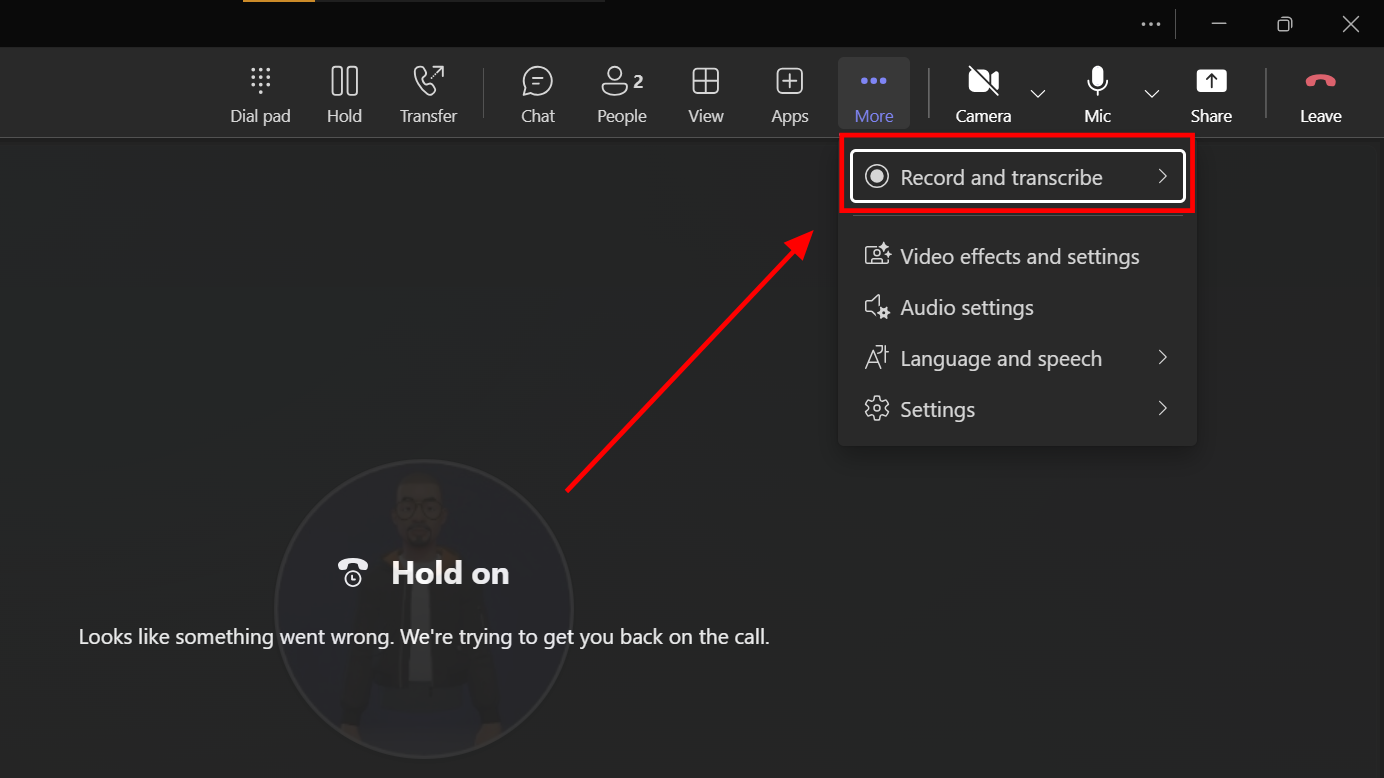
Step 3: Select 'Record and transcribe'
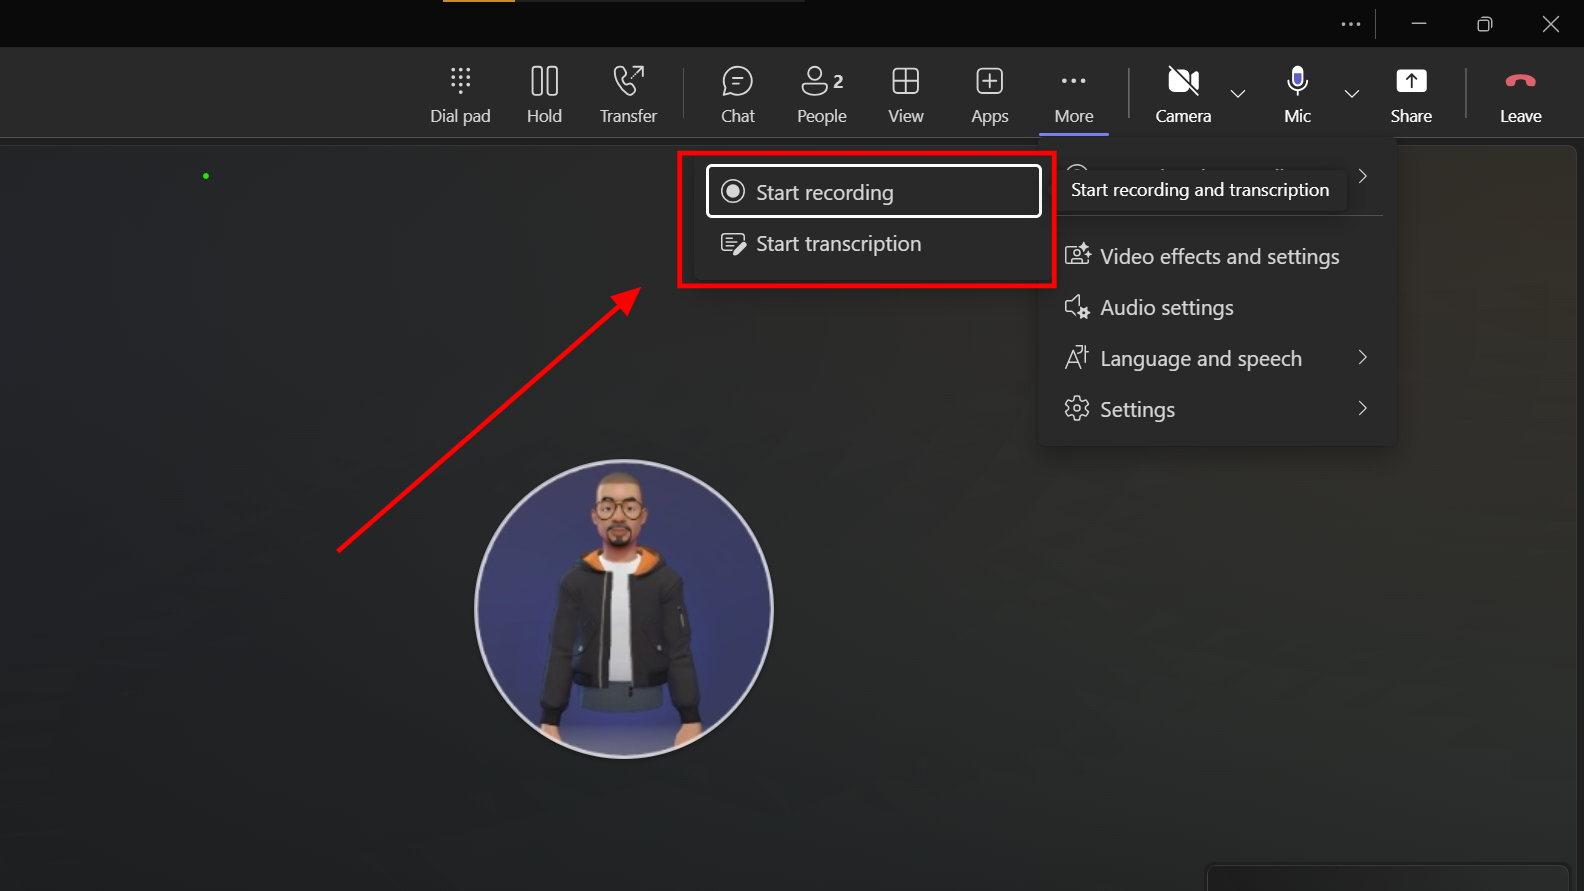
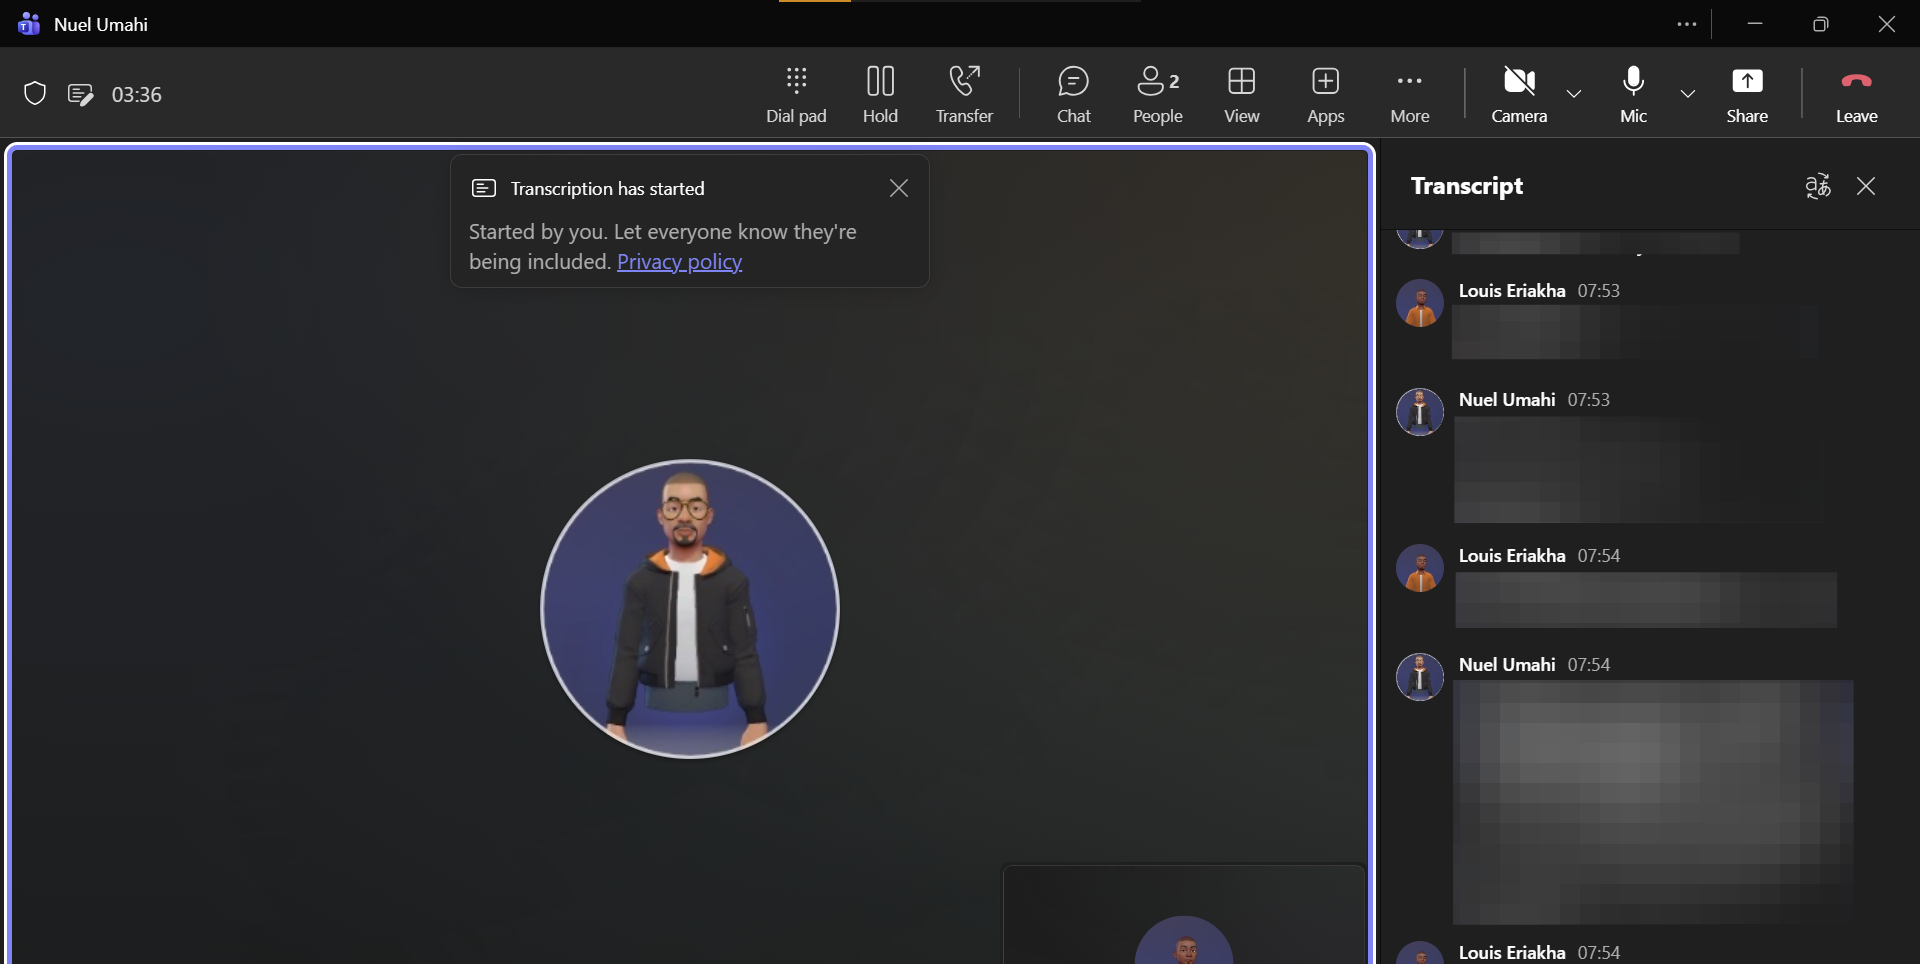
Step 4: You can choose to either start a transcript or start a recording; it doesn't really matter which you pick. I chose 'Start transcription'
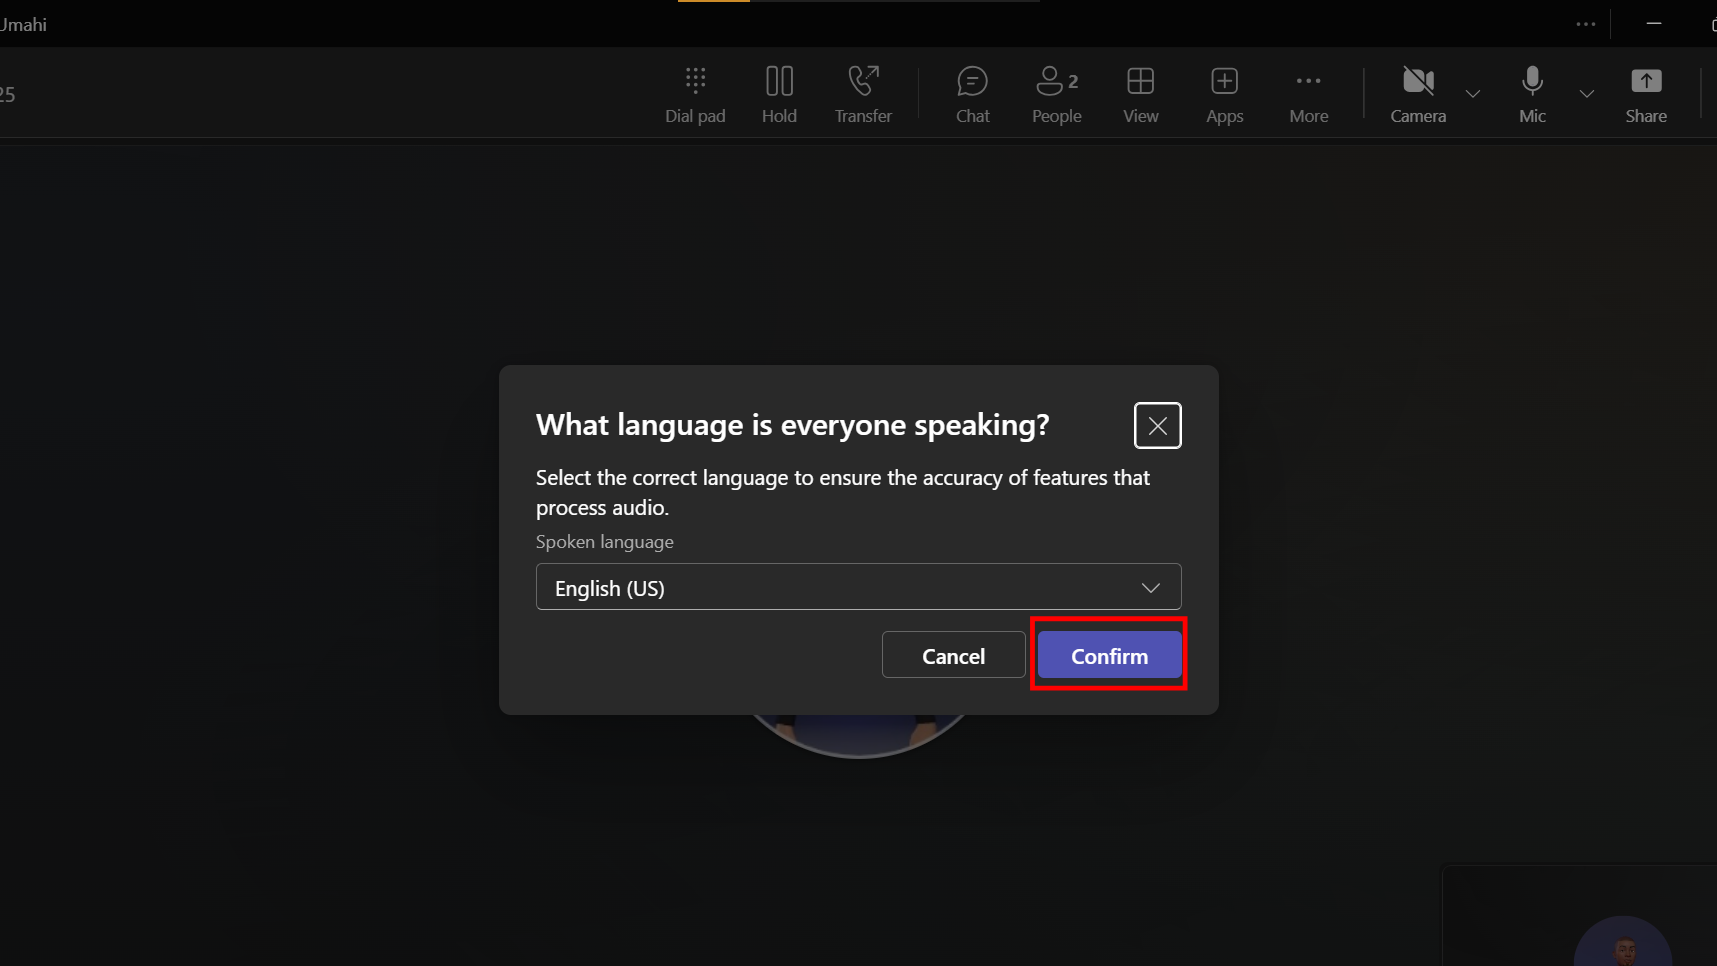
Step 5: Confirm the language. Once you do that, the meeting is recorded and stored, and everyone receives a notification that they are being recorded. (But you should mention it to them too.)
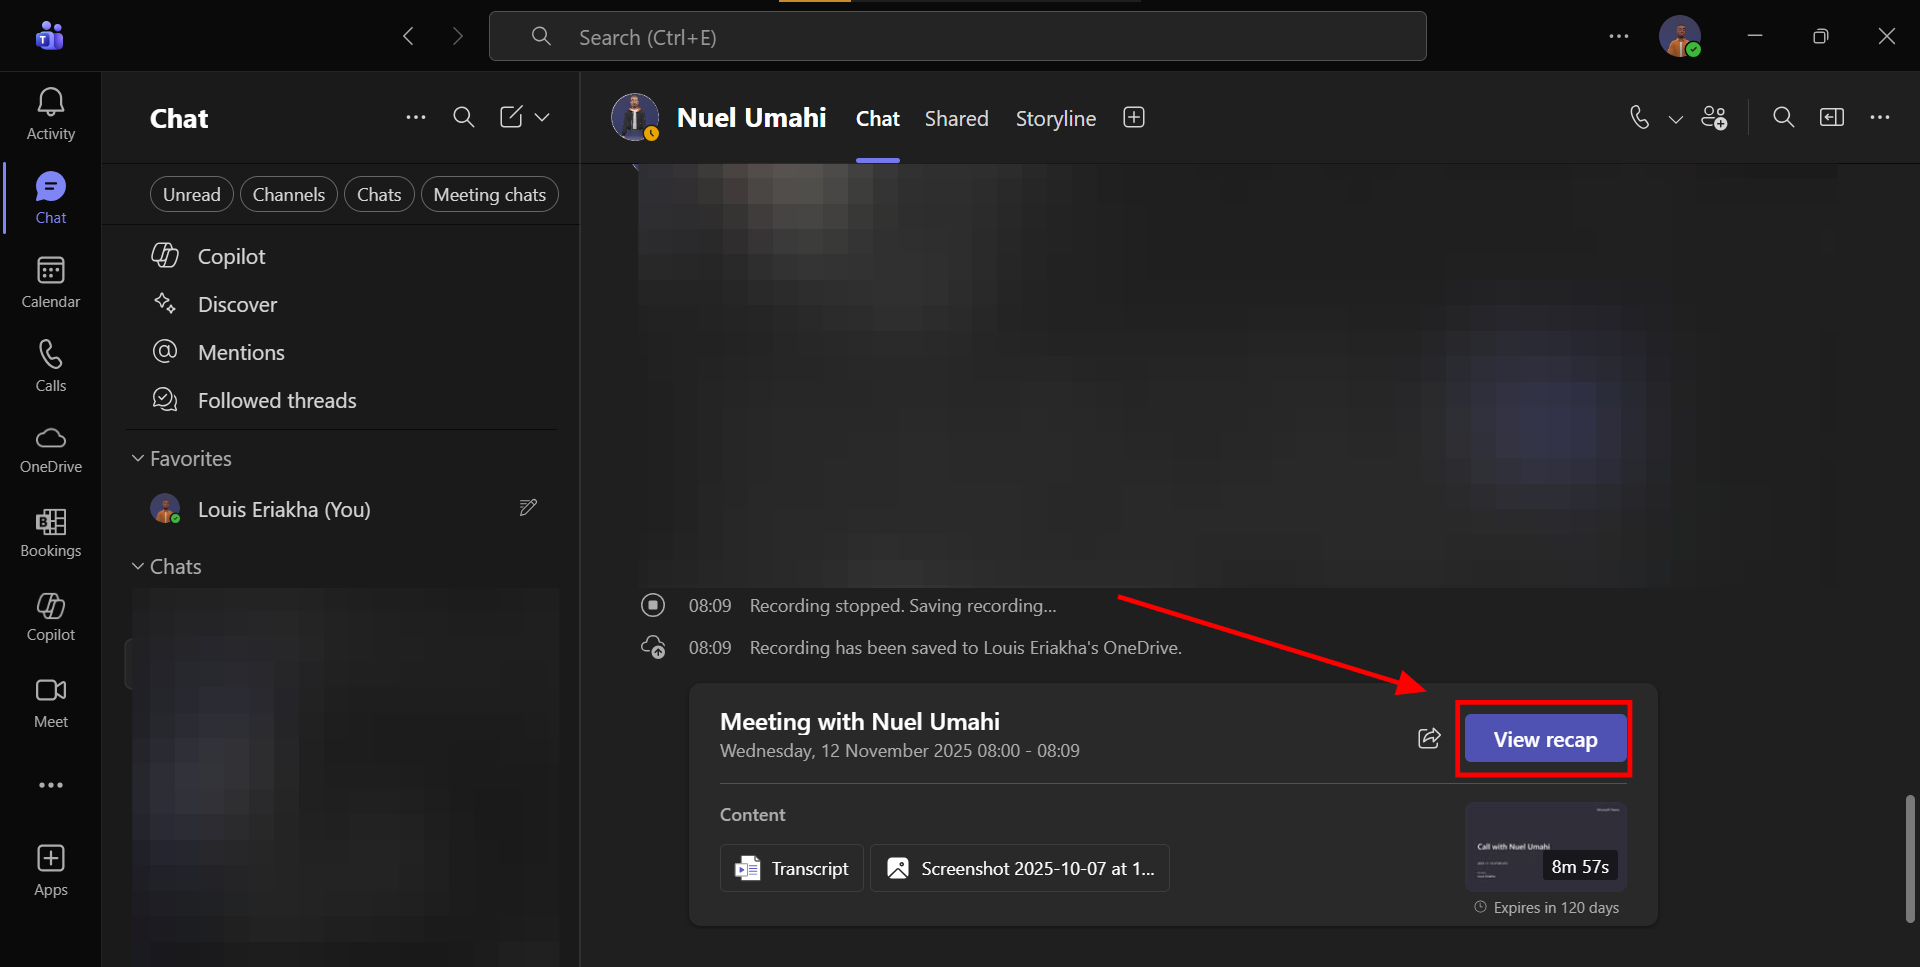
Step 6: A few minutes after the meeting is over, you should be able to see a 'View recap' button pop up in chat
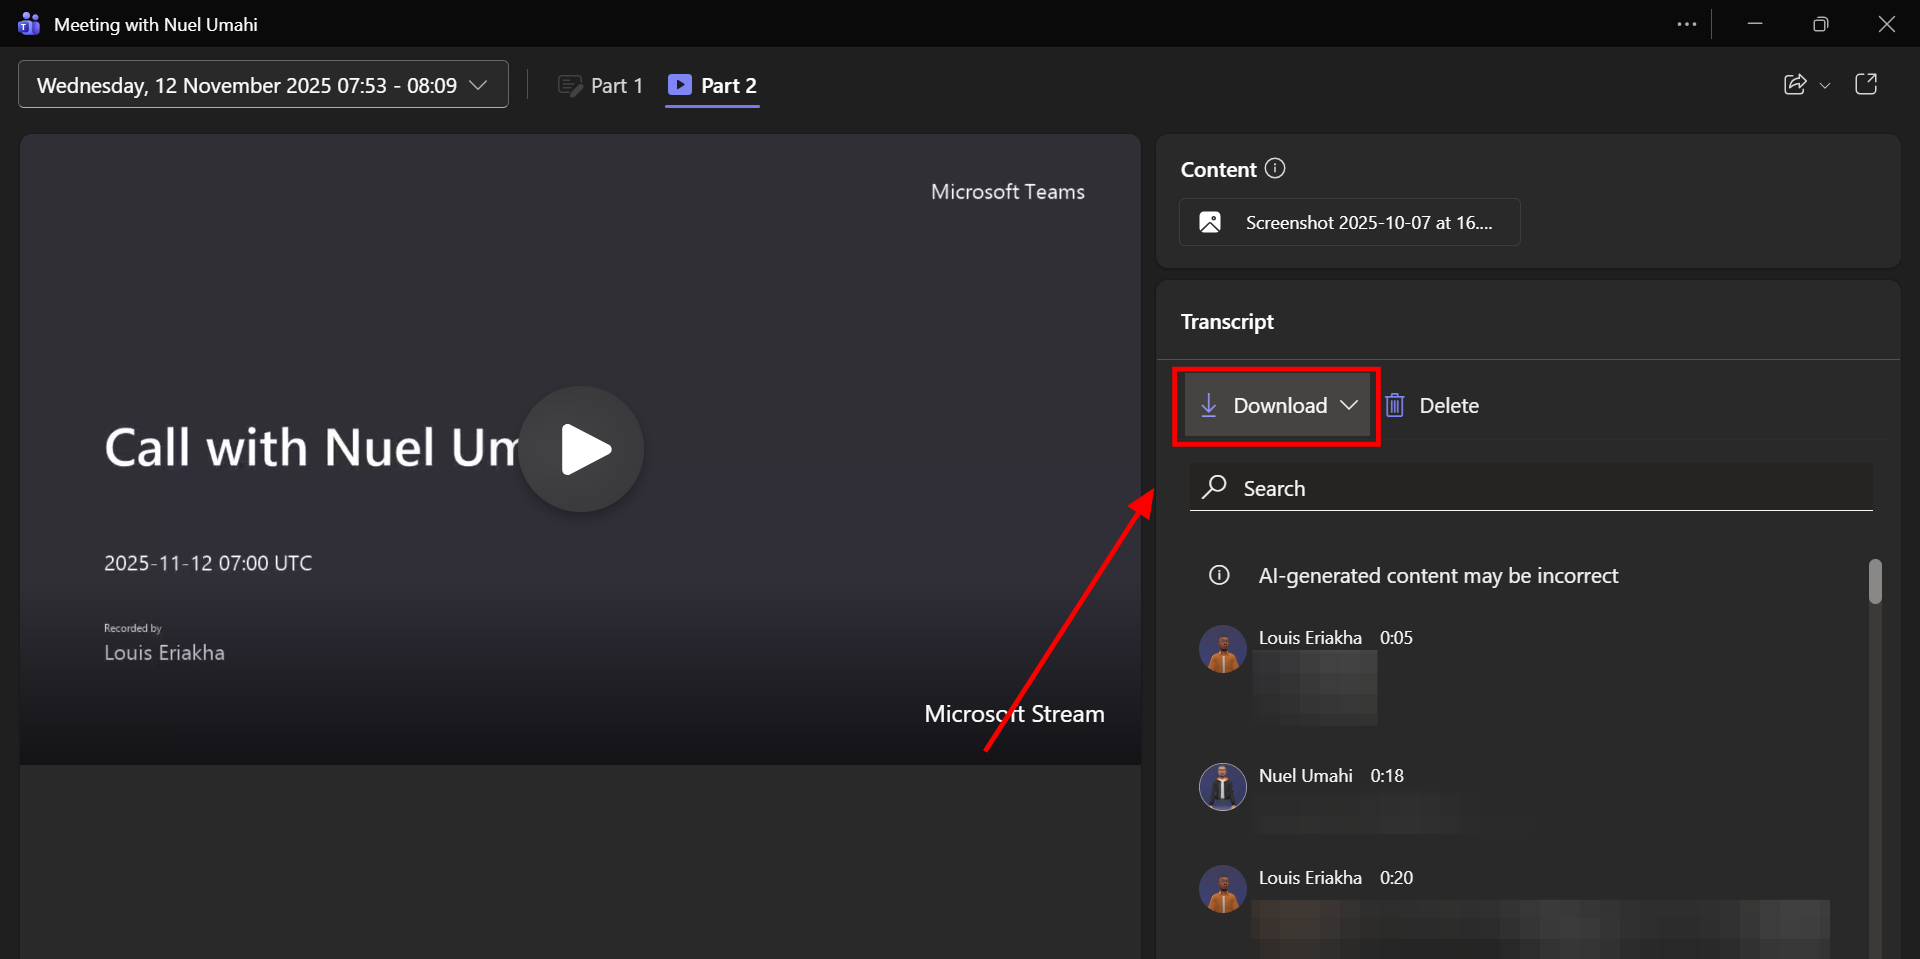
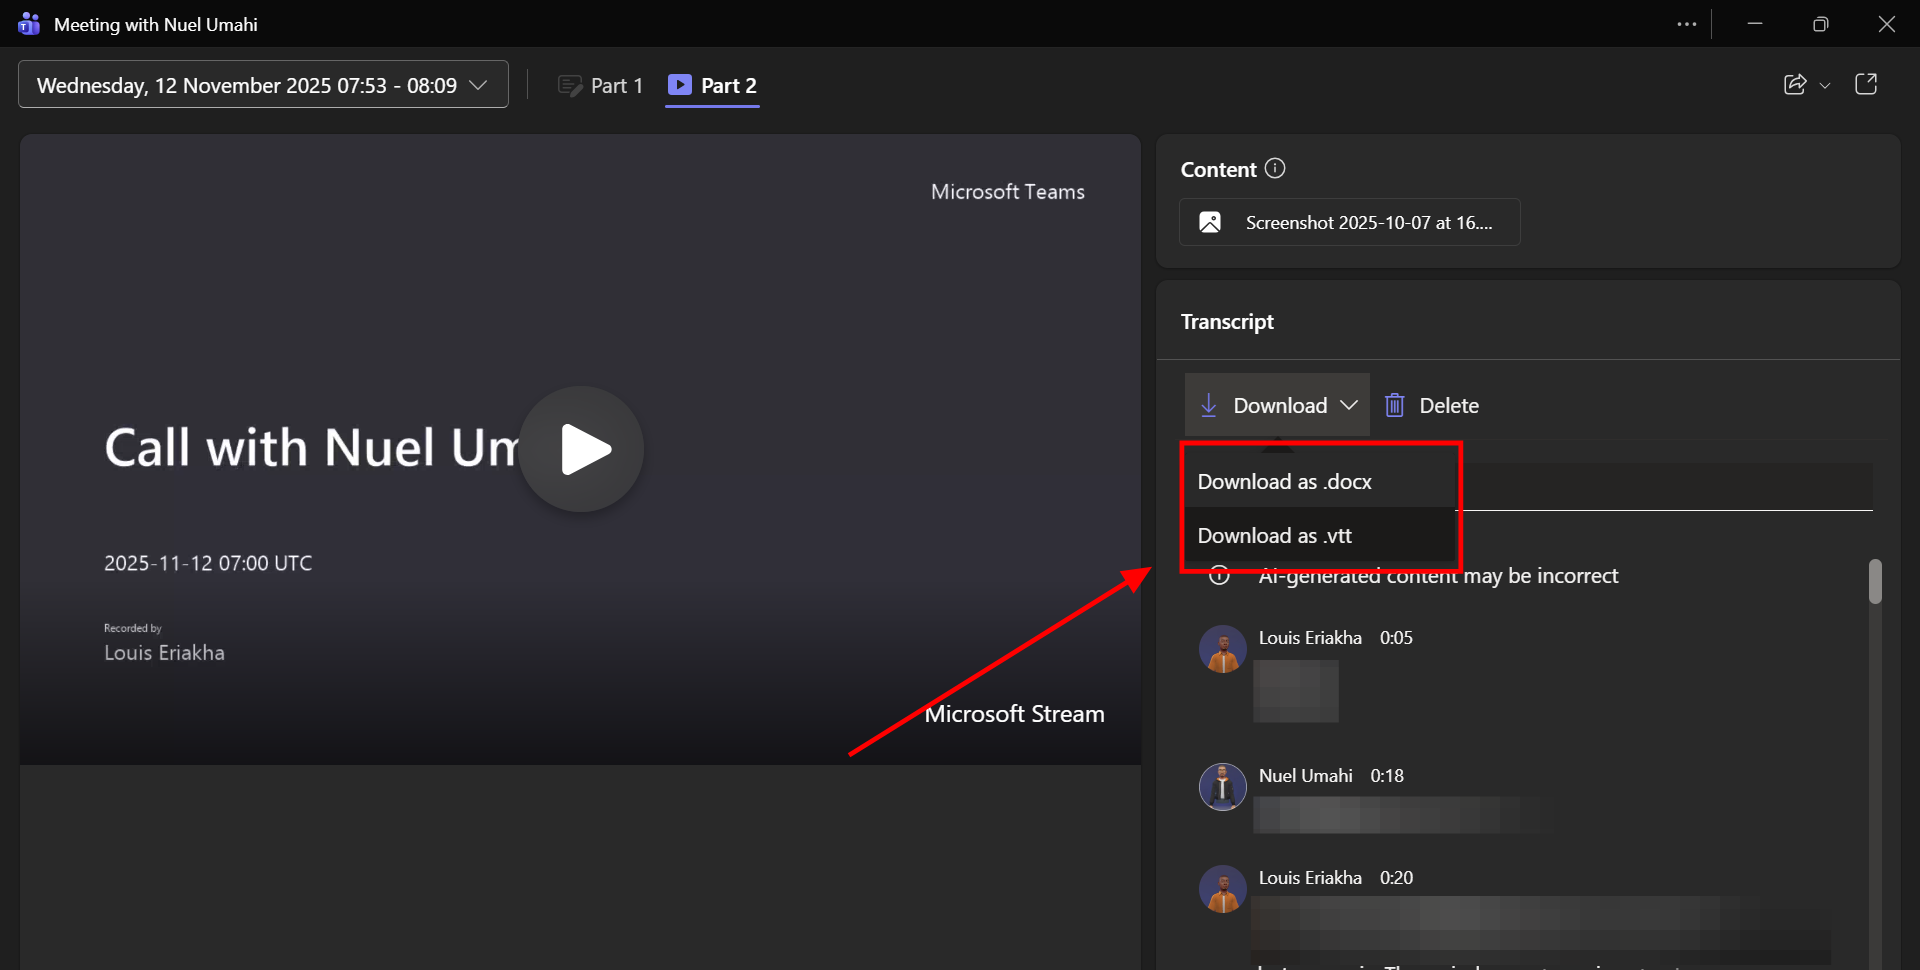
Step 7: You can now download the transcript of the call as either a .docx or .vtt file format
Conclusion
That’s it, your meeting transcript is ready. With Teams handling transcription automatically, you no longer need to scramble for notes or miss key points. It’s especially helpful if you want to revisit discussions, verify decisions, or share meeting highlights later.
Image Credit: Louis Eriakha / Techloy.com