

I got fed up watching ads mush up my screen when I just wanted to read an article or check a recipe, especially while using data. The alternative, which was relying on ad blocker apps, felt heavy and battery-hungry.
Then I discovered a smooth alternative baked right into Android: Private DNS. It’s built into Android 9 and above and lets you block ads at the DNS level, soundtracked by fewer pop-ups, faster browsing, and no extra apps running in the background.
It’s simple, efficient, and cleaner, all without rooting. Here's how to go about it.

Steps to Block Ads on Android with a Private DNS
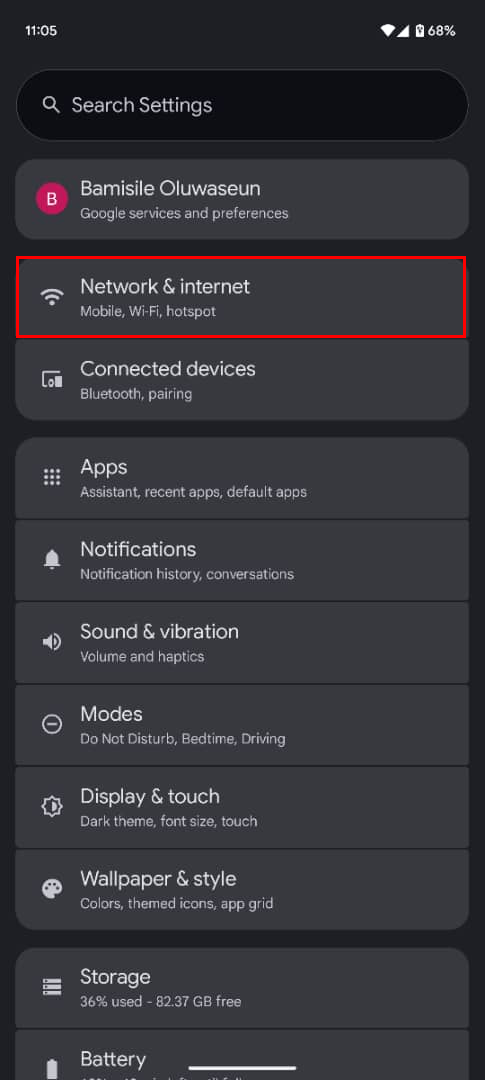
Step 1: Open your Settings app, then go to "Network & Internet" (it might say “Connections” or “Network & Internet” depending on your phone).
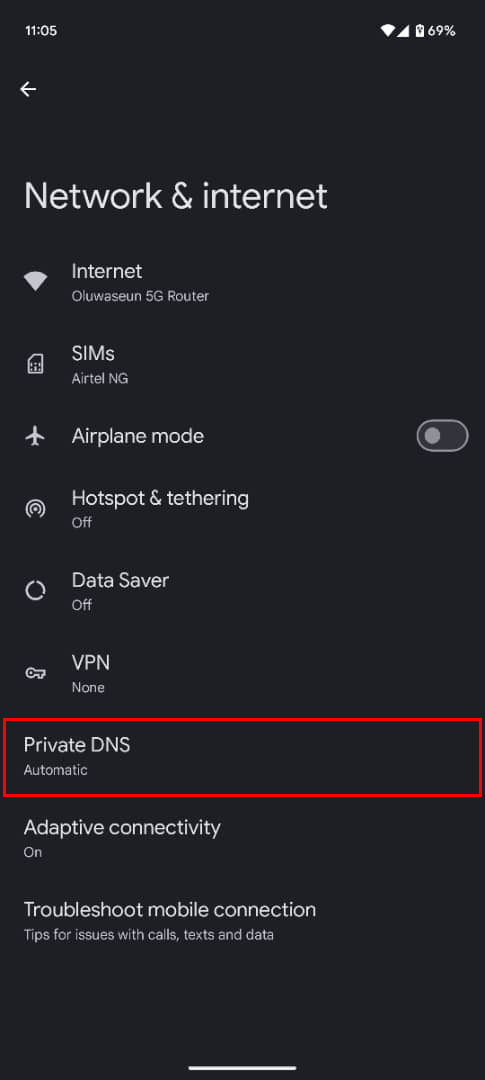
Step 2: Tap "Private DNS"
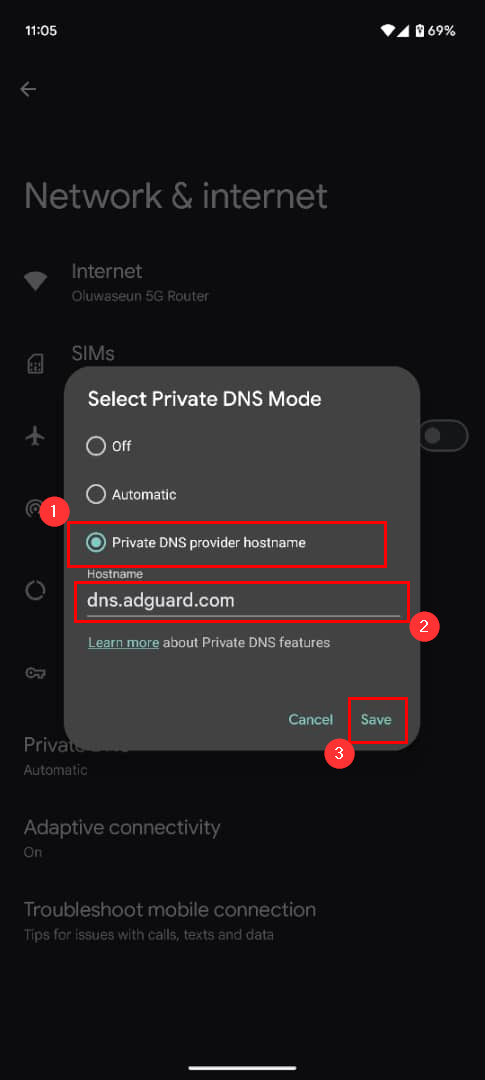
Step 3: Select Private DNS provider hostname, type "dns.adguard.com" in the input box, then click the Save button. This will block ads on websites and apps across your Android device.

Conclusion
Private DNS offers a minimalist yet powerful way to reclaim your browsing experience. Since it works across your entire device, you don’t have to worry about setting up individual browsers or apps one by one. And because it’s built directly into Android, it feels more reliable than third-party apps that may slow down your phone.
Of course, it won’t block every single type of ad, especially those baked directly into platforms like YouTube. But for general browsing and in-app clutter, it makes a big difference.


