

Shopify is a popular e-commerce platform where you can create and manage an online store without the need for extensive technical knowledge.
Millions of individuals use the platform daily to sell and promote their products online. If you are a business person who wants an e-commerce store on Shopify, this guide will help.
A Step-By-Step Guide on How to Build a Basic E-commerce Store Using Shopify
Step 1: Sign in to Shopify
Head to Shopify's website, and click the "Start free trial" on the upper right corner of your screen. Once you do that you will log in and start your 14-day trial after which you will need to purchase a plan that suits the type of store you want.

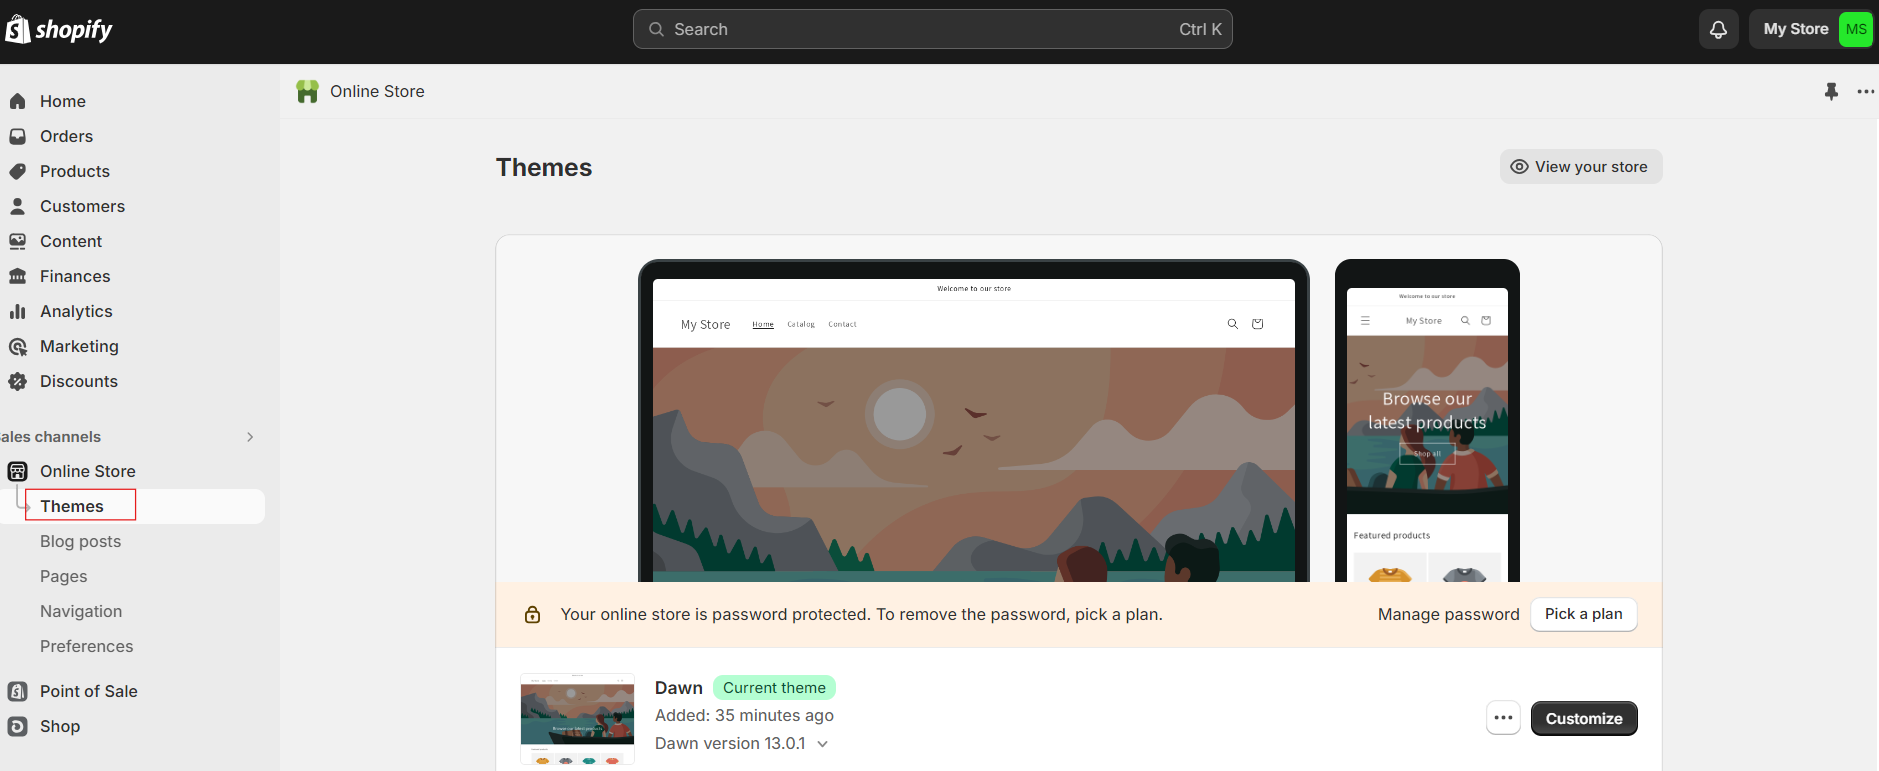
Step 2: Choose a Theme
On your Shopify dashboard, click on "Customize your online store" which you will find under the Sell online tag which is part of the Setup guide you will get from Shopify once you are on your dashboard.
Alternatively, you can click "Online Store" in the left-hand menu of your dashboard, then select "Themes." Once you have clicked on it, browse through Shopify's collection of free and paid themes and choose one that suits your store's branding and style.
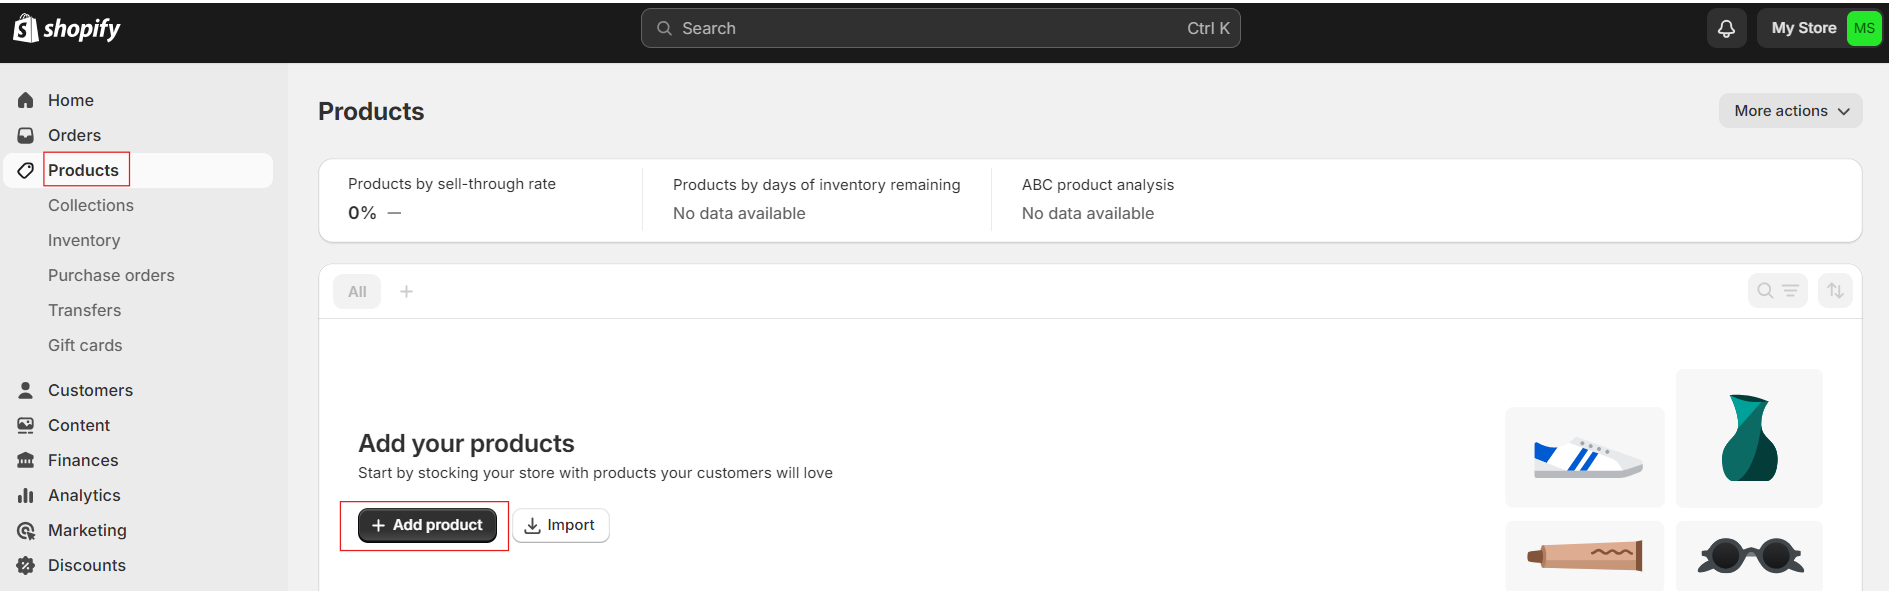
Step 3: Add Your Products
You can add your products by clicking on the "Add product" button on the personalized guide or clicking on "Products" on the left-hand menu of your dashboard. You can also write a description, add photos, and set pricing for the products you plan to sell.
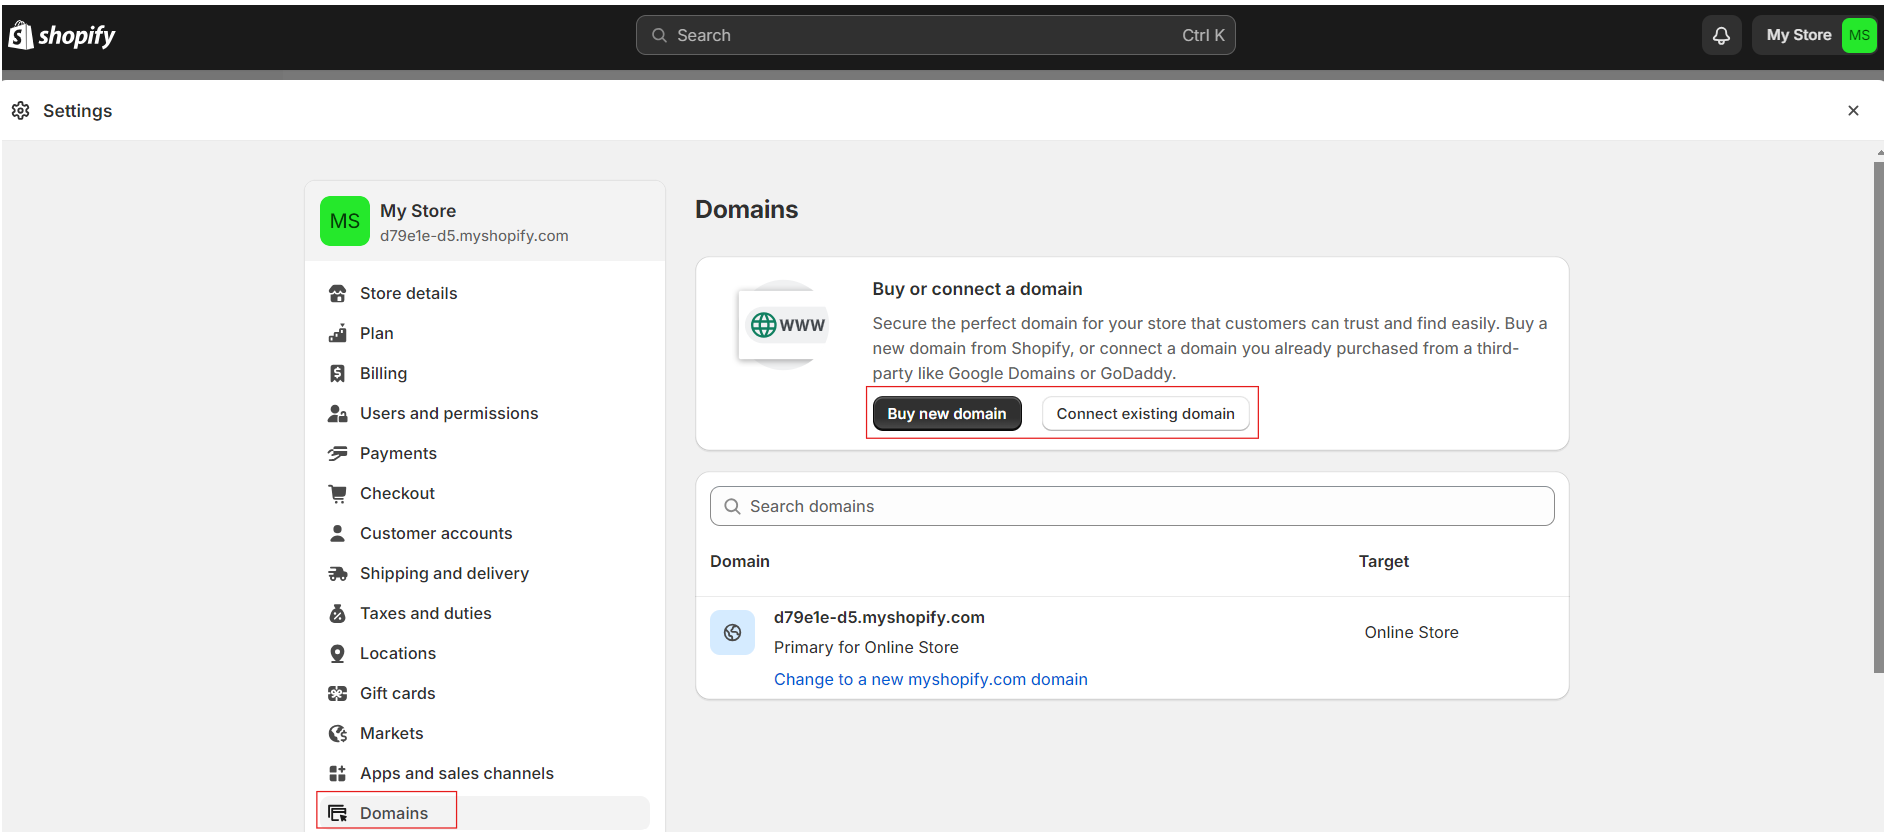
Step 4: Add a Custom Domain
Shopify will give you a domain once you have activated their free trial. However, having a custom domain that stands out is best so your customers can easily find your online store like BOGO Shopify.
You can add a custom domain to Shopify by going to Settings, then Domains, and clicking "Connect existing domain." Then, enter your domain name, such as johns-apparel.info, and click Next. Finally, click "Connect domain."
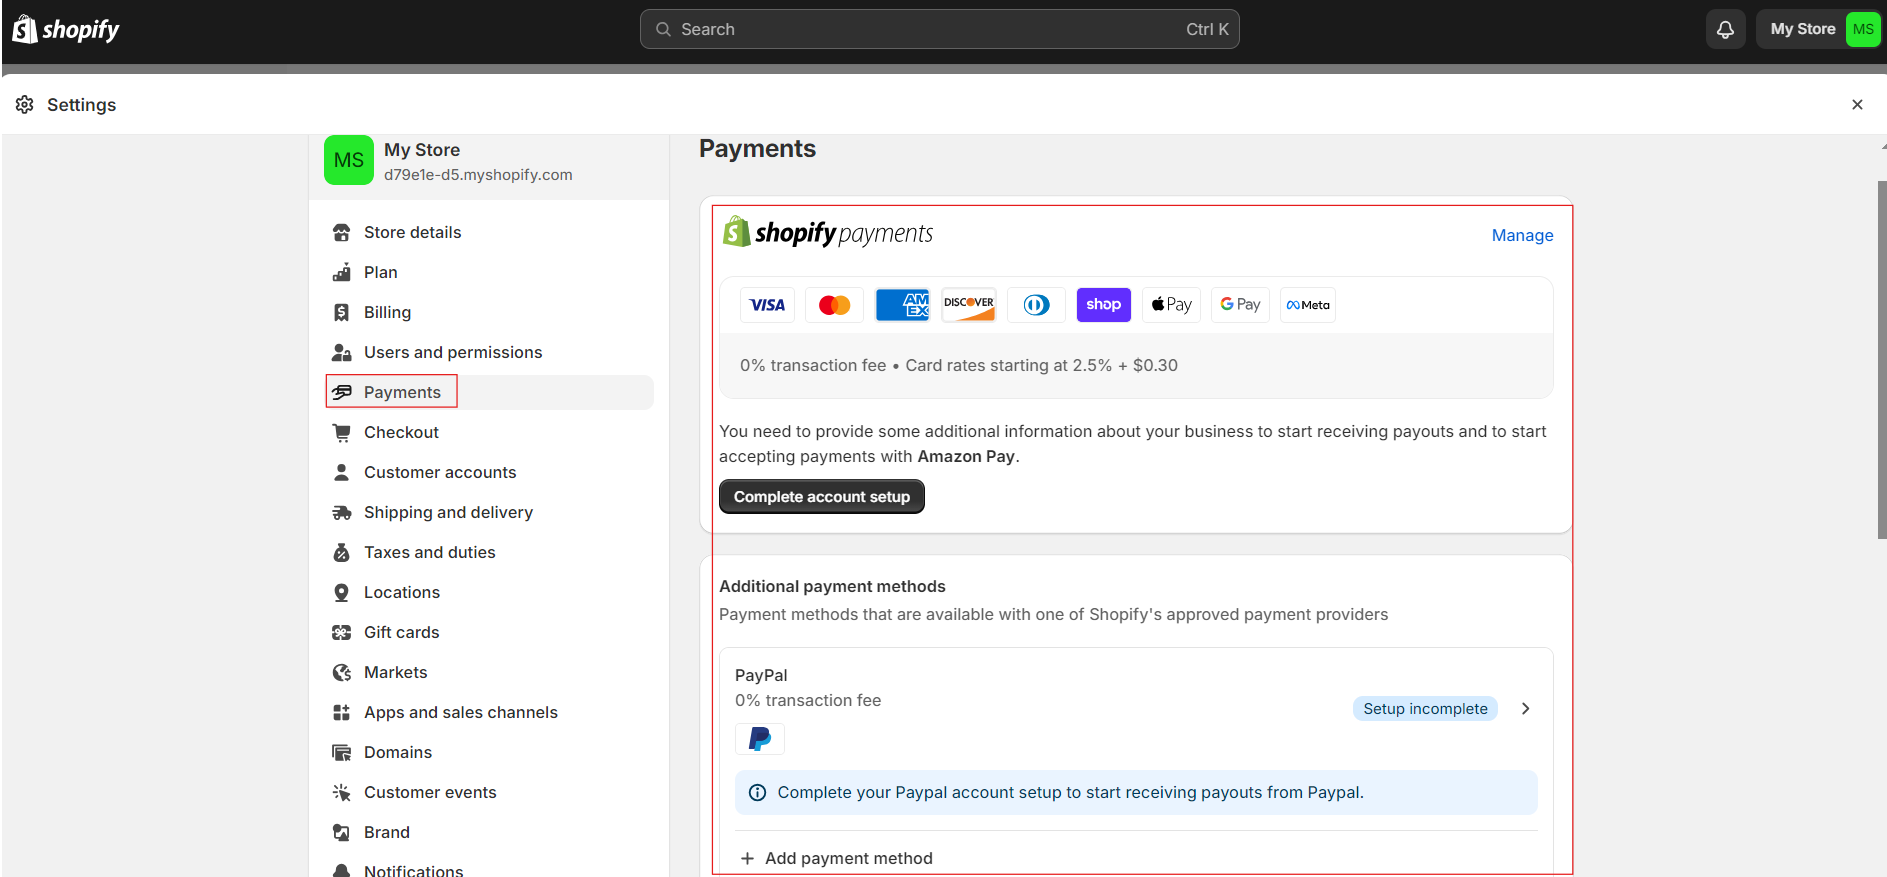
Step 5: Set Your Shipping Rates and Payments
Click on "Settings" on your dashboard and then click on "Payments." Here you will see how to choose your preferred payment gateways and set up your payment processing settings. Also, you can control how payment methods appear to your customers at checkout.
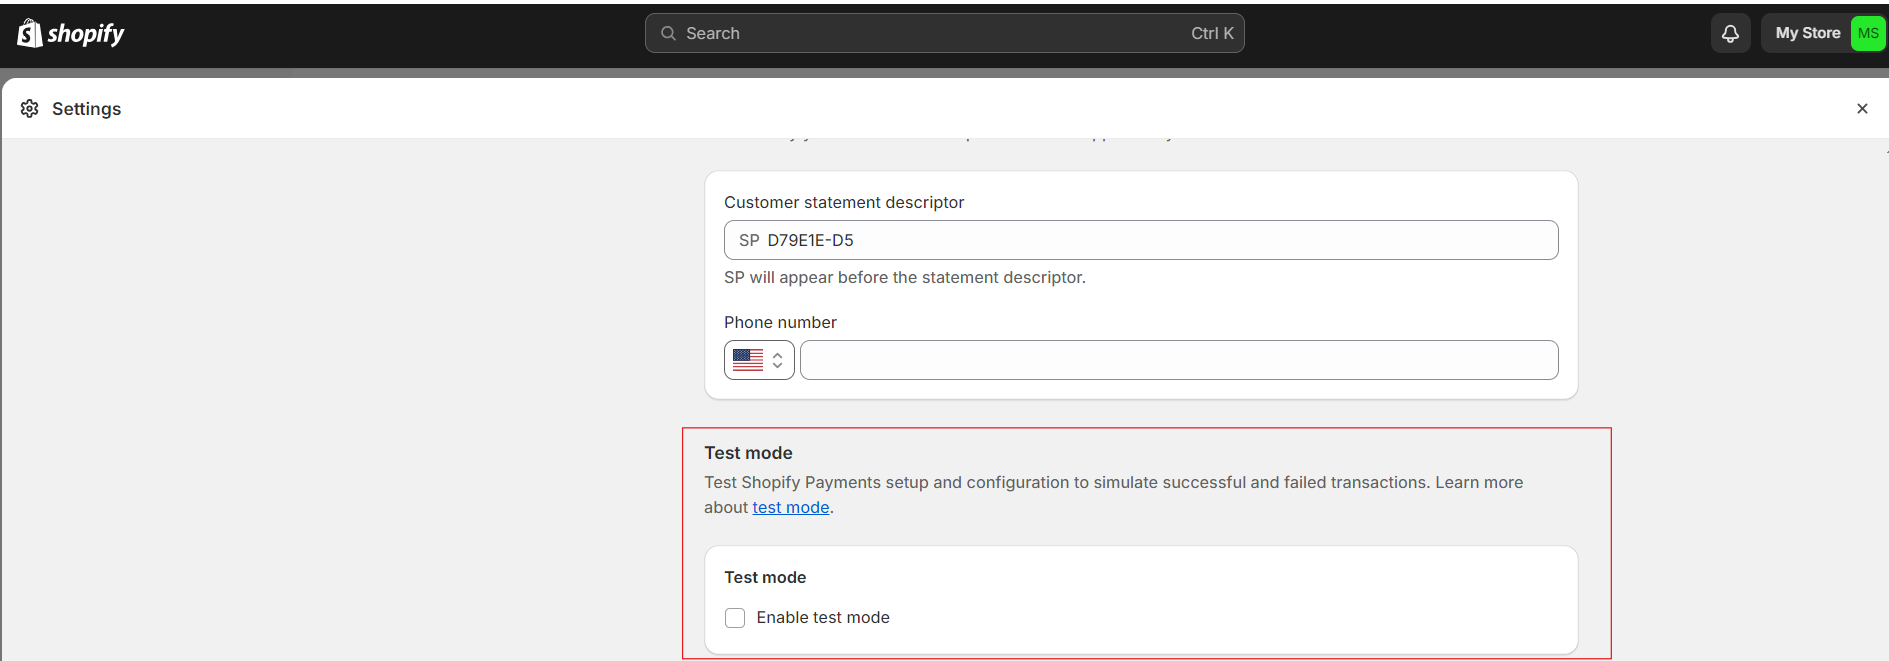
Step 6: Place a Test Order
Before launching your store, thoroughly test it to ensure everything is functioning correctly. Place test orders to check the checkout process, payment processing, and shipping calculations.
To do this, go to "Settings," then "Payments." Click on "Manage" at the top right corner, then scroll down to the bottom to enable test mode. Test the responsiveness and functionality of your store on different devices and web browsers. For a dropshipping business, this step is crucial to avoid any hiccups in order fulfilment and ensure a smooth customer experience from browsing to checkout.
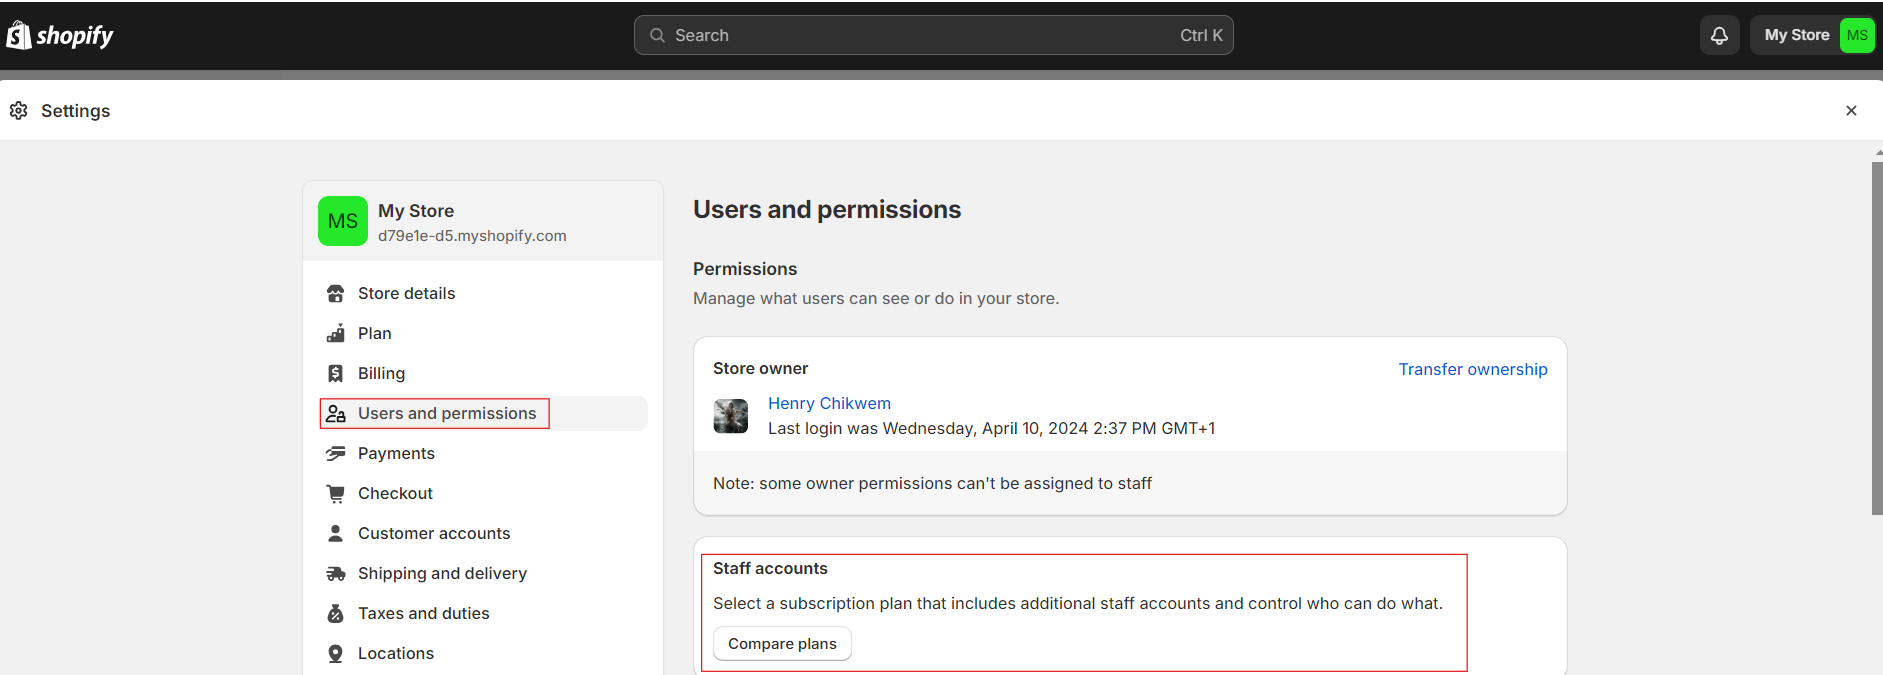
Step 7: Launch Your Store
Once you're satisfied with your store's setup and the test order, it's time to launch your store. Click on "Settings" in the Shopify dashboard, then select "Users and permissions." Here you will choose a subscription plan that includes additional staff accounts and control who can do what. Once you have gotten a subscription plan, launch your store!
Conclusion
By following these step-by-step instructions, you can quickly and easily build a basic e-commerce store using Shopify. Remember to continue optimizing and updating your store to attract and retain customers and drive sales.


