

Modern websites are more graphically demanding than ever, with smooth animations, complex layouts, and high-resolution assets. To keep up, Chrome relies on rasterization, the process of converting vector-based elements (like HTML, CSS, and SVG) into pixels for display. By default, Chrome uses your CPU for this task, which works fine but may struggle with performance-heavy pages.
That’s where GPU rasterisation comes in. By shifting the workload to your graphics card (GPU), Chrome can render pages faster and more efficiently, especially if you have a powerful GPU. You will get smoother scrolling, quicker page loads, and better performance on media-rich sites.
However, since this is an experimental feature, it may not work perfectly on all systems. Some users report glitches, crashes, or even worse performance if their GPU drivers aren’t up to date. Plus, if you already have Hardware Acceleration enabled, GPU rasterisation may not make a noticeable difference.
In this guide, we’ll show you how to enable GPU rasterisation in Chrome.

How to enable GPU rasterisation in Chrome
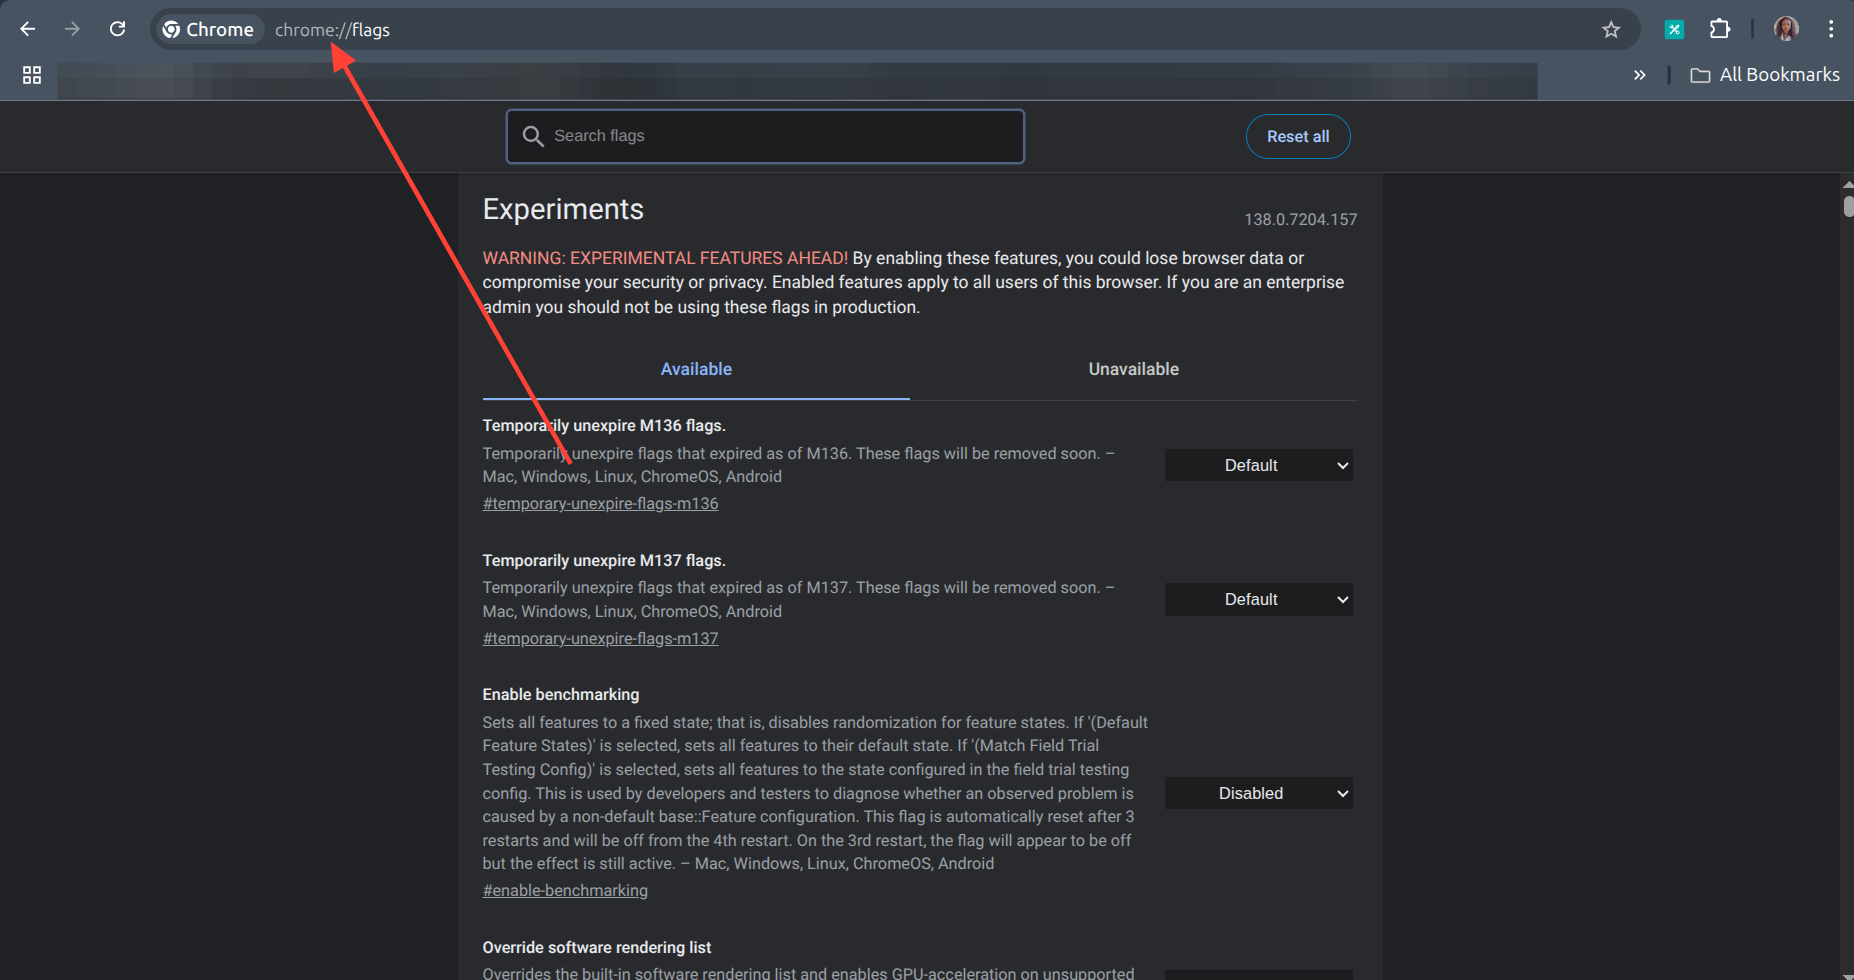
Step 1: Open Chrome on your PC and enter "chrome://flags" in the search bar.
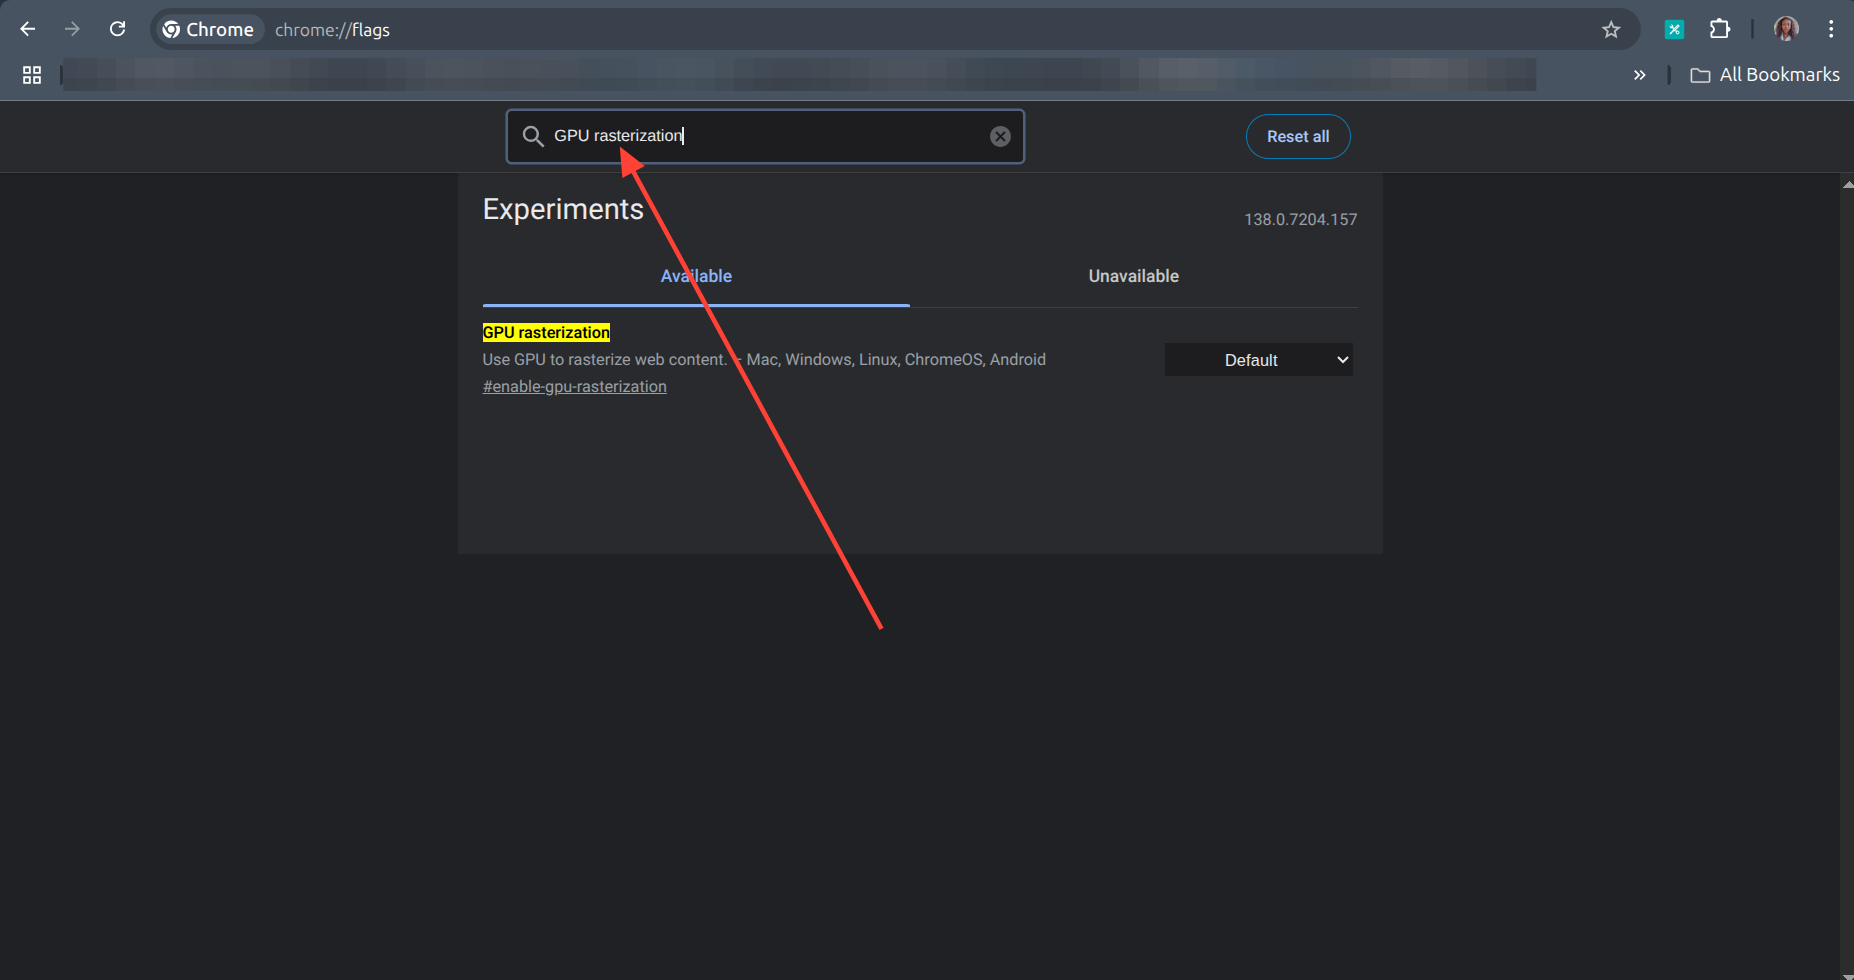
Step 2: On the flags page, type GPU rasterization in the search bar at the top.
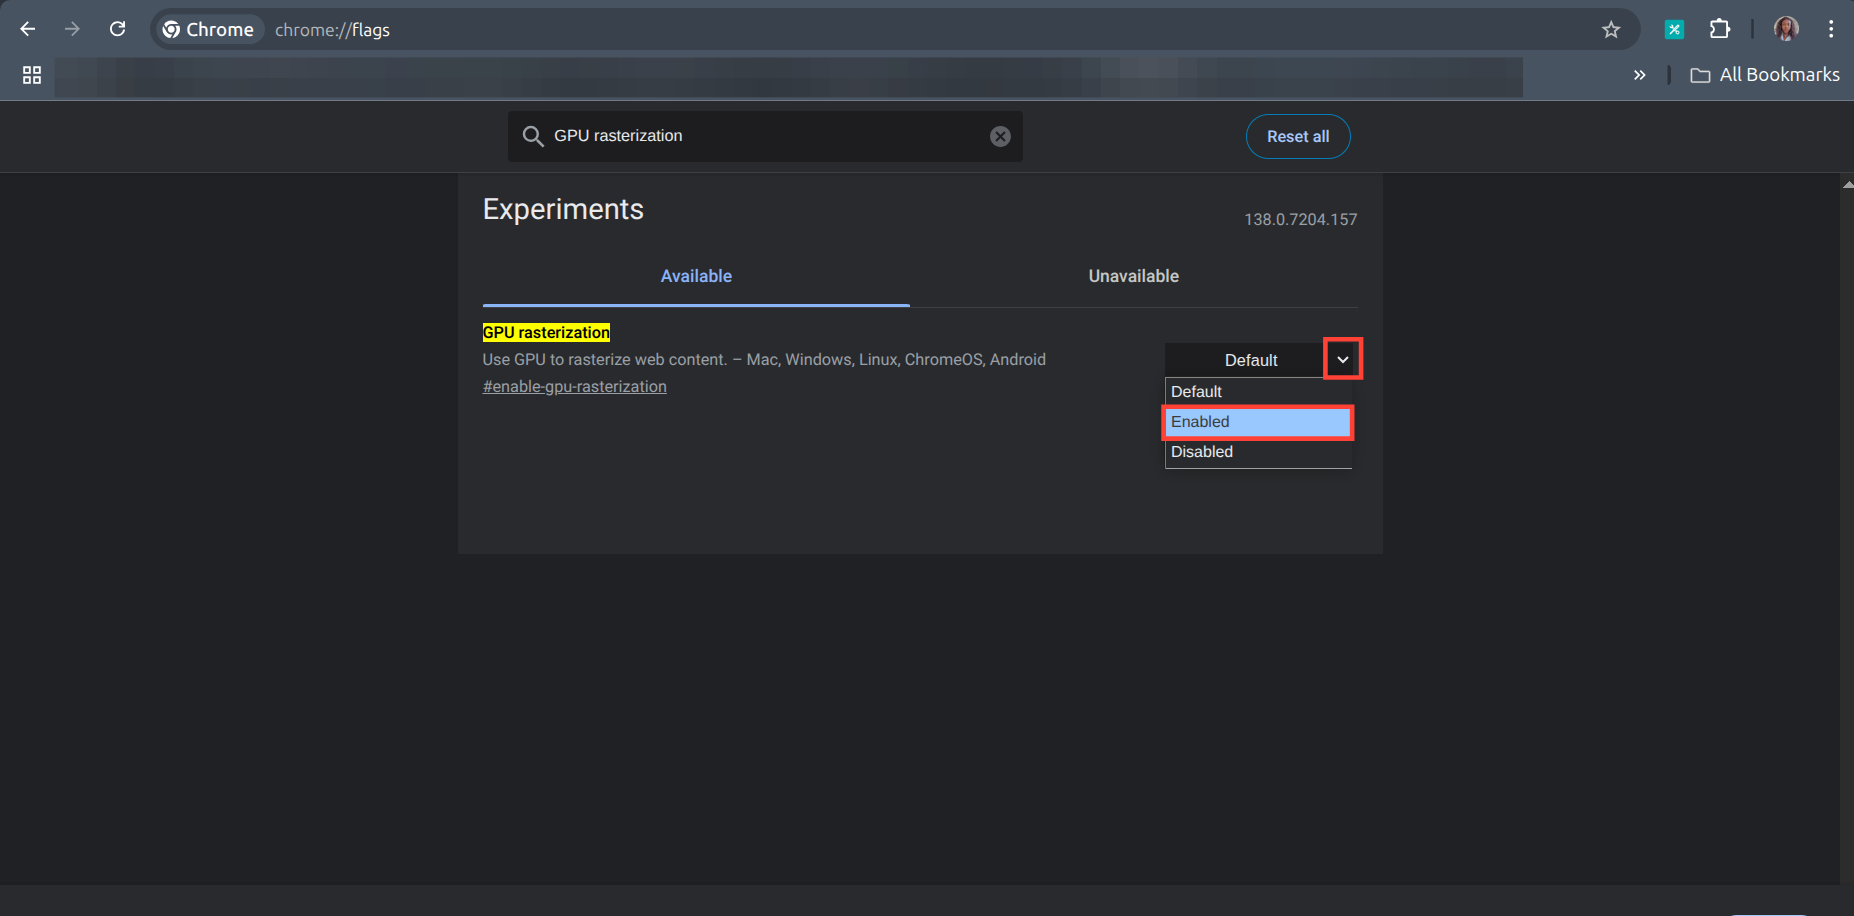
Step 3: Click the drop-down menu next to GPU rasterization and select Enabled.
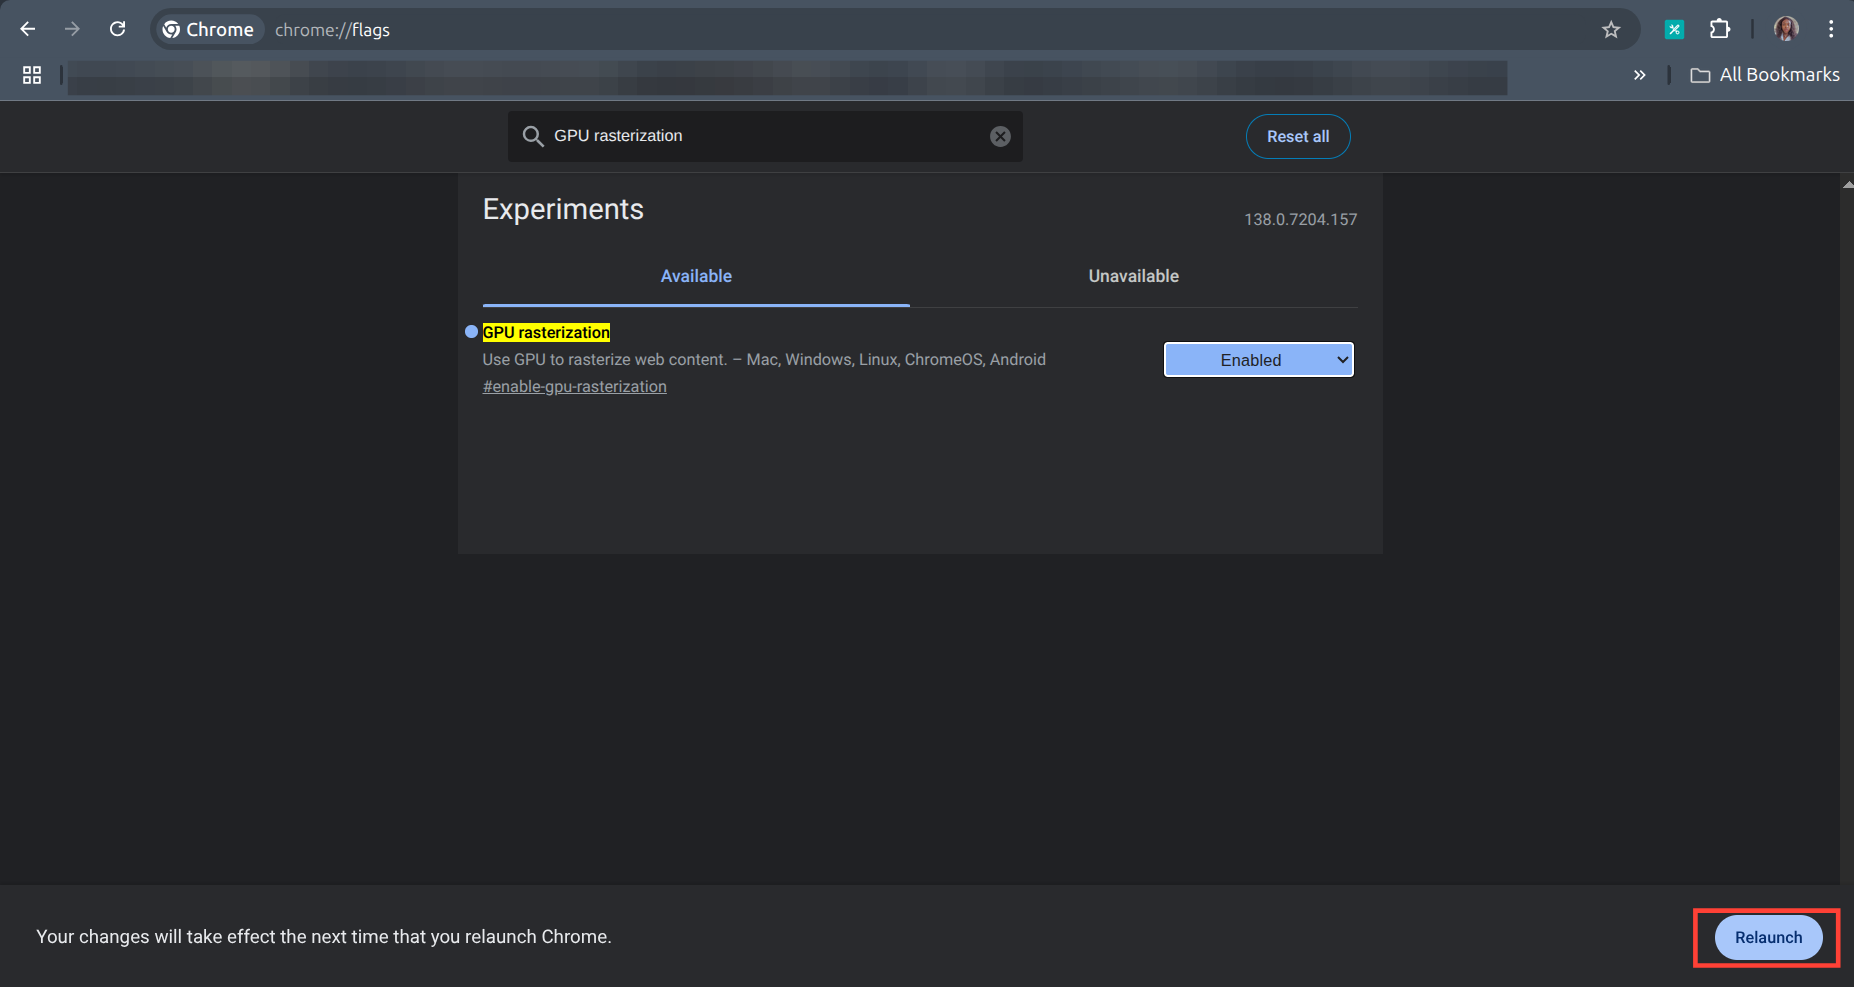
Step 4: Click the relaunch button at the bottom of the page.
Conclusion
GPU rasterisation can be a game-changer for browsing performance, especially if you frequently visit visually complex websites or use Chrome for graphic-intensive tasks. However, since it’s still an experimental feature, results can vary. Some users see smoother animations and faster rendering, while others encounter instability or minor graphical bugs.
If you decide to try it, keep an eye on Chrome’s behaviour. If you notice crashes, visual artifacts, or no improvement at all, you can easily disable it again. And remember: updating your GPU drivers before enabling this feature can help avoid issues.
Image Credit: Oyinebiladou Omemu/techloy.com


