Your iPhone might be revealing more than you think each time you connect to Wi-Fi. By default, it broadcasts a unique MAC (Media Access Control) address, a kind of digital name tag for your device that can be used to track you across networks. That’s where a Private Wi-Fi Address steps in.
This iOS feature assigns your device a different, random MAC address for each network you join, making it much harder for network providers, advertisers, or anyone else to build a profile of your movements. It's a simple privacy win, and it only takes a few taps to turn it on.
How to Turn on Private Wi-Fi on an iPhone
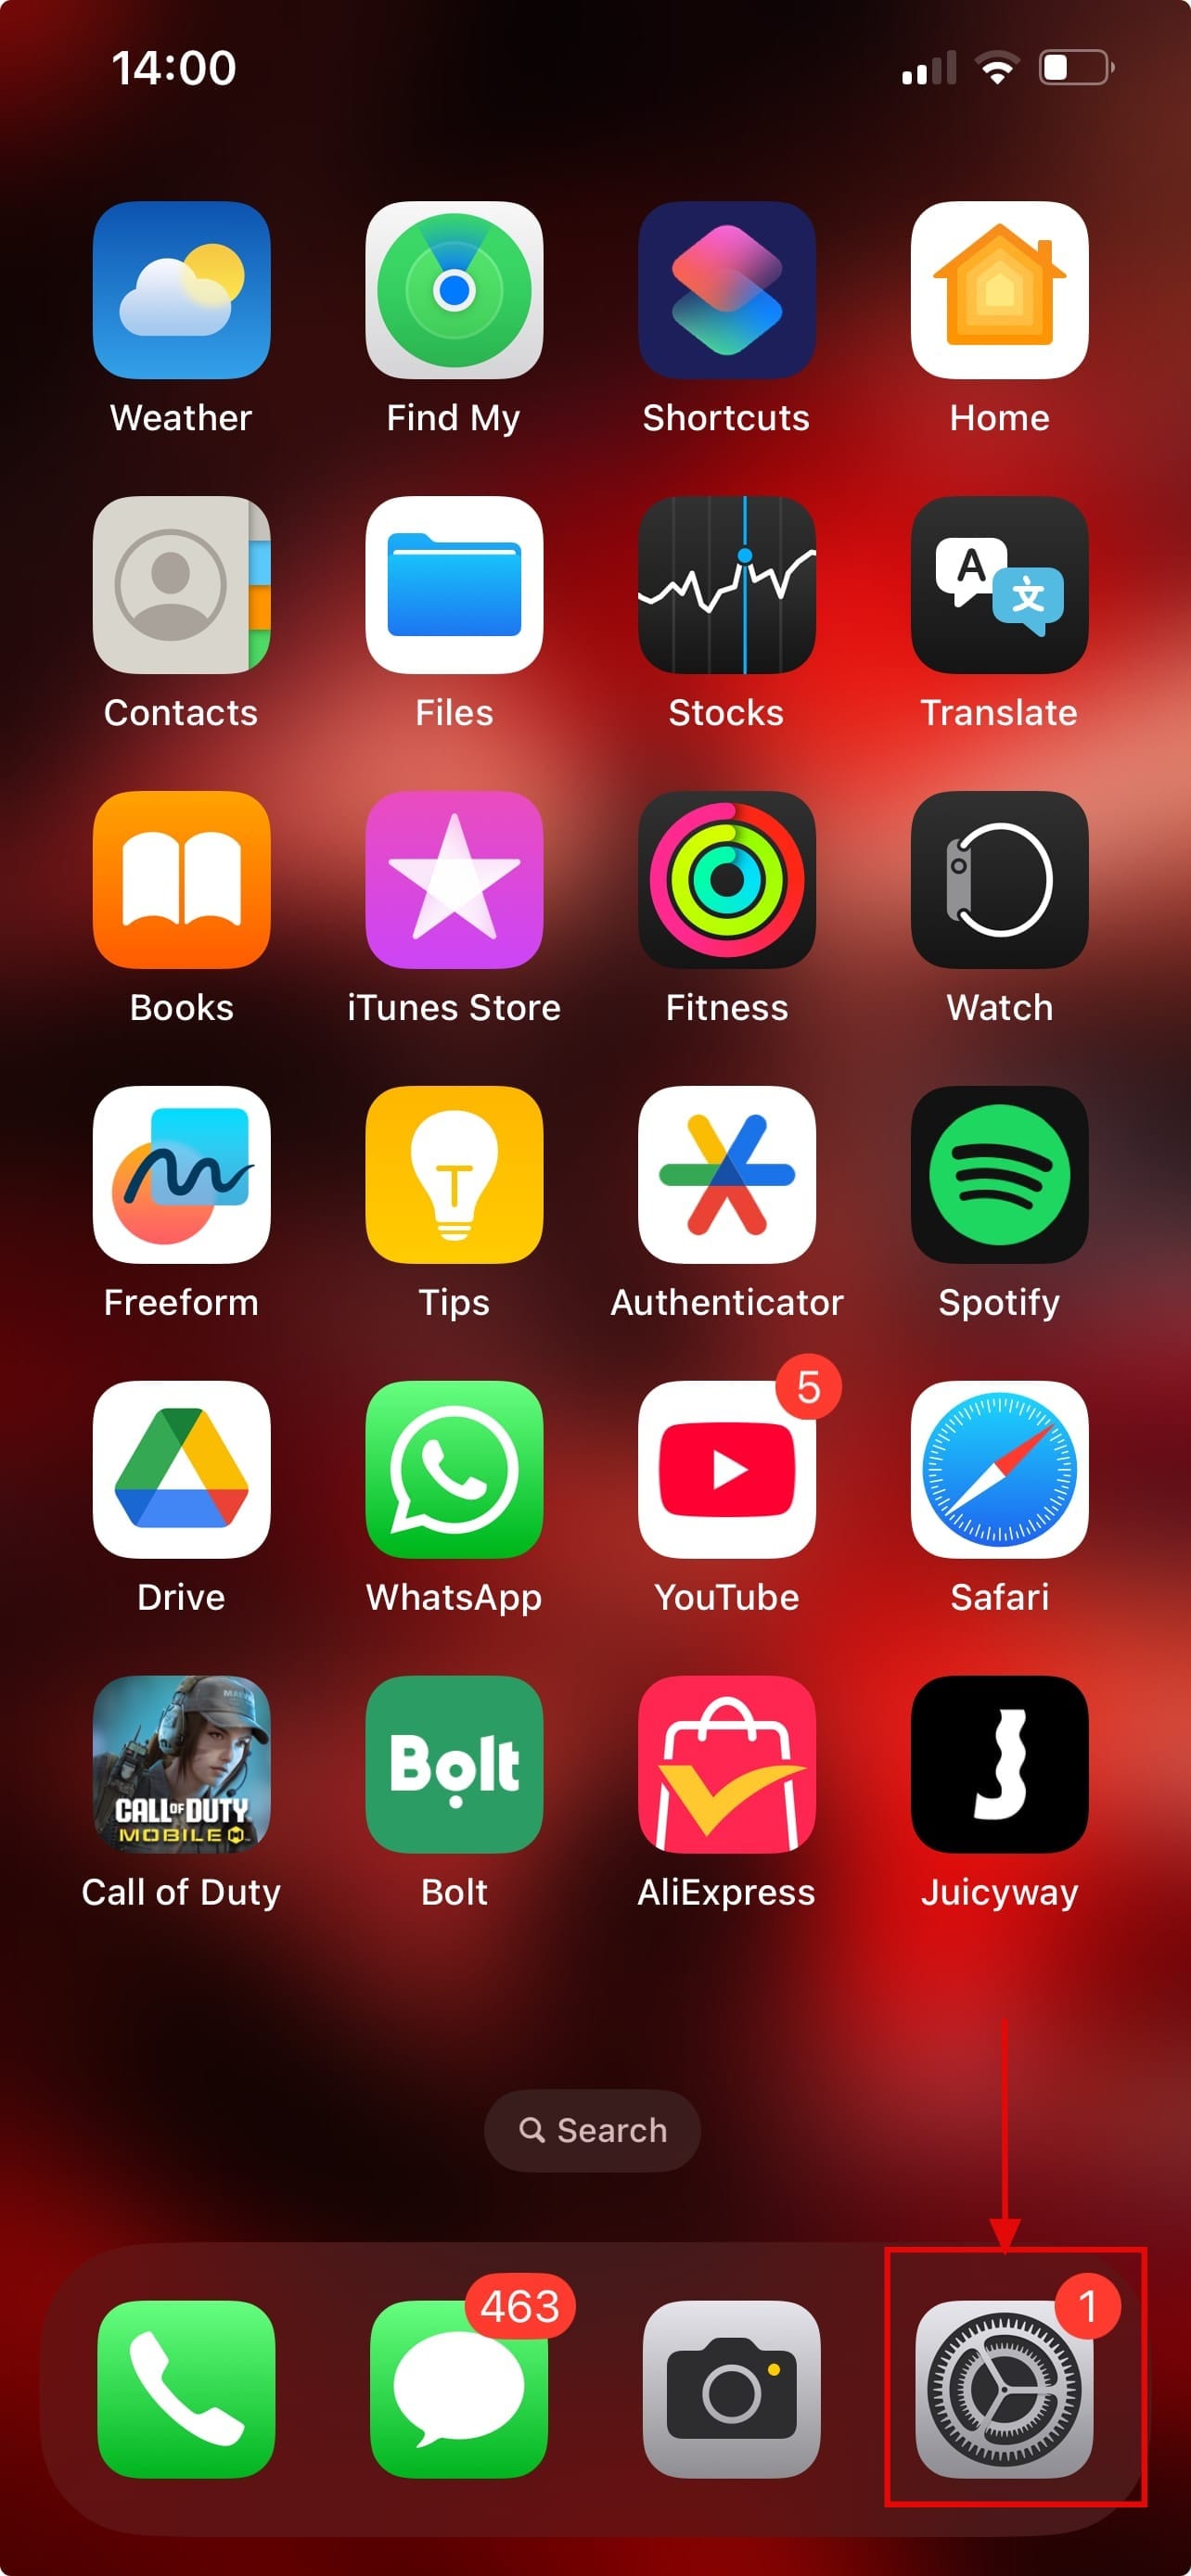
Step 1: Open the Settings app on your phone.
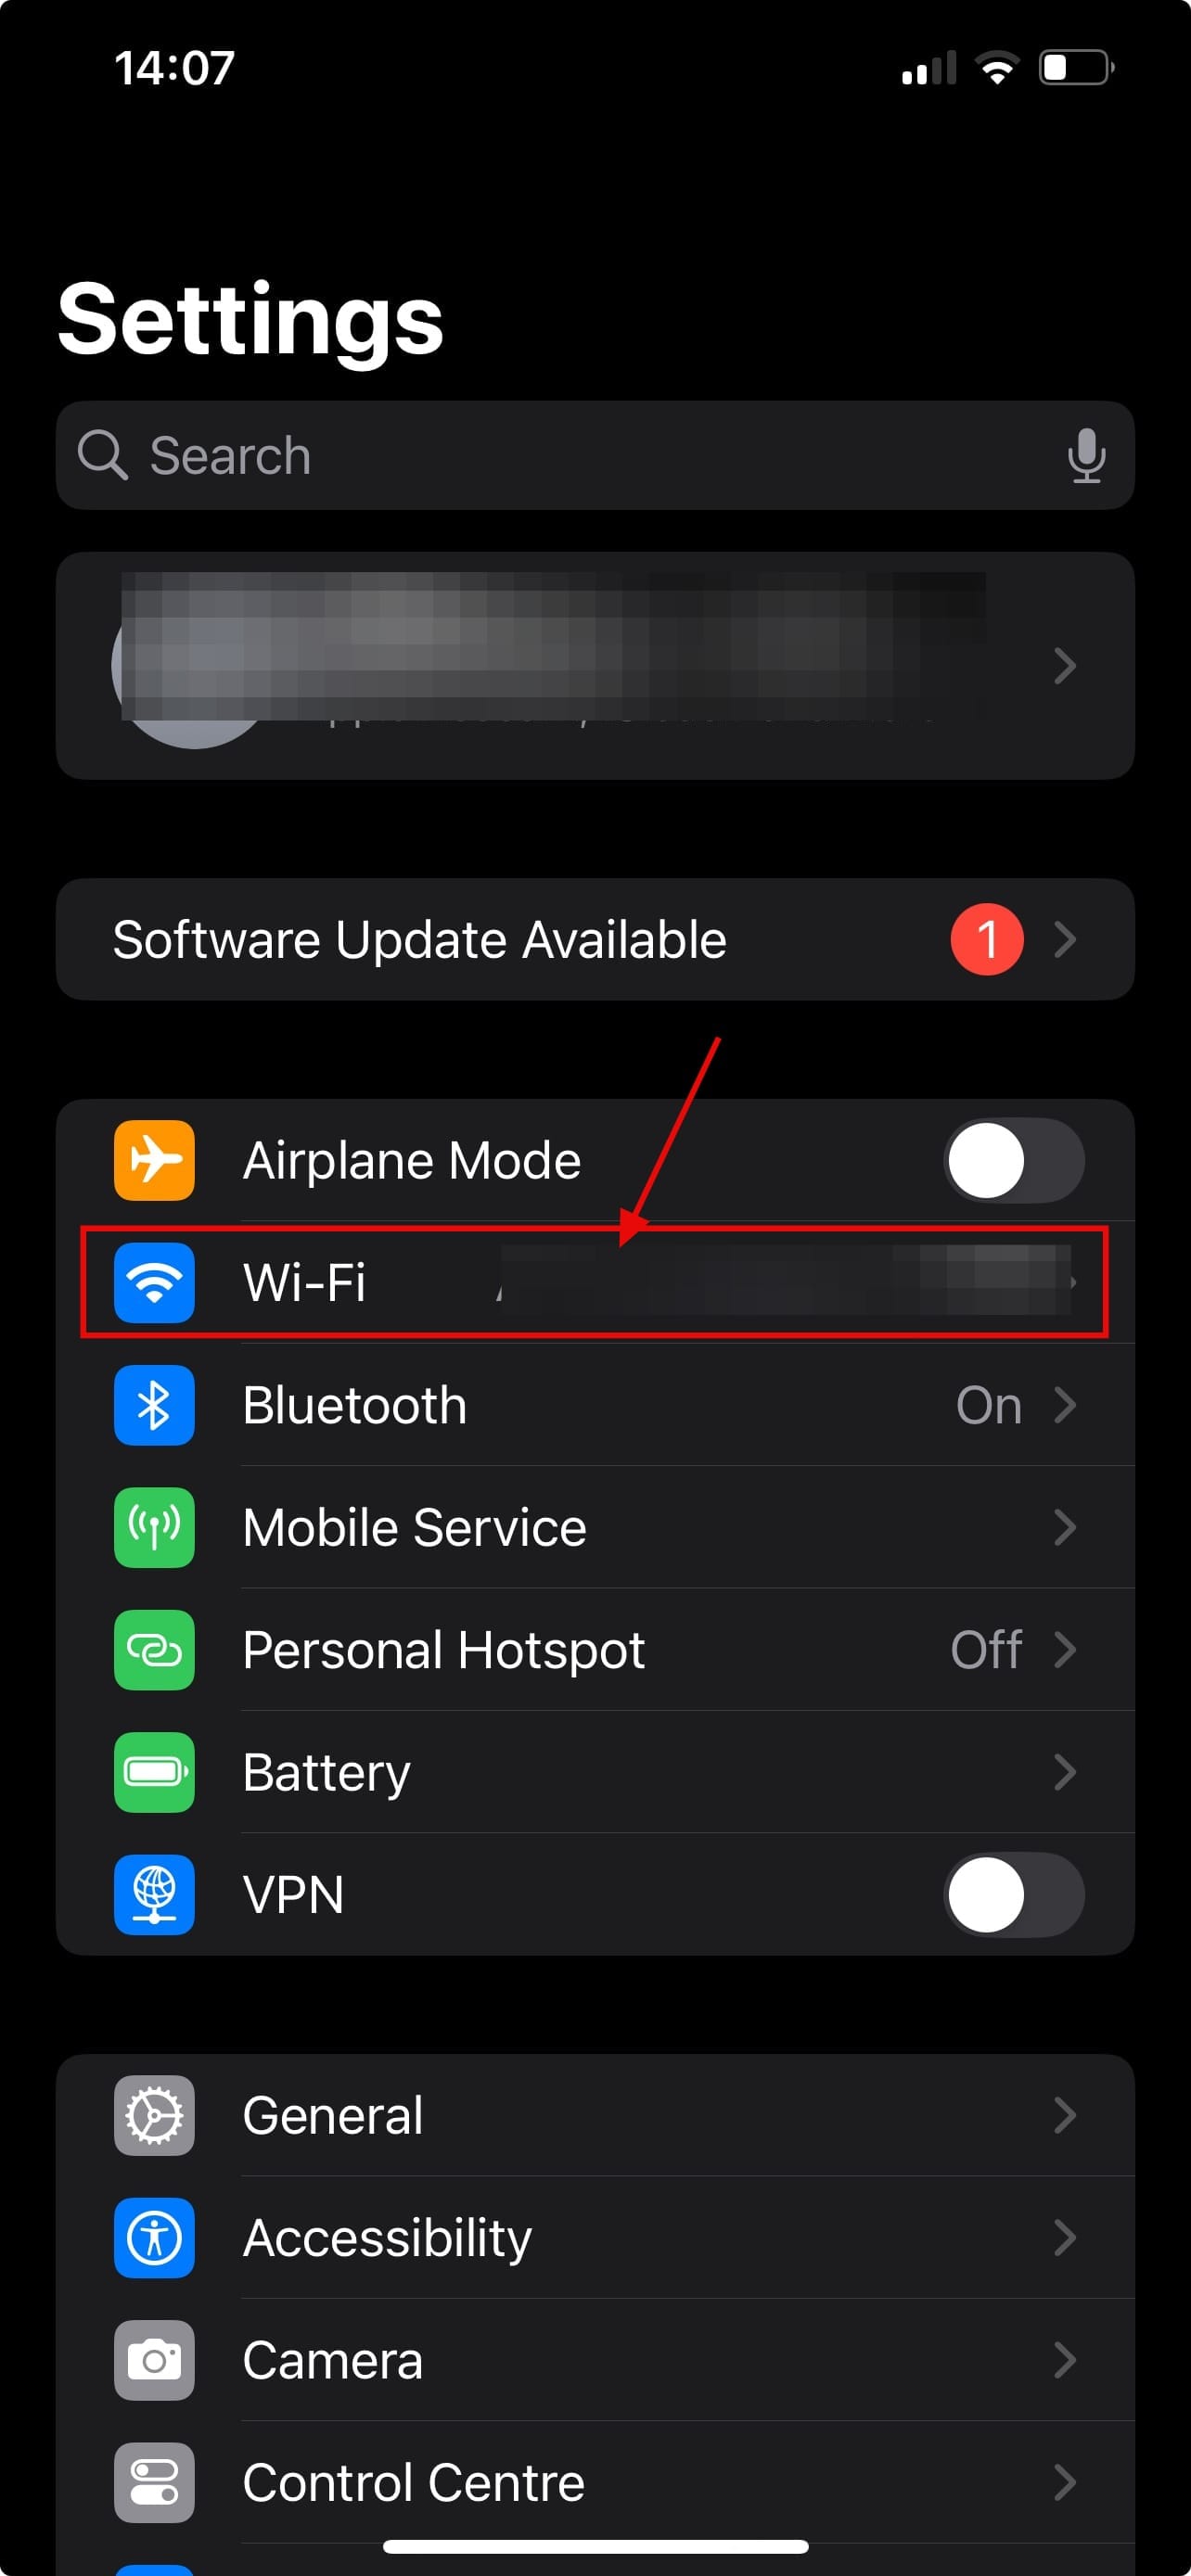
Step 2: Go tap on Wi-Fi.
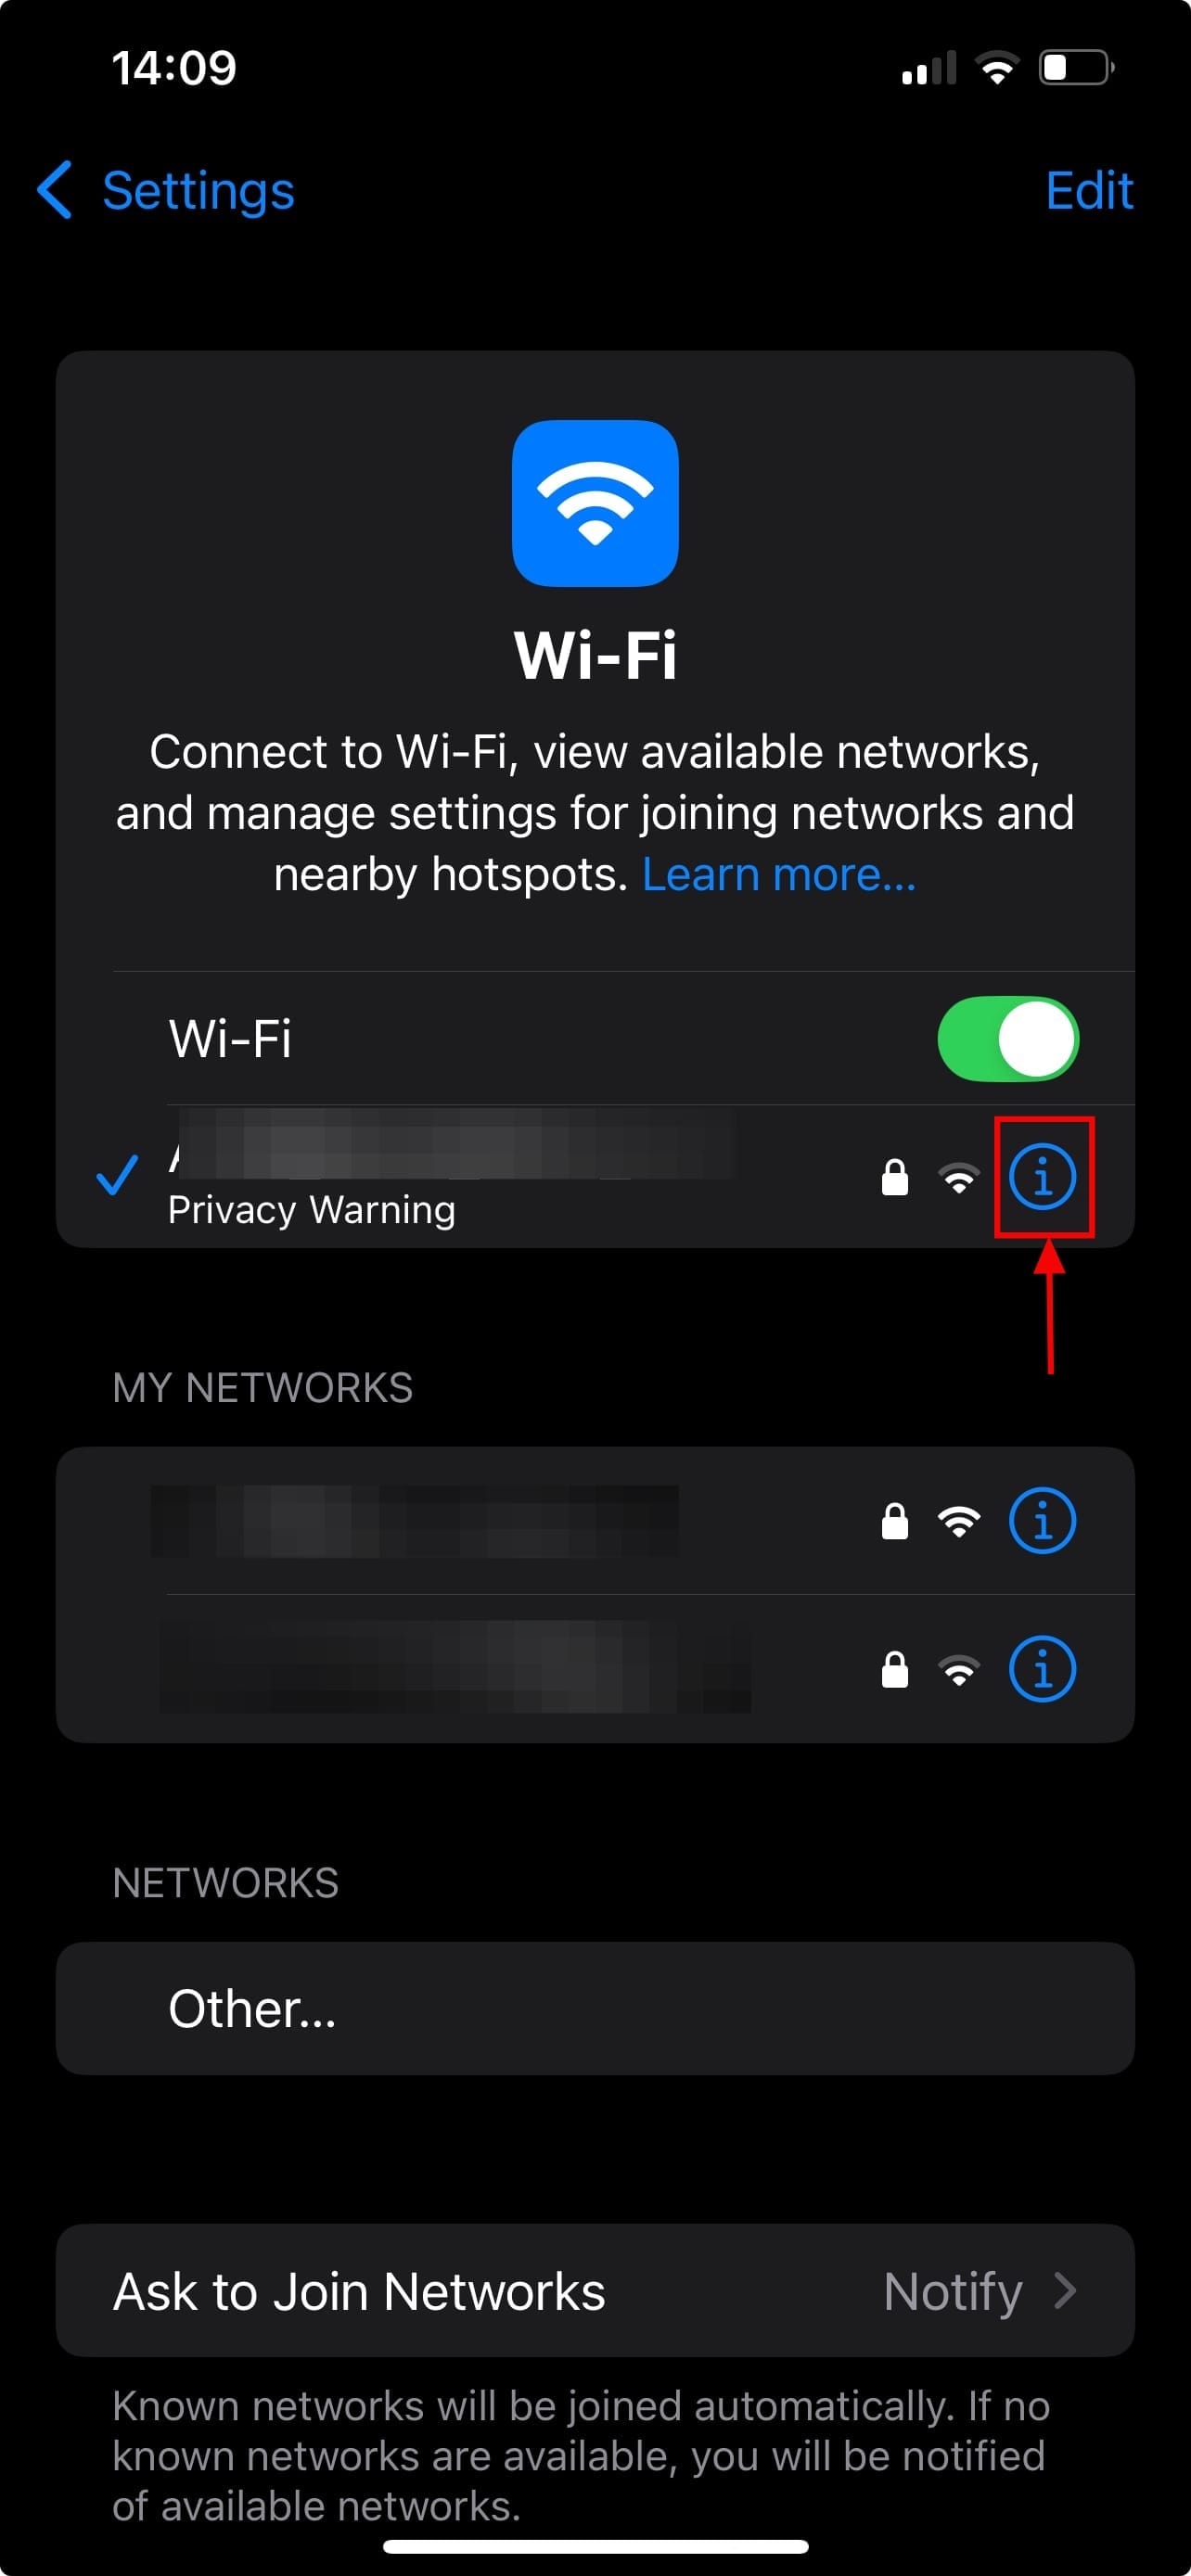
Step 3: Locate the Wi-Fi network you are currently connected to. Tap the information icon (i) next to the network name
Step 4: On the network details screen, scroll down and tap on Private Wi-Fi Address section

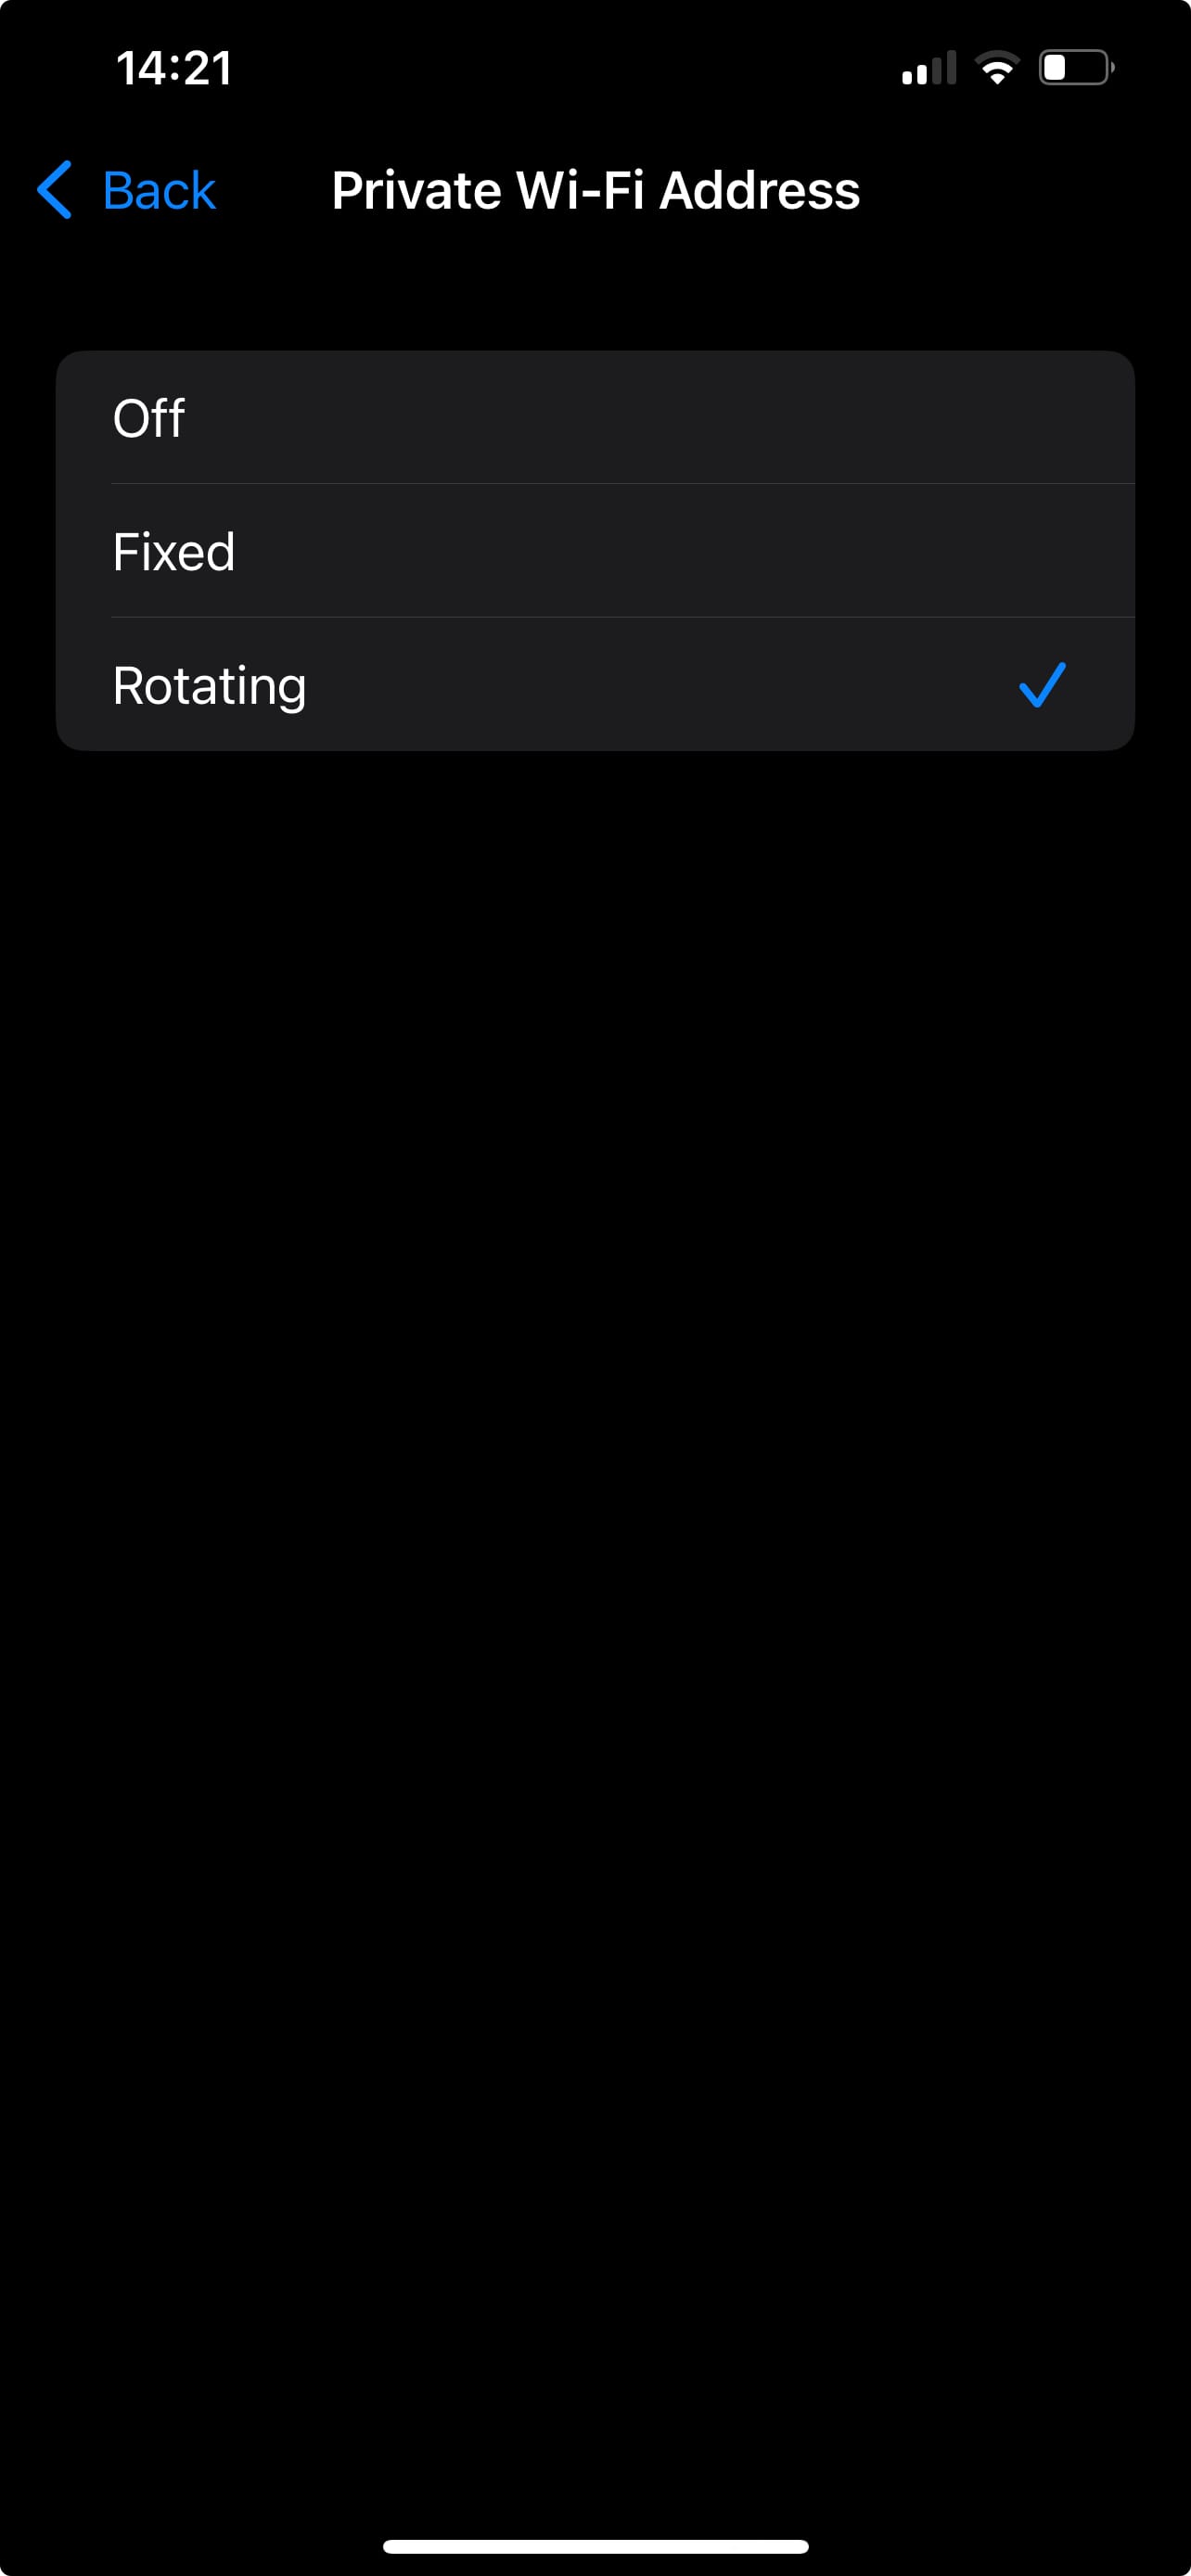
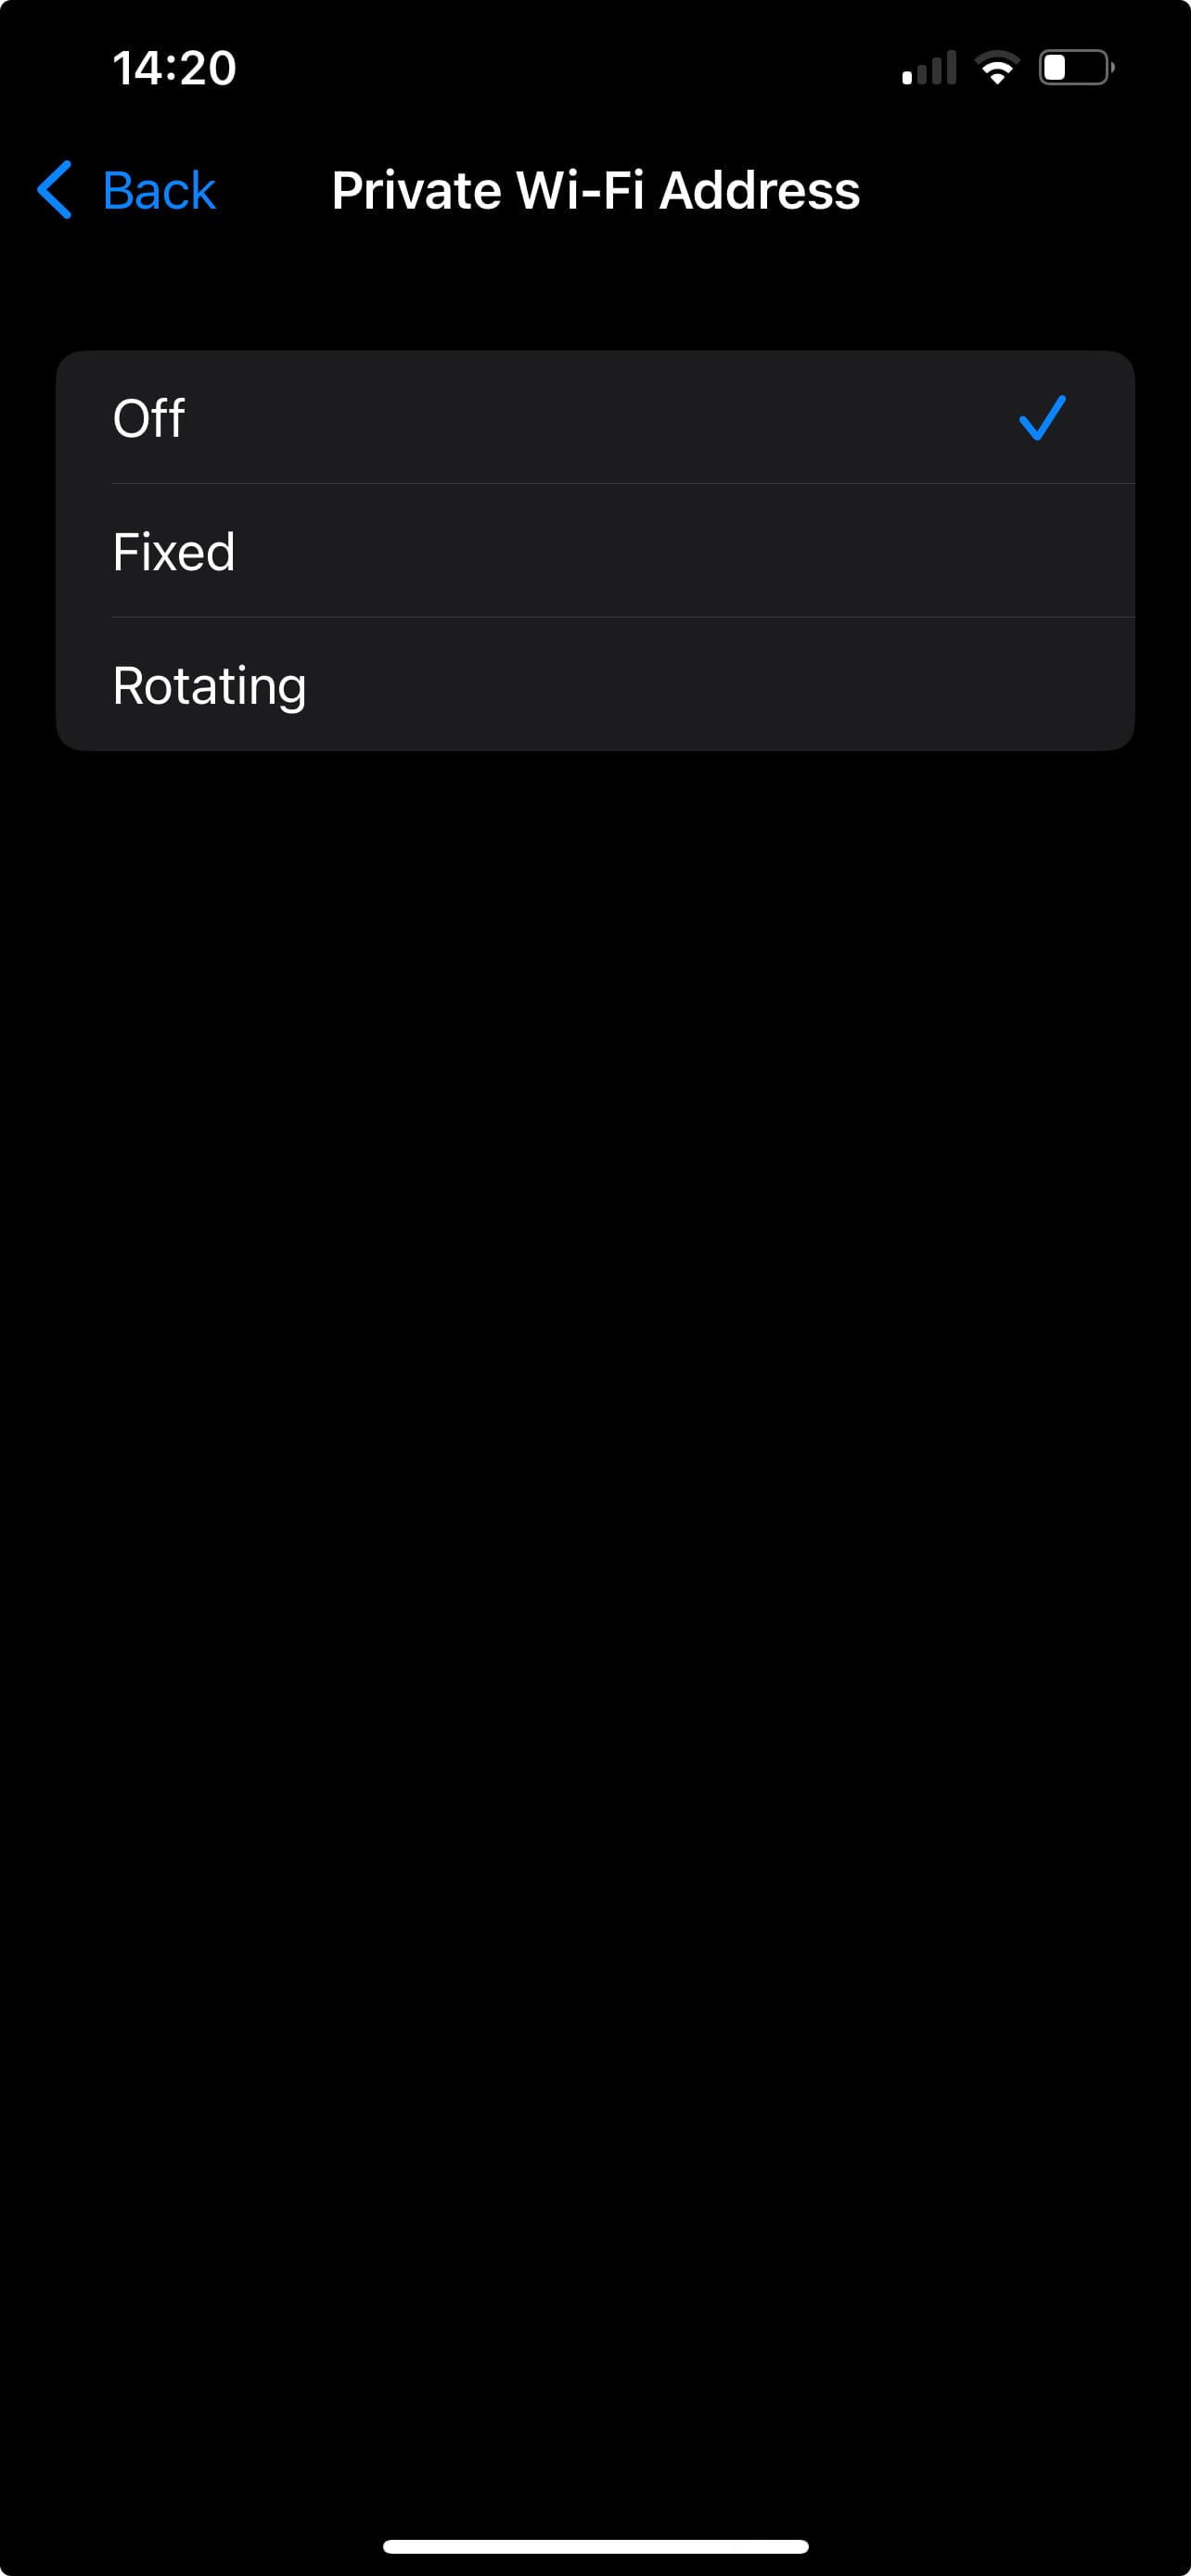
Step 5: To turn on the Private Wi-Fi address, you can either select Fixed or Rotating, any one is fine.
Fixed: Uses a static, unique MAC address for this network, improving privacy by preventing tracking across networks while still allowing for consistent network access.
Rotating: Automatically rotates the MAC address periodically, enhancing privacy by making tracking more difficult. After choosing one Private Wi-Fi address will be enabled
To revert the changes you have made to the Private Wi-Fi address, you can choose the Off option
Conclusion
Using your iPhone’s Private Wi-Fi Address isn’t just a nice-to-have, it’s a simple, effective way to stay more anonymous on public and private networks. By masking your device’s identity, it helps reduce the risk of long-term tracking without disrupting how you connect. For anyone serious about mobile privacy, it’s a no-brainer.