

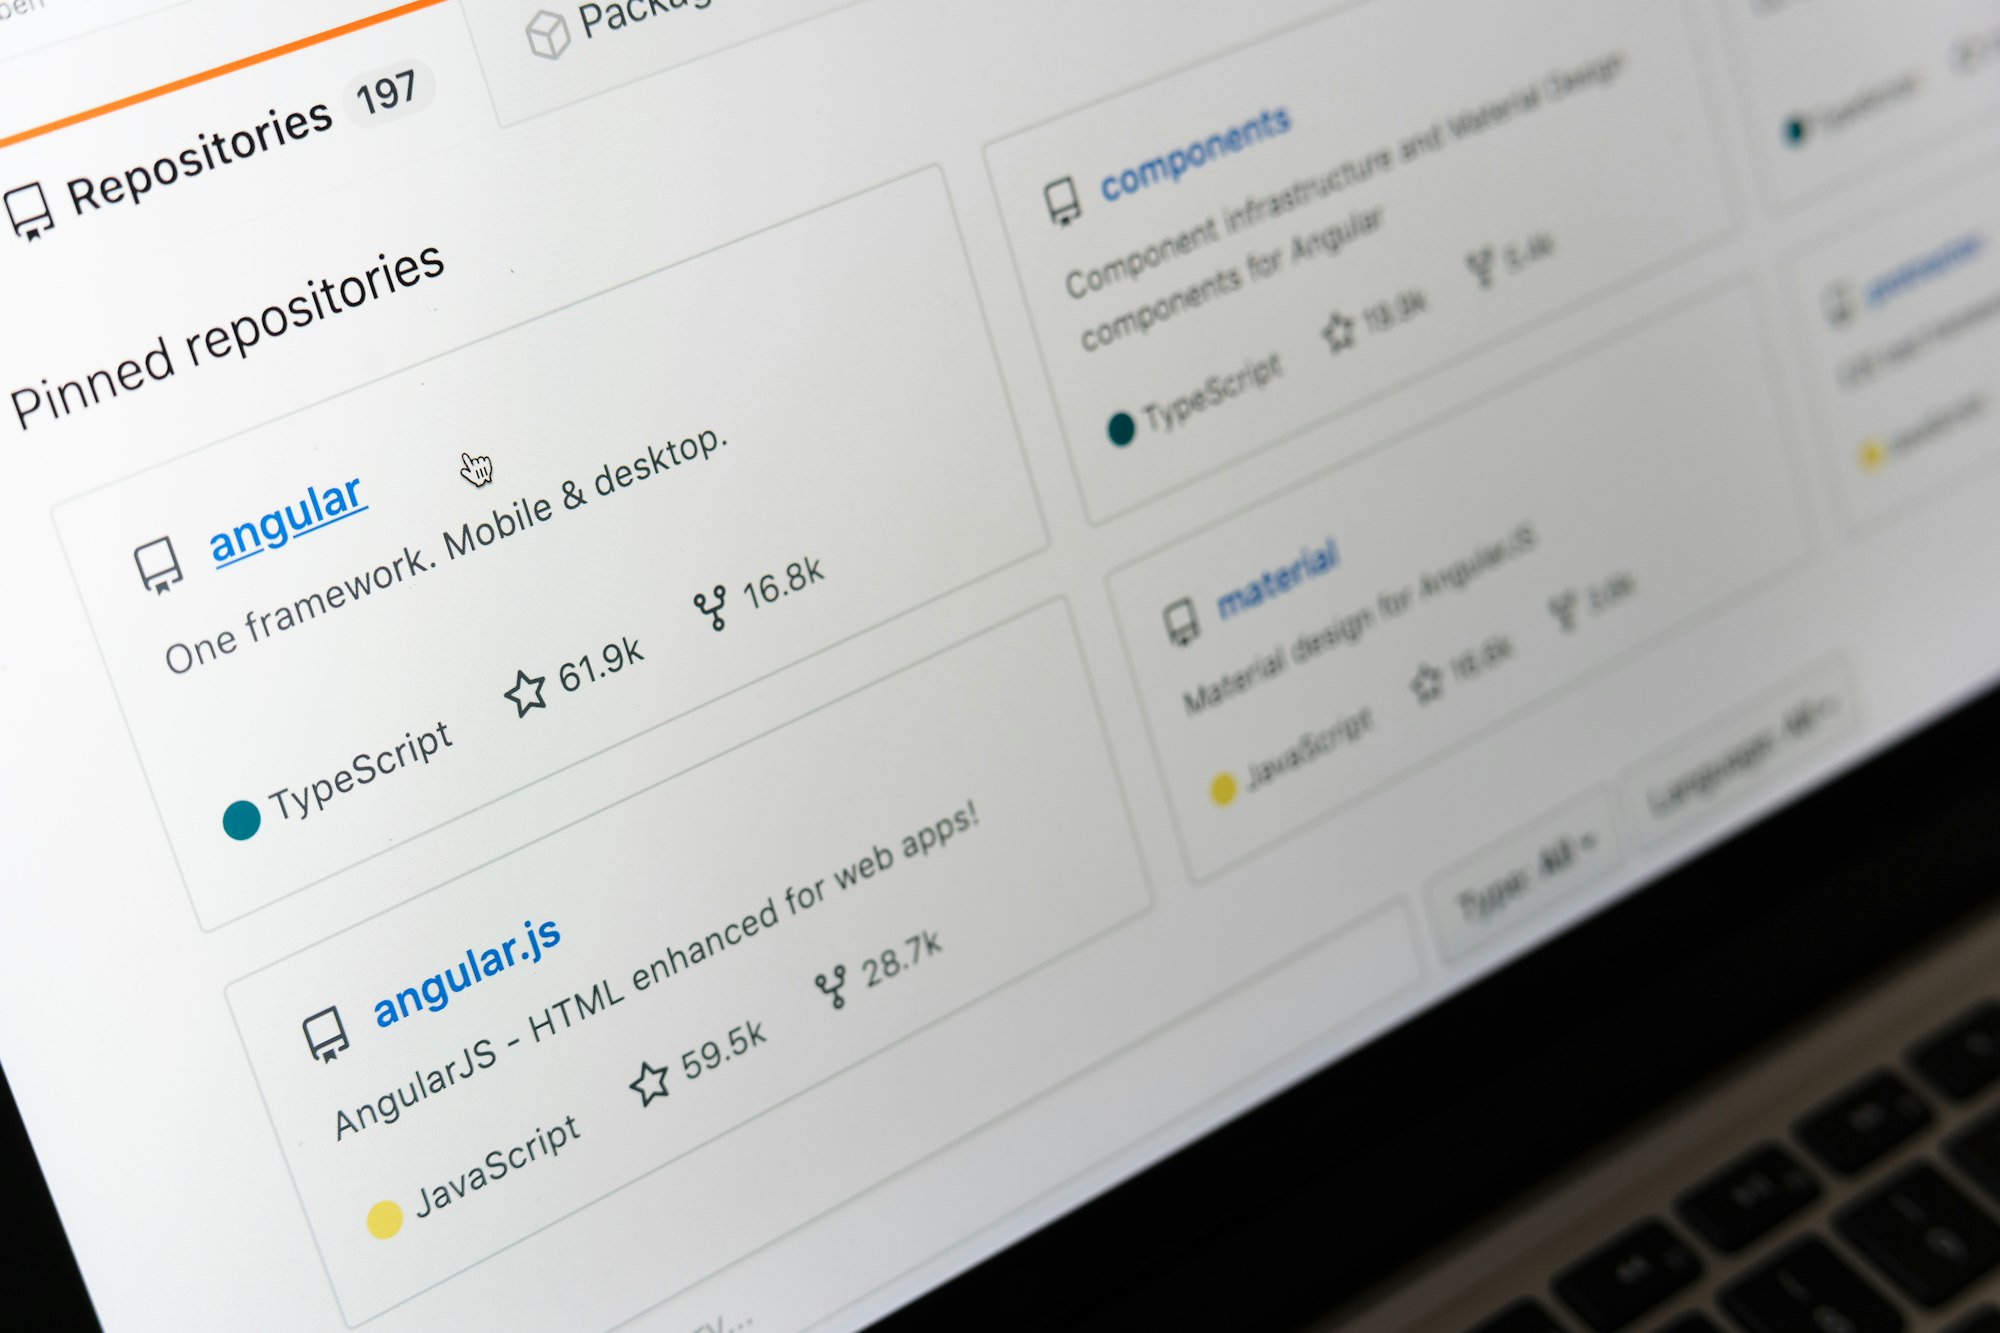
You already know GitHub as the go-to platform for big projects, but what about those small code snippets you want to share quickly? You may not necessarily want to create a repository for that, and that’s where GitHub Gists come in.
Gists are just GitHub’s lightweight repository, perfect for sharing single files, code snippets, or even notes without setting up a full repository. If you’re a developer who wants to share a quick fix or have a discussion about a specific isolated issue, Gists provides a fast and simple way to do it.
Gists support syntax highlighting, can be public or private, and even allow collaboration, just like regular repos, but without the whole heavy format. In this guide, you'll learn how to create and share Gists.
How to use Gists on GitHub
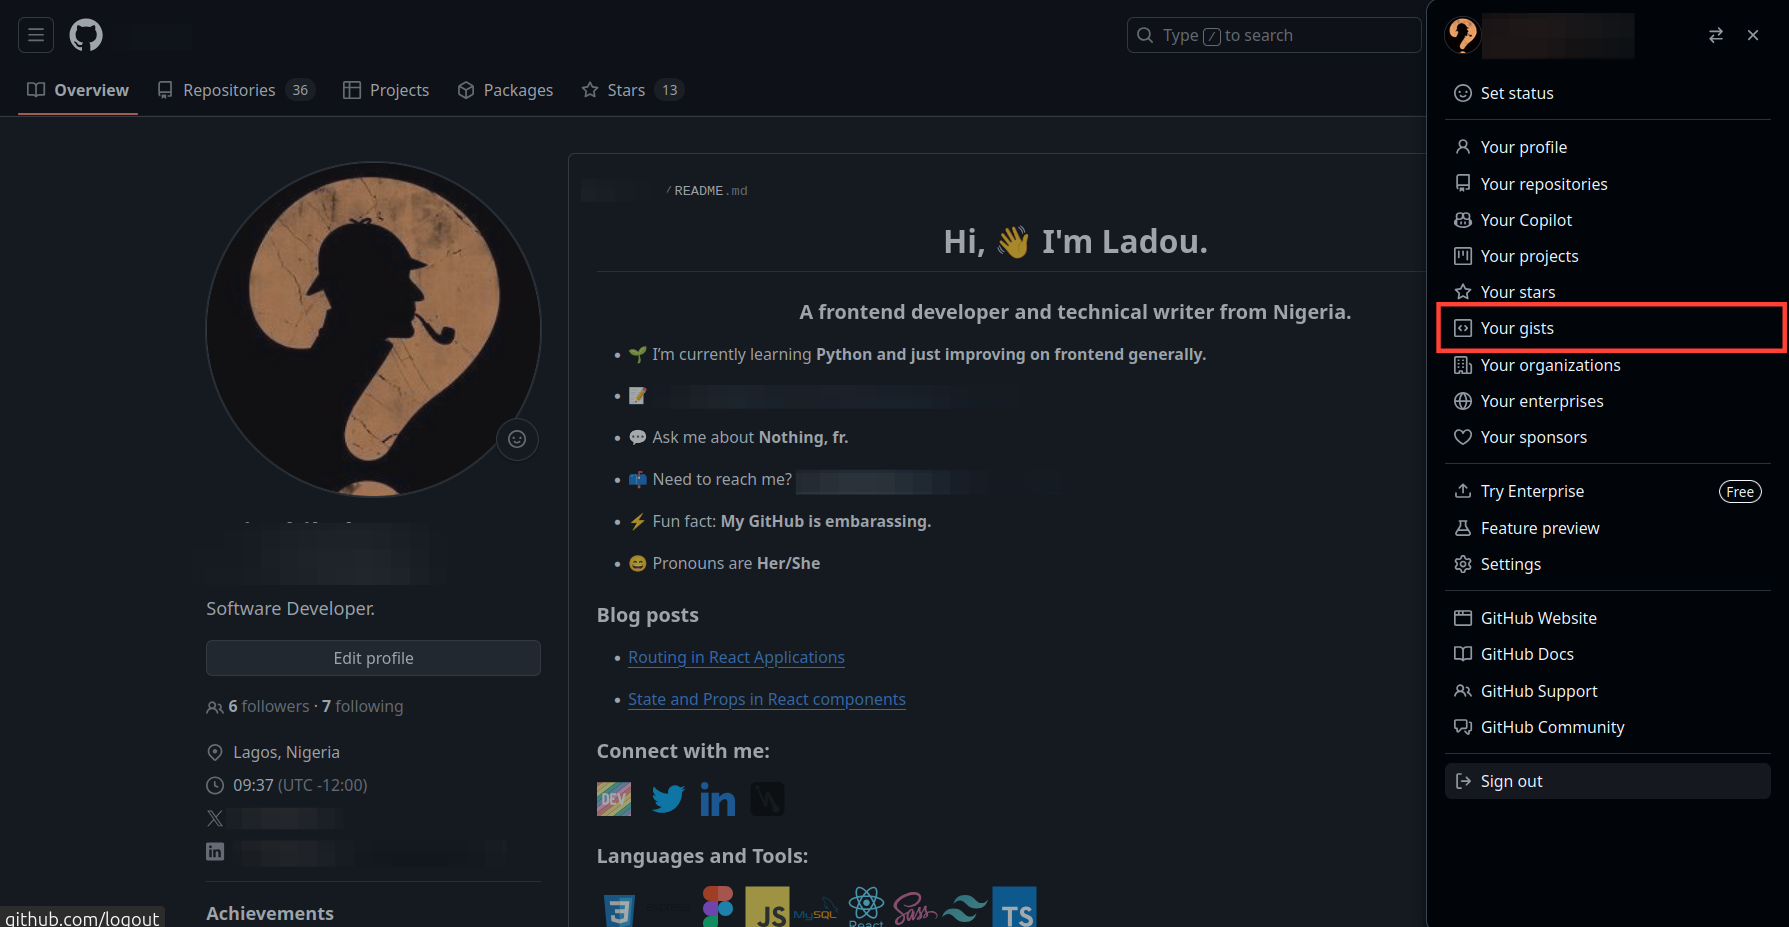
Step 1: Login to your GitHub account and click on your profile at the top right and select "Your Gists"
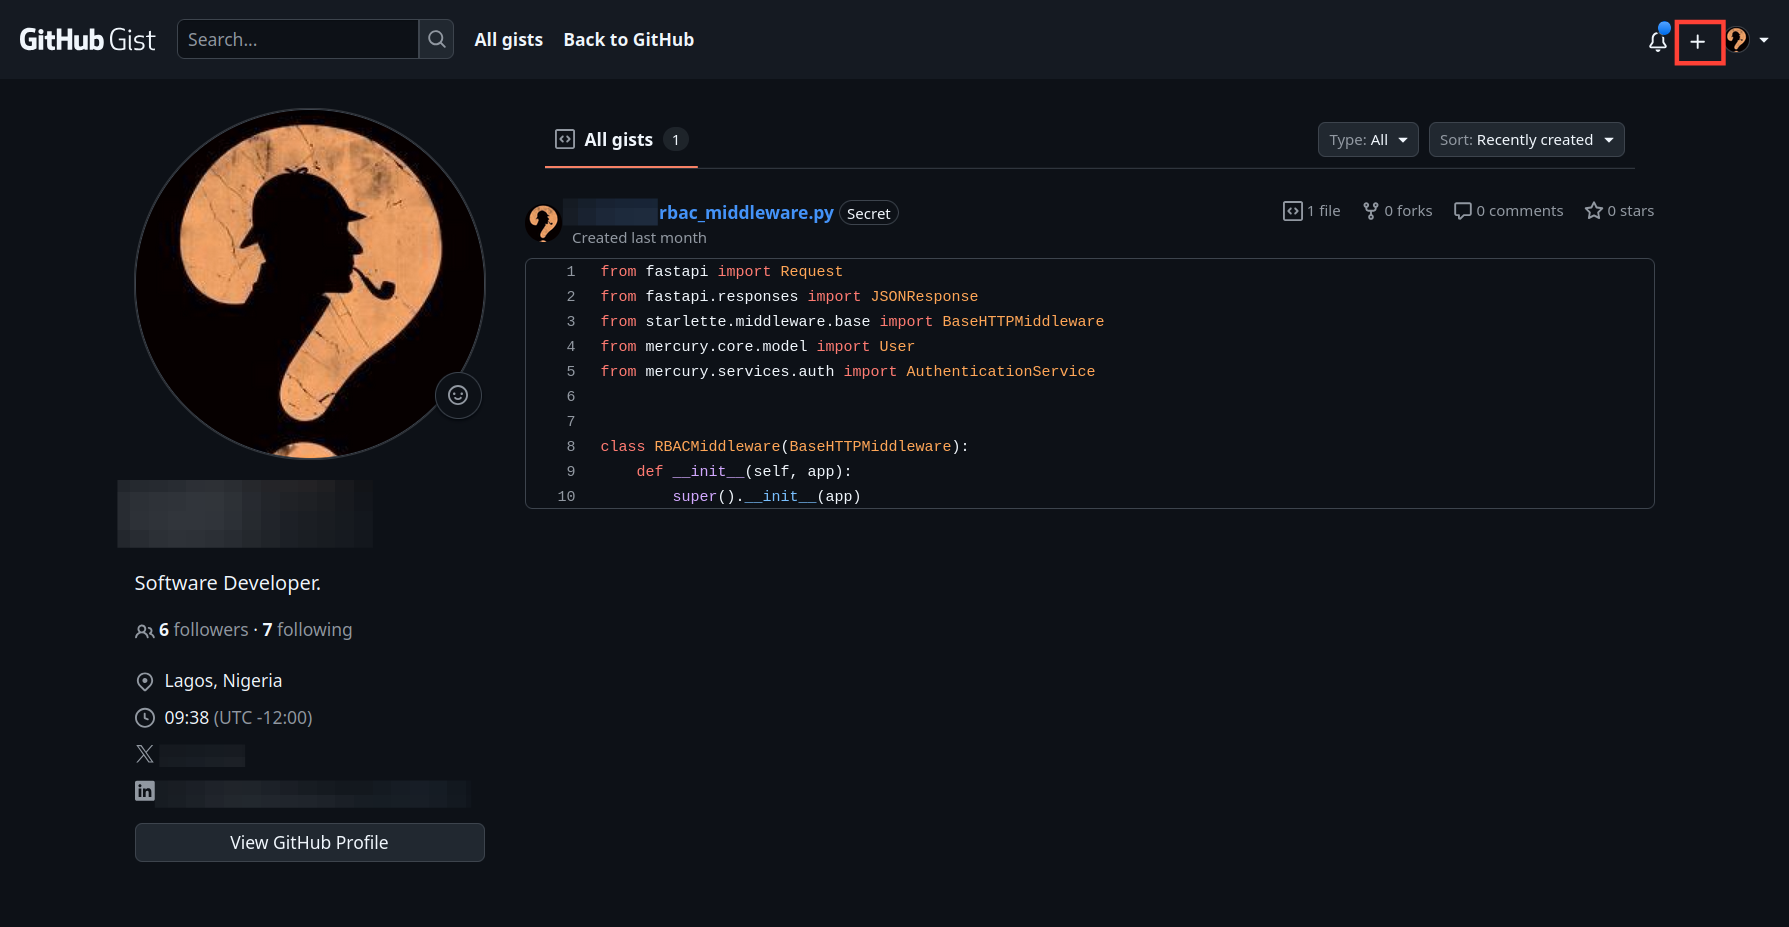
Step 2: Click the plus icon at the top to create a new gist.
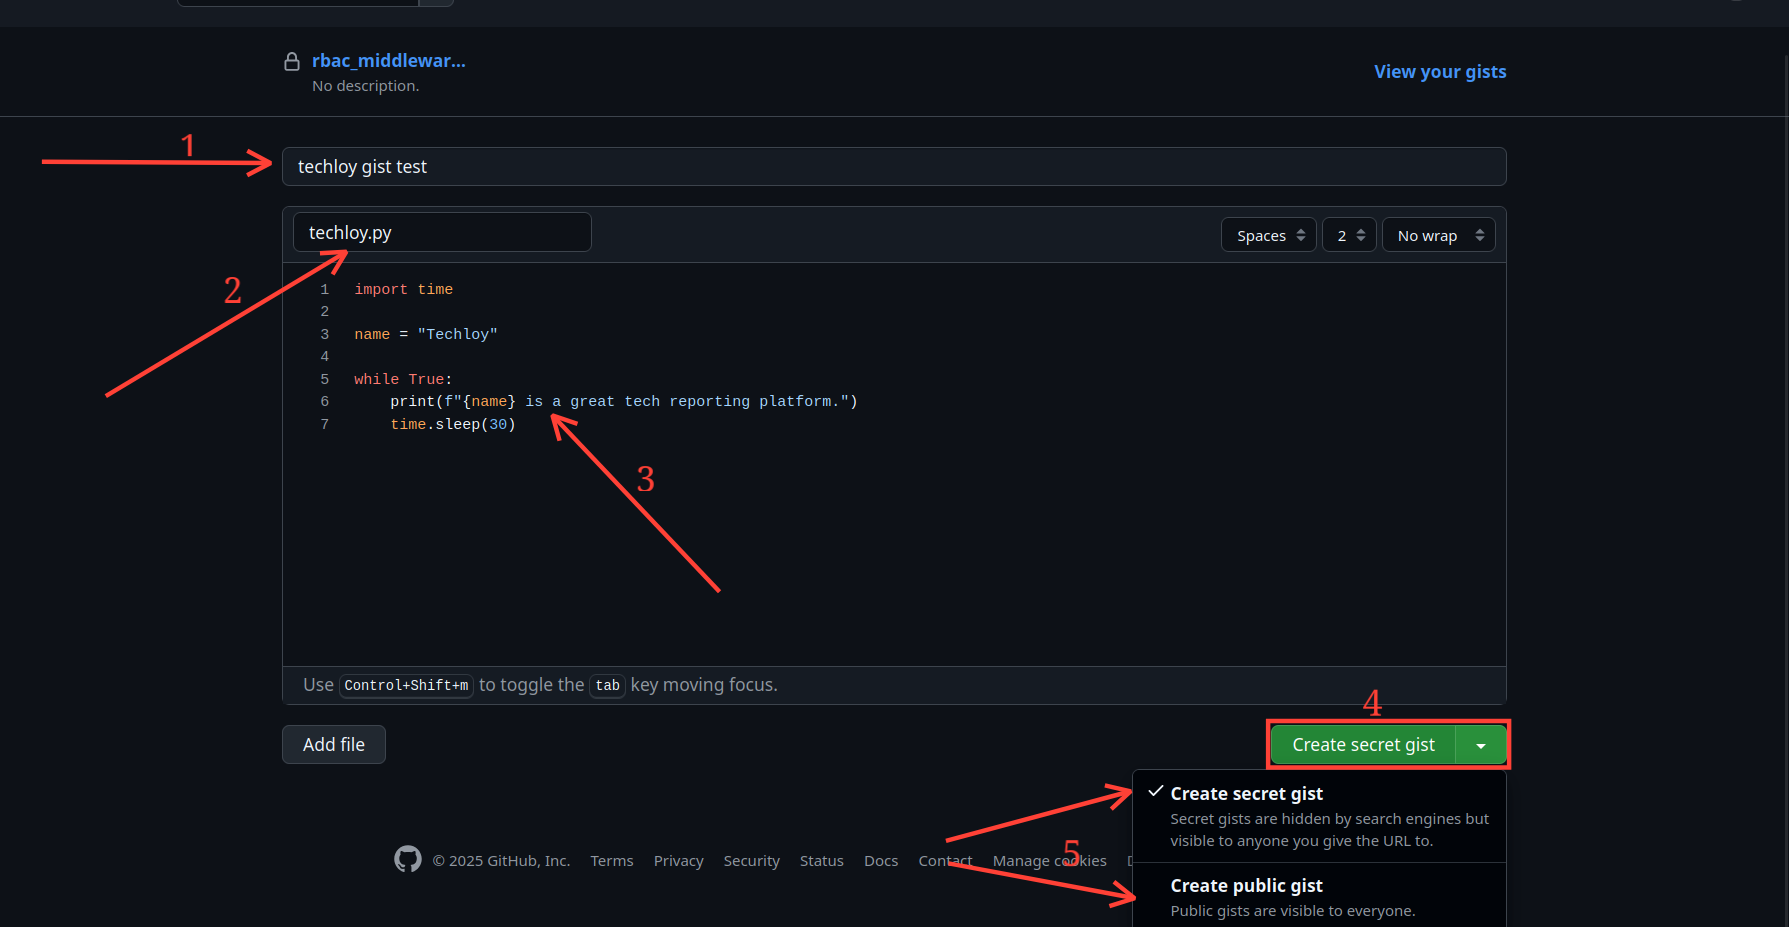
Step 3: Enter the description of the gist, the file name for it, and the content of the gist. Click the Create Gist dropdown to create it as either a secret (private) gist or a public gist.
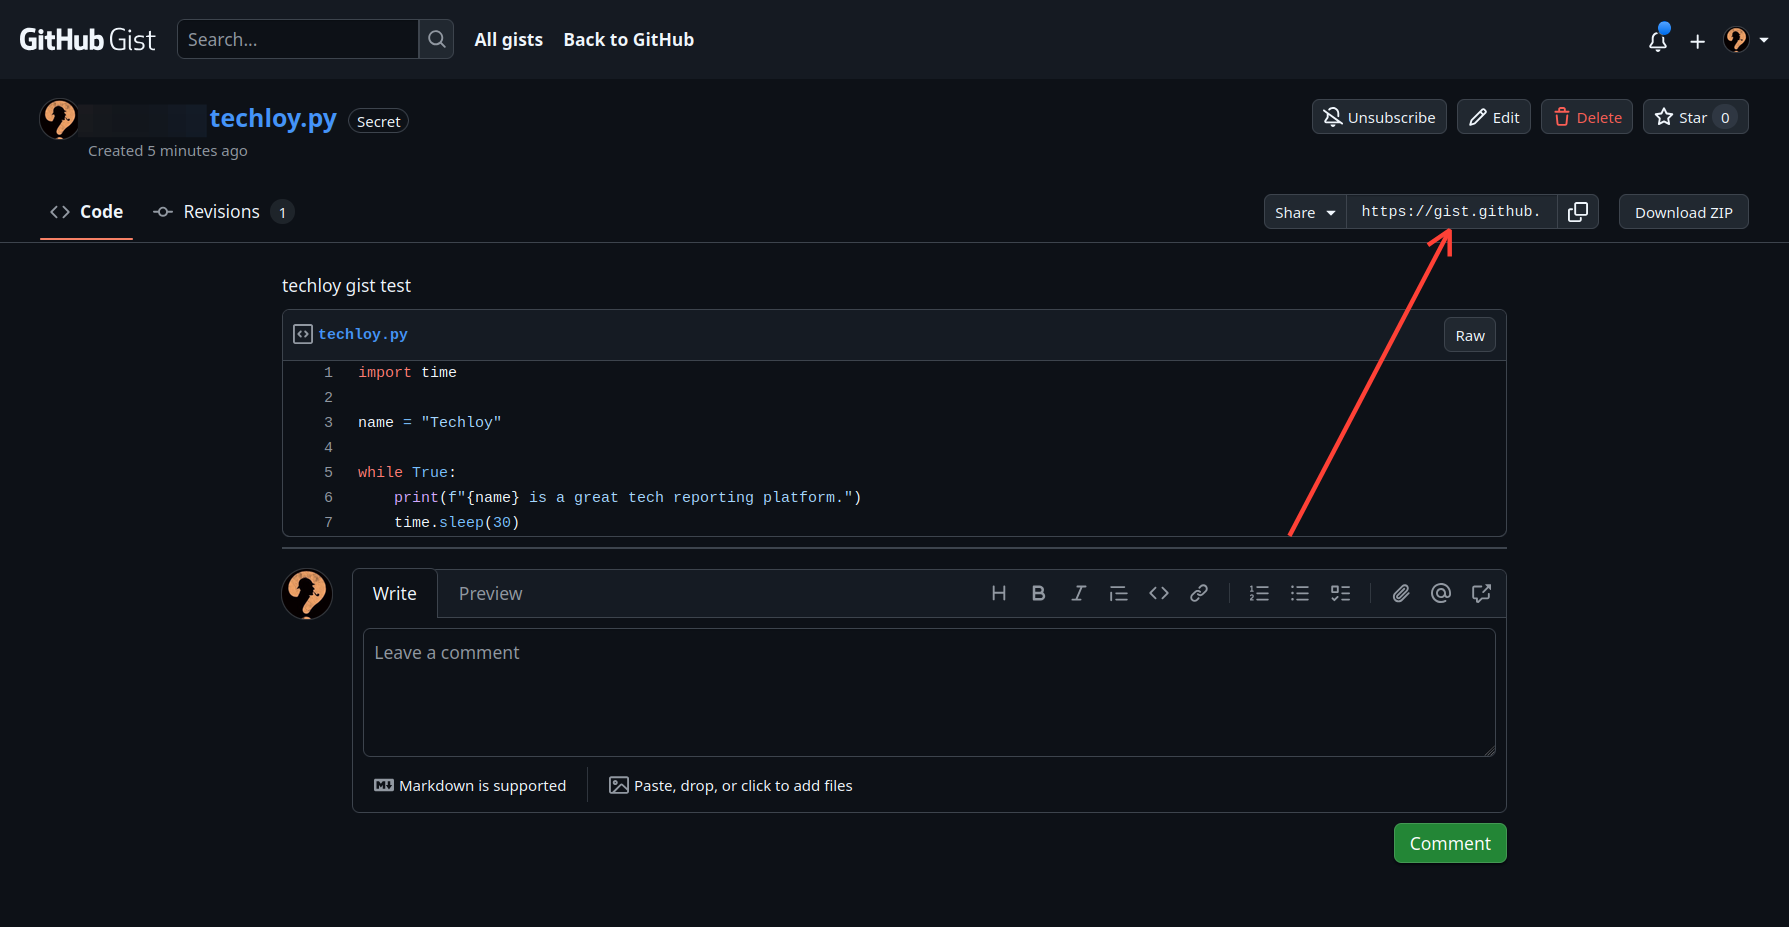
Step 4: Once you're done, to share it, click the Embed dropdown and select Share.
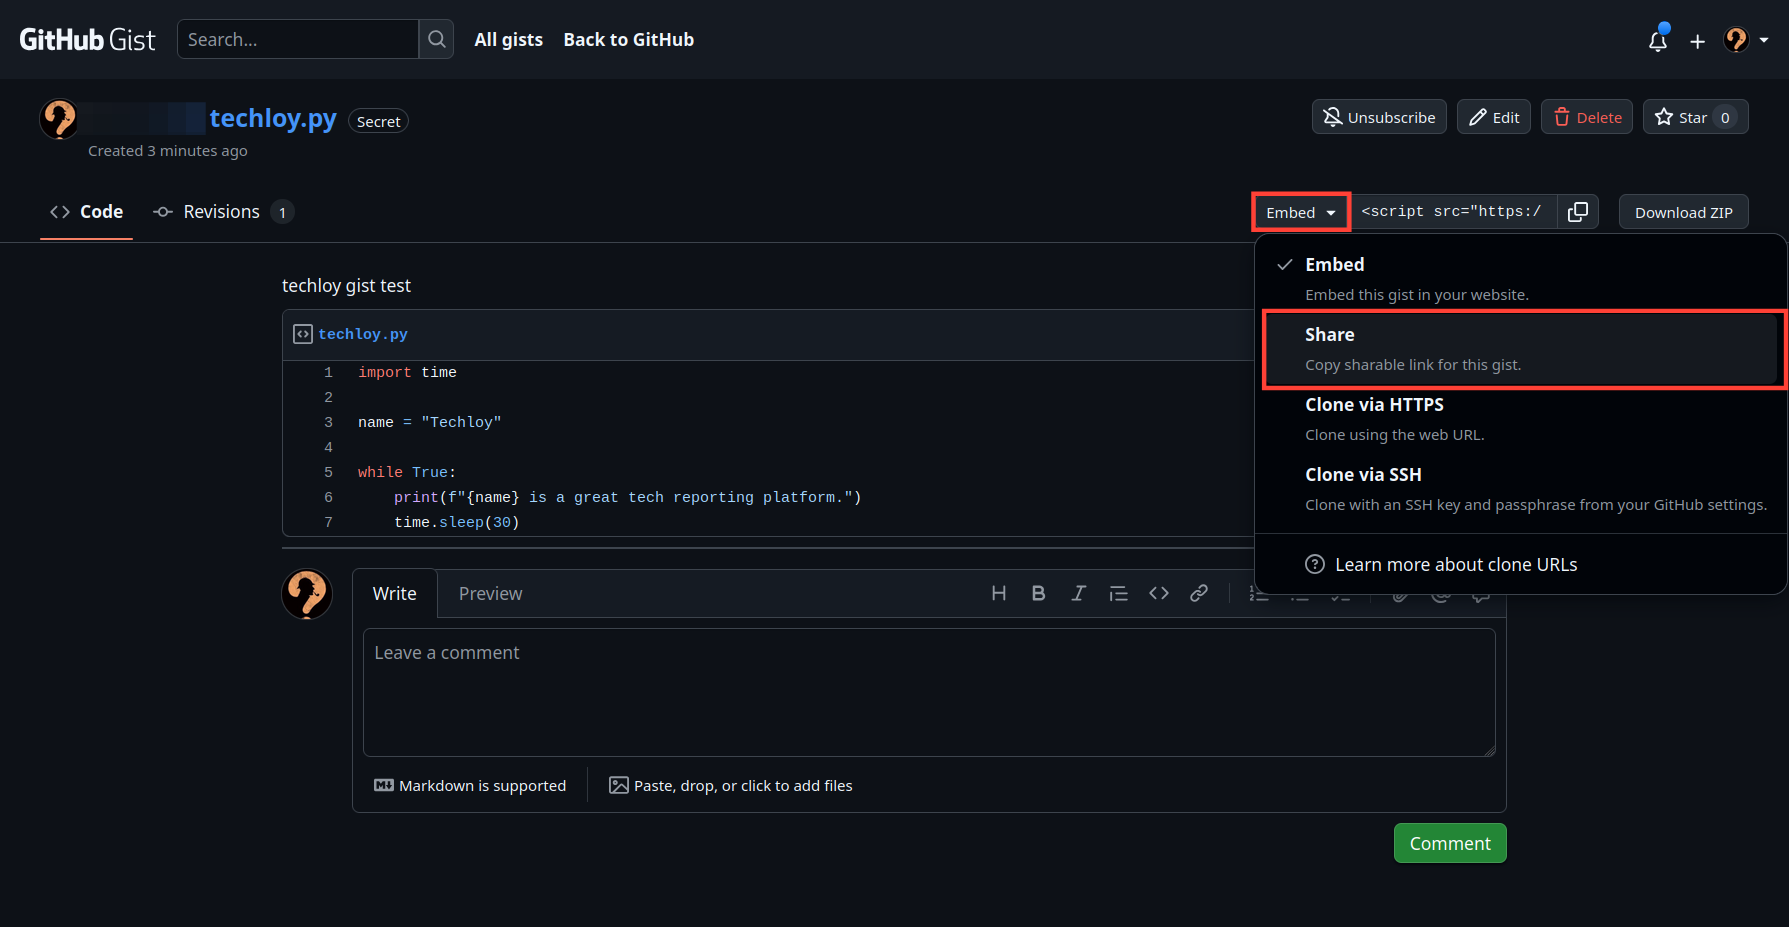
- This creates a shareable link you can now copy. If it's a secret (private) gist, only those with the link can access it.
Conclusion
GitHub Gists might seem simple, but it's an important tool for developers, writers, and tech enthusiasts, not talked about enough. Unlike full repositories, Gists takes away the complexity, letting you focus on a specific issue, sharing code, notes, or even mini-projects in seconds.
With Gists, you don't need to create a repo just for a small script. And you can embed the Gists into blogs, docs, or forums with ease. And thanks to the privacy, you can decide whether to share your gist with the public or not.
Image Credit: Oyinebiladou Omemu/techloy.com


