

You’re juggling emails, jumping between browser tabs, editing a doc, and suddenly everything feels a little off. Maybe the text is too small to read comfortably, or your apps look stretched and pixelated. It’s not your eyes; it’s likely your screen resolution.
Windows 11 is designed to look sleek, but its default resolution settings don’t always match your ideal setup. Whether you're working long hours, watching content, or just trying to reduce eye strain, tweaking your screen resolution can make a huge difference in how comfortable and efficient your workflow feels.
Luckily, changing your resolution is quick, and Windows gives you plenty of control. You just need to know where to click. Let’s walk through it.

Steps to Change Screen Resolution on Windows 11
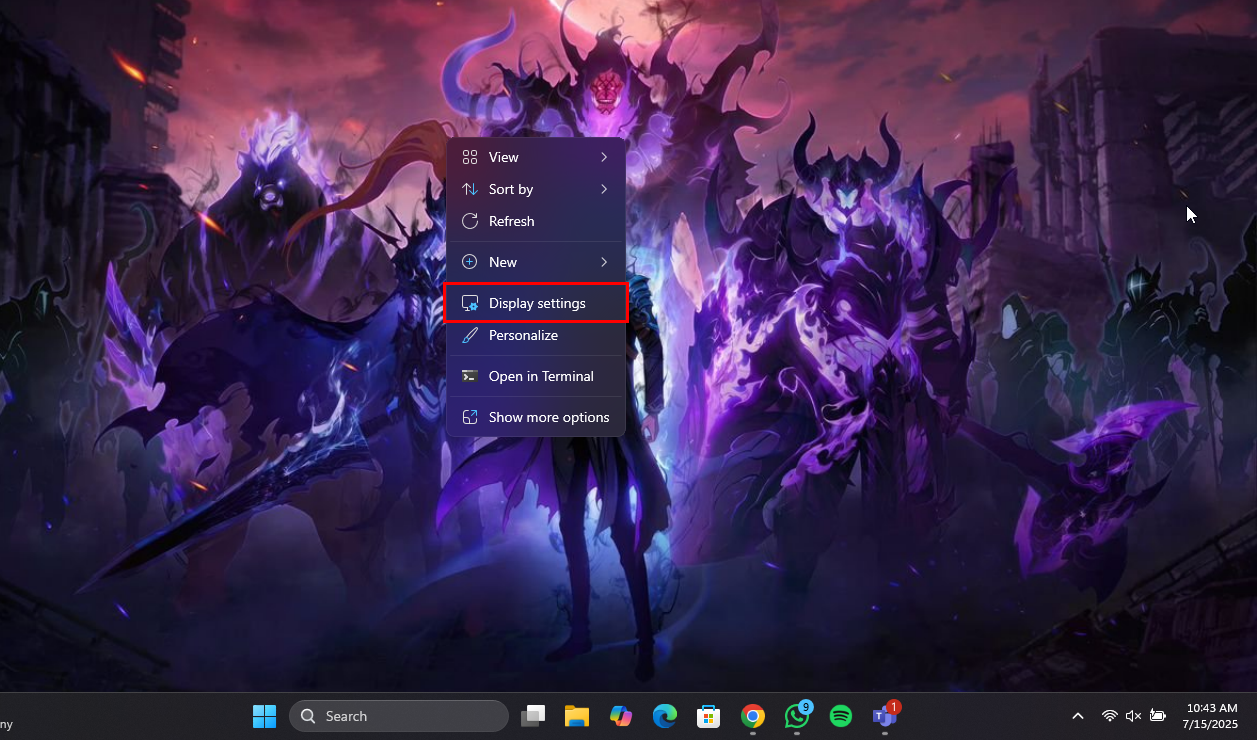
Step 1: Right-click on your desktop and select "Display settings"
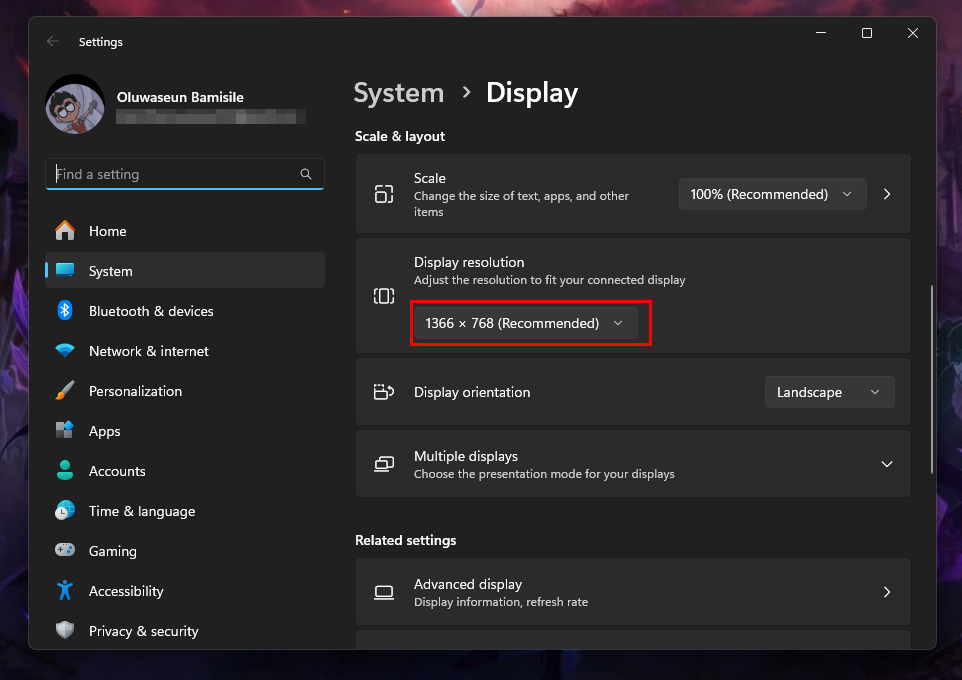
Step 2: Click the Display resolution dropdown in the Scale & layout section
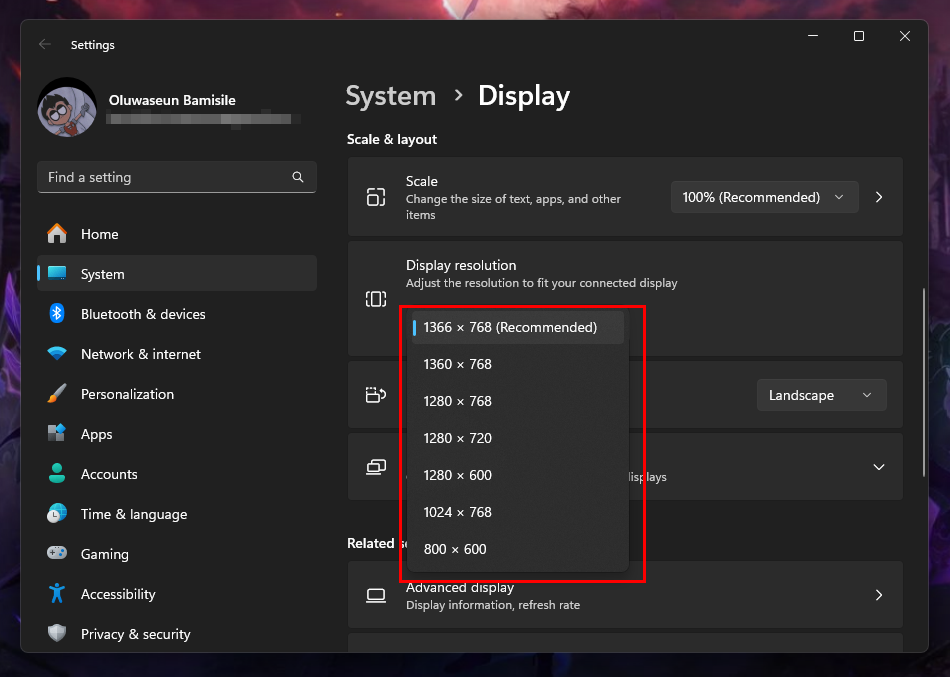
Step 3: Select your preferred resolution
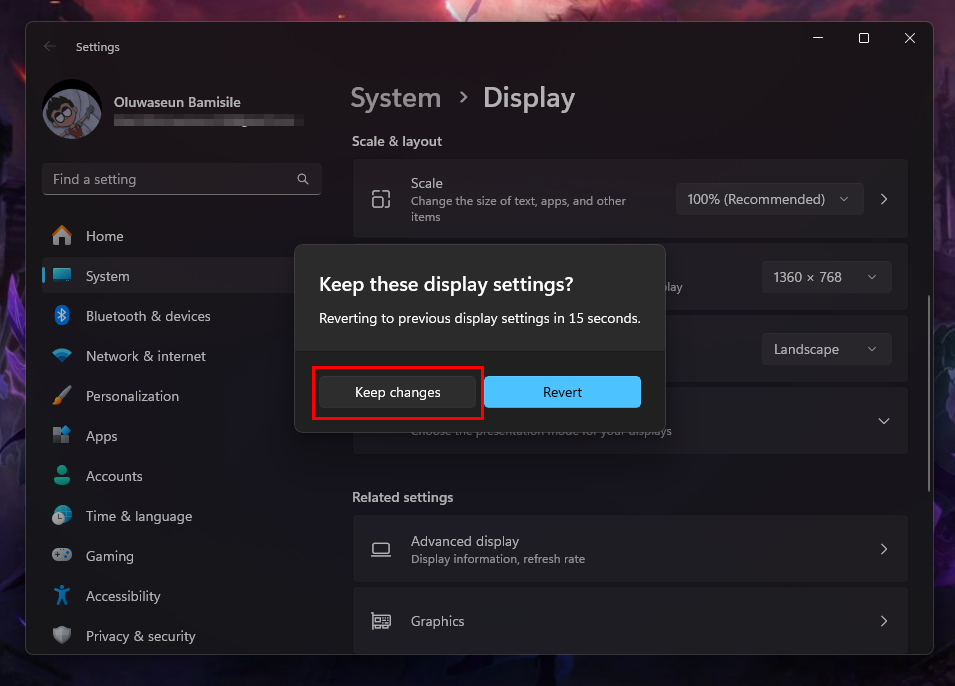
Step 4: Following that, you should receive a prompt asking if you want to keep the display settings. Select "Keep changes"
Conclusion
Changing your screen resolution on Windows 11 might sound technical, but it’s actually one of the simplest ways to dramatically improve your experience.
Whether you want everything to look razor-sharp, need more space for multitasking, or just want to stop squinting at tiny text, dialling in the right resolution can make your screen feel brand new. Windows 11 gives you the flexibility to adjust things until it feels just right.
Image credit: Oluwaseun Bamisile/Techloy.com


