

A USB flash drive can be incredibly handy until it's cluttered with years of random files, weird folders, or errors that won’t let you save anything new. Whether you’re prepping it for a new project, trying to make it work with another device, or cleaning up old data, formatting is the fastest way to start fresh.
I’ve had USBs passed between multiple laptops, printers, and even smart TVs. And eventually, things just stop working smoothly. That’s when formatting steps in.
On Windows 11, it’s straightforward and takes just a minute. Just a few clicks, and your drive is clean, compatible, and ready for whatever you throw at it next. Here's how to go about it.

Steps to Format a USB Drive on Windows 11
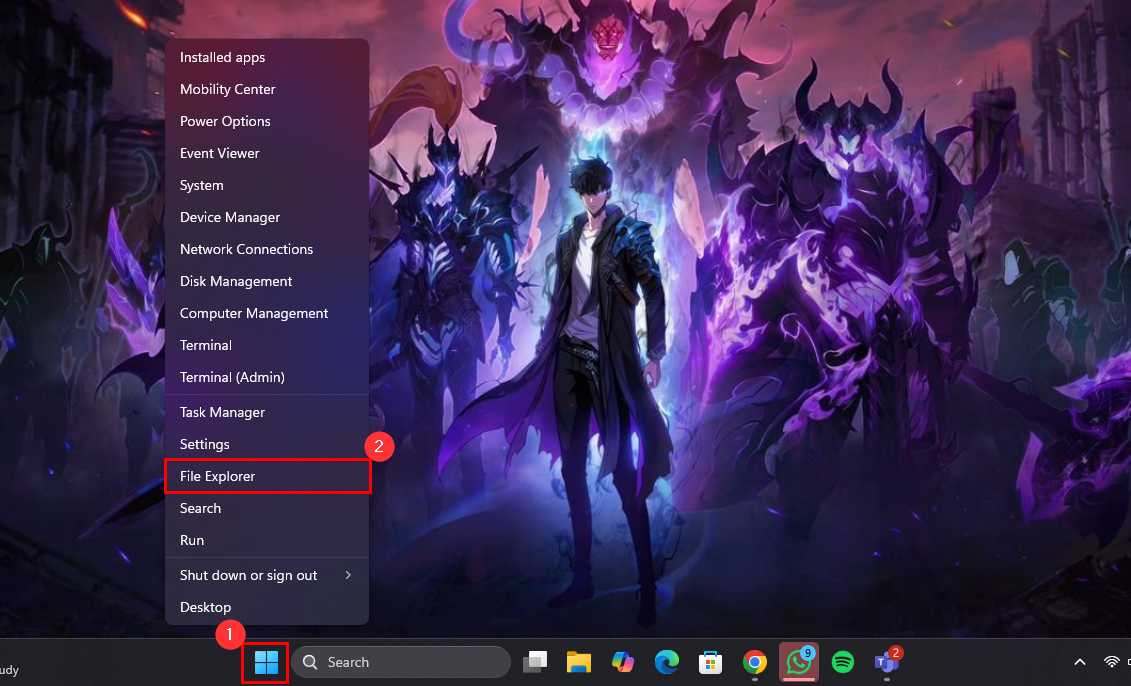
Step 1: Plug in your USB flash drive, right-click the Start button on the taskbar, then select "File Explorer"
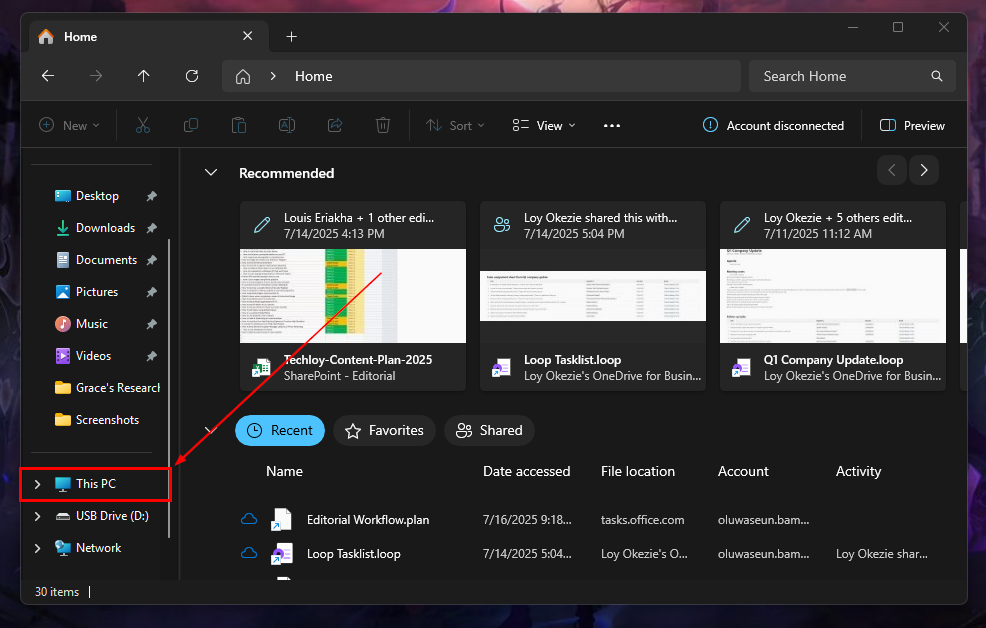
Step 2: Select "This PC" on the left pane
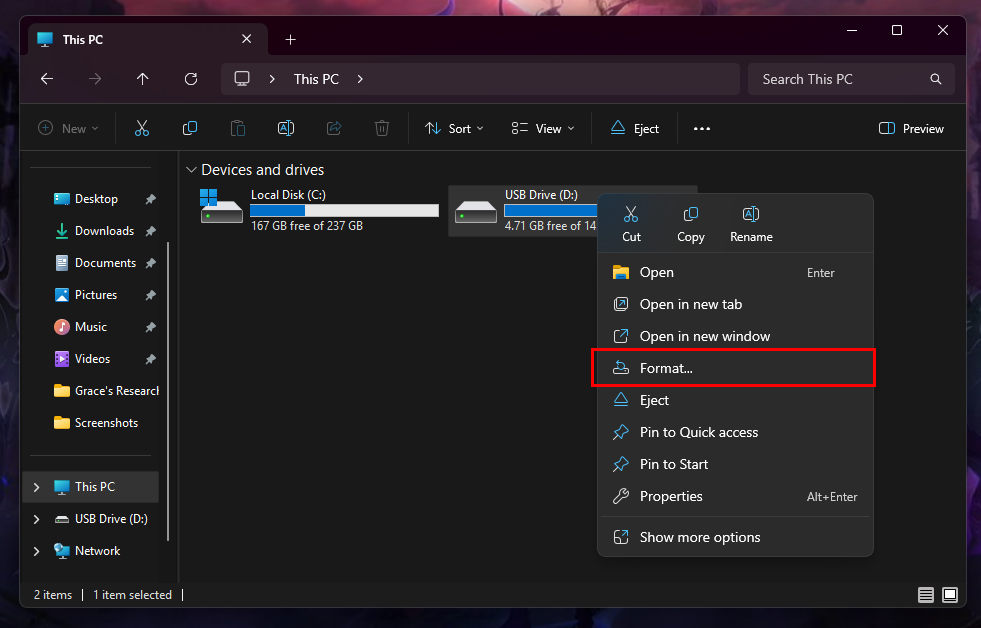
Step 3: Now, under "Devices and drives", right-click the USB drive you wish to format and click "Format..."
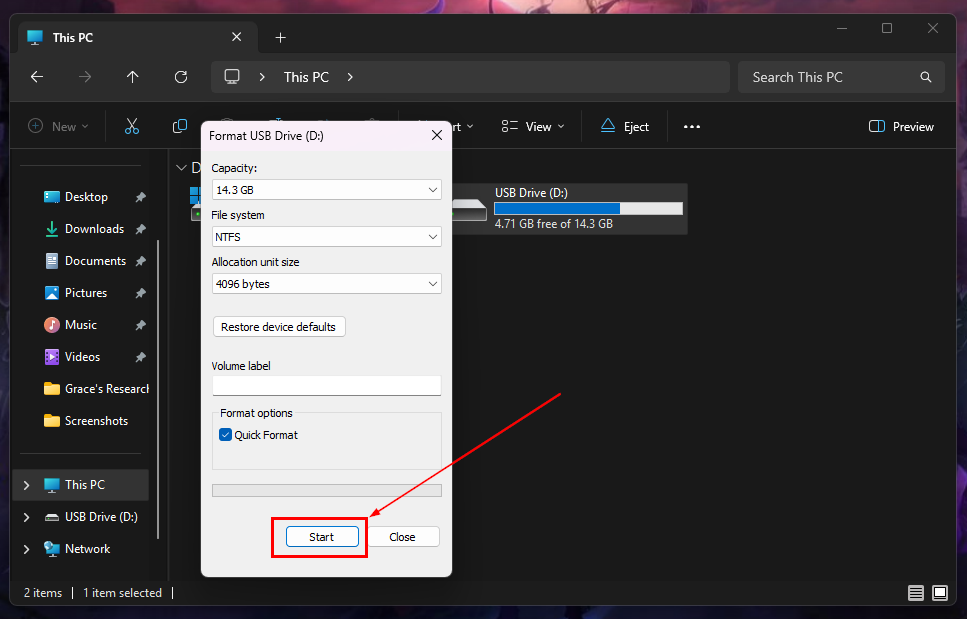
Step 4: In the Format window, click the File system drop-down and select your preferred file system
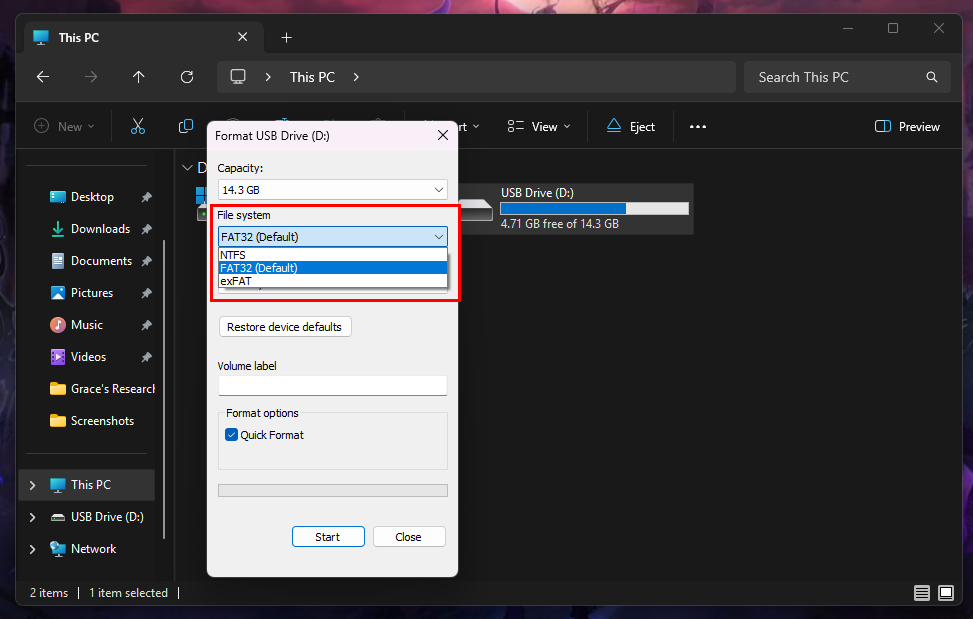
Step 5: Click the Start button
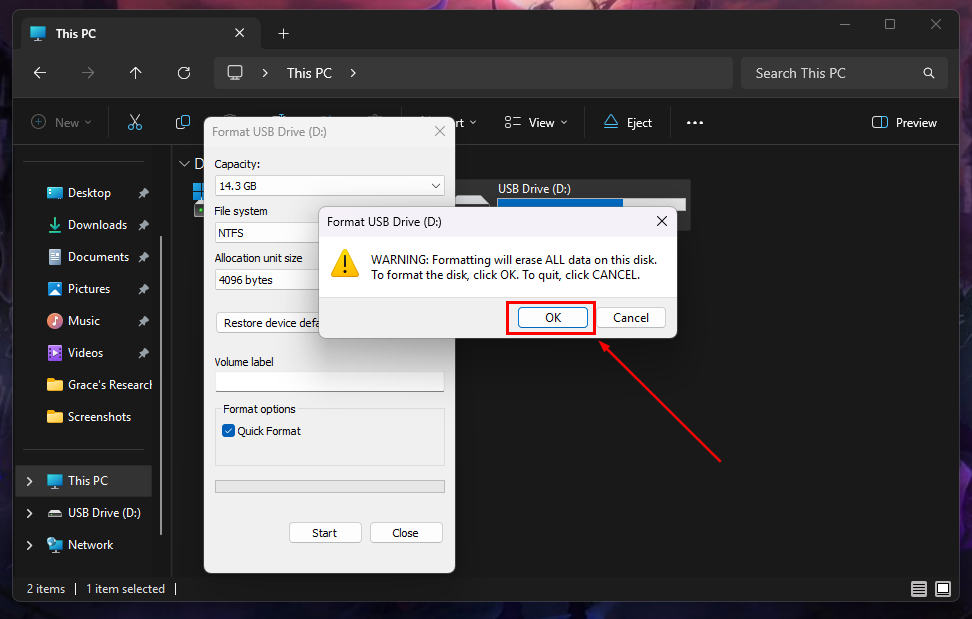
Step 6: You will be prompted with a warning. Click "OK", and the formatting process should begin
Conclusion
Formatting a USB drive in Windows 11 is one of those low-effort, high-payoff tasks. Whether you're clearing out old files, fixing a glitchy drive, or prepping it for a new use, it only takes a minute. And once you've done it a few times, it becomes second nature.
Just remember to choose the right file system for where you plan to use the drive, and always double-check you're formatting the right one.


