

If your PC crashes tomorrow, would your important files survive?
That’s one question everyone should ask before something goes wrong. Because once your system crashes, it’s often too late. Photos, documents, and work files are all stored in the same place as Windows itself. And if the system goes down hard, so does everything with it.
In order to prevent such an occurrence, partitioning your hard drive is crucial.
Creating a separate partition lets you split your hard drive into separate sections, so you can keep your personal files away from your system files. That way, even if something goes wrong with Windows, your important stuff stays untouched.
It also helps in other ways. You can use it to keep your files better organized instead of piling everything into one chaotic C: drive. You can carve out space for a dedicated recovery area in case you ever need to reset your system. And if you want a dual setup, you can run another OS (like Linux), without messing with your main setup. In some cases, having dedicated partitions can even help with system performance by keeping file access more efficient.
If you’ve never done it before, it’s not as technical as it sounds. You can set up a basic partition in a few clicks.
How to Create a Partition in Windows
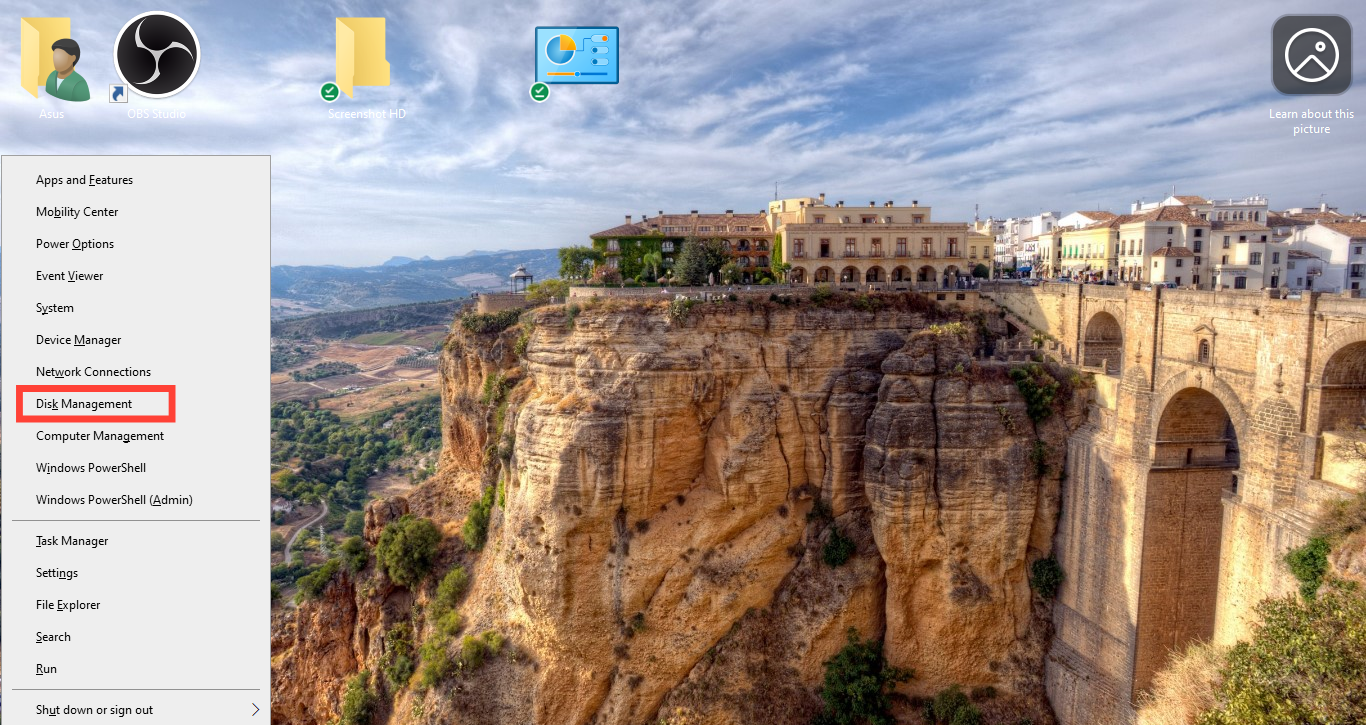
Step 1. Press "Windows + X," then select from the list of options "Disk Management."
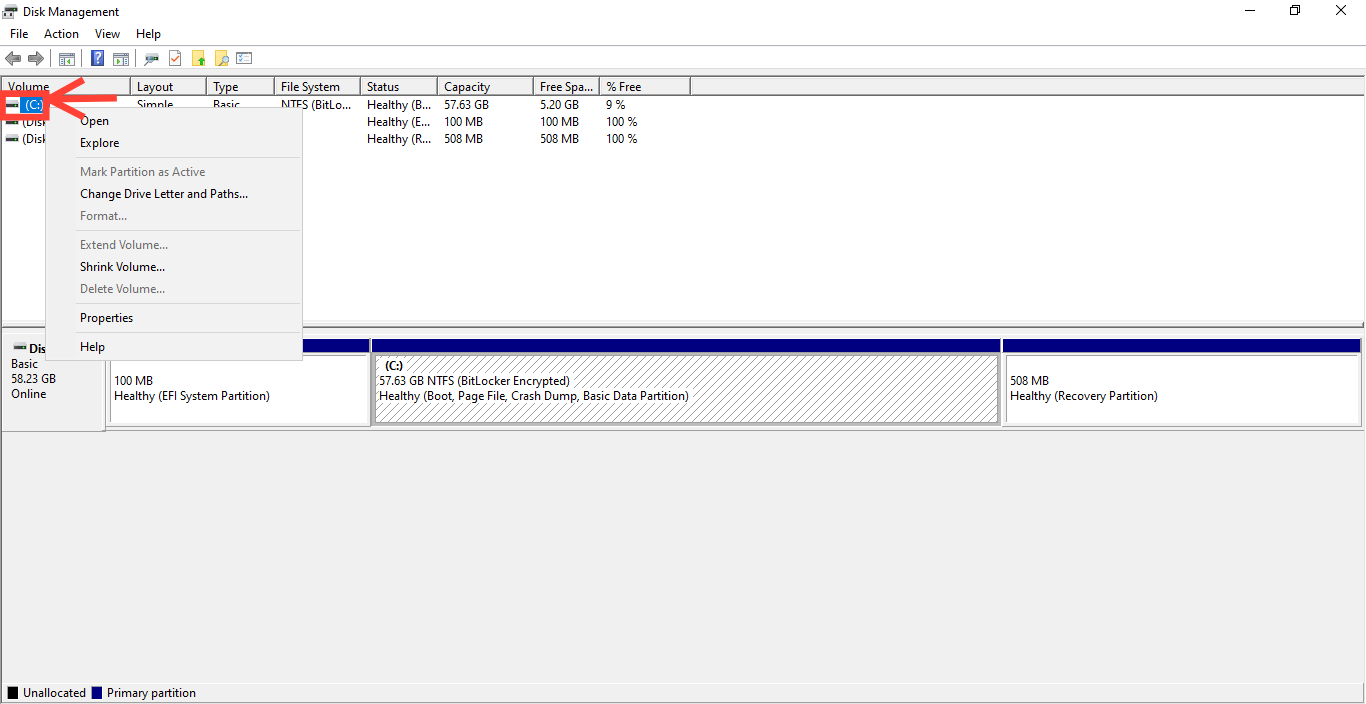
Step 2. Right-click on your main drive (usually labeled C:)
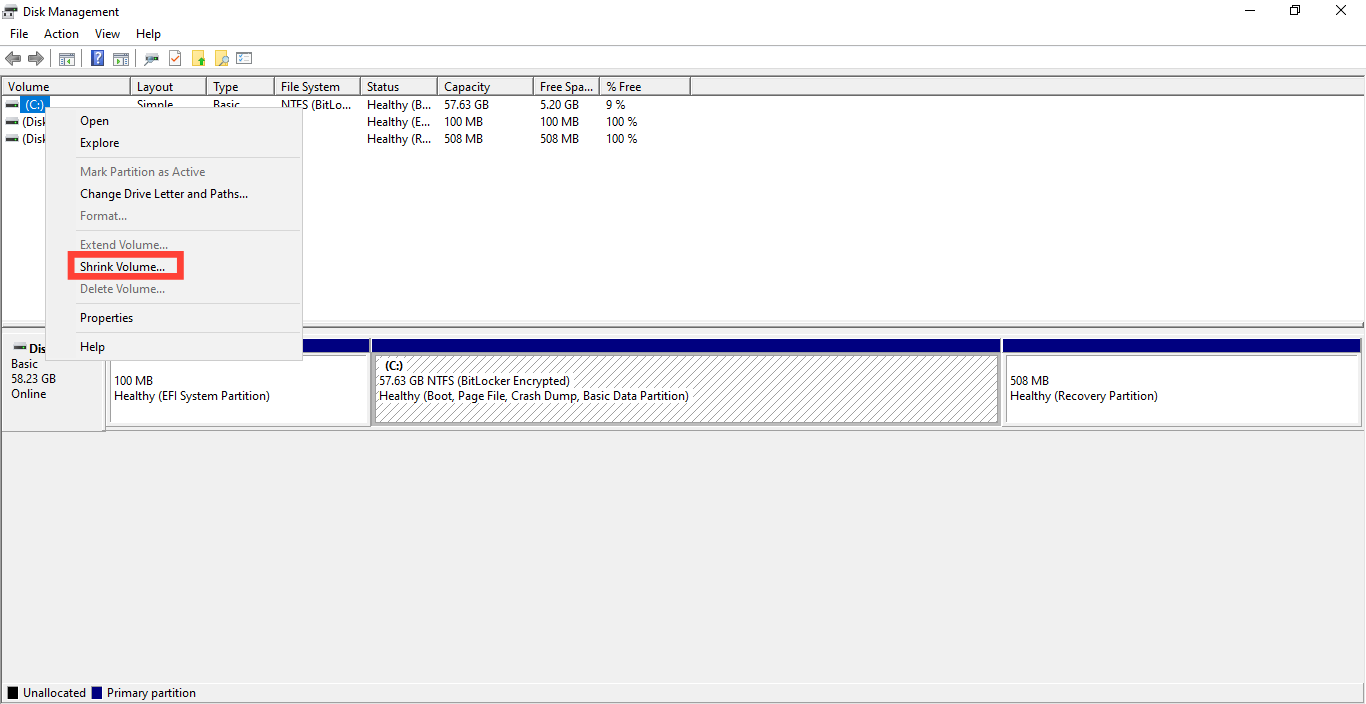
Step 3. Select “Shrink Volume...”
Step 4. Decide how much space you want to allocate for the new partition (in MB)
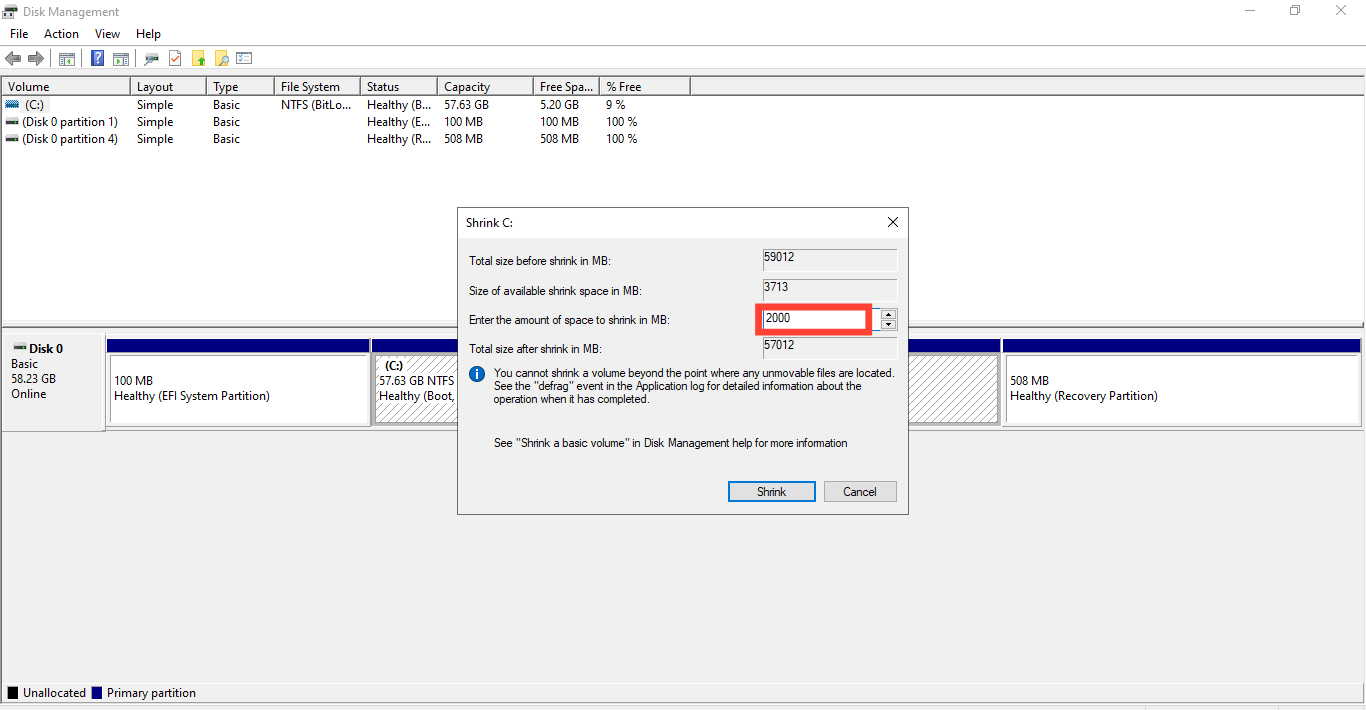
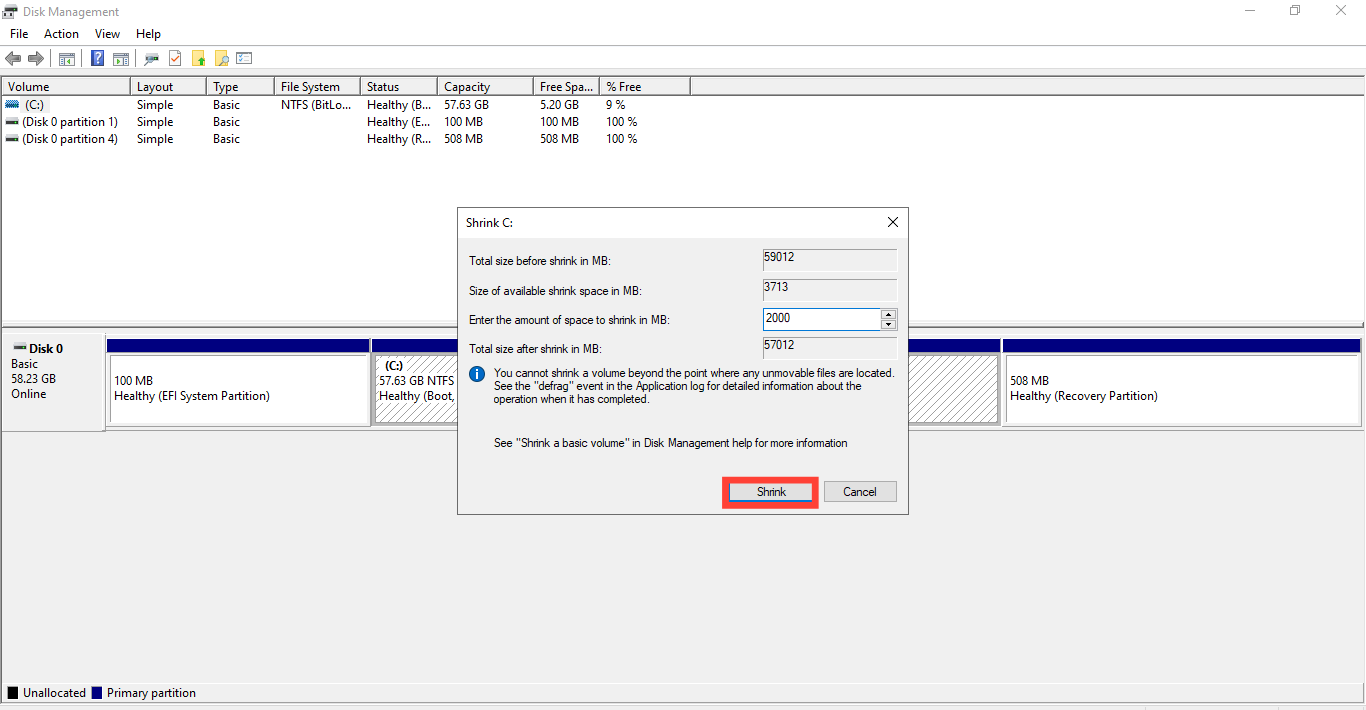
Step 5. Click “Shrink.”
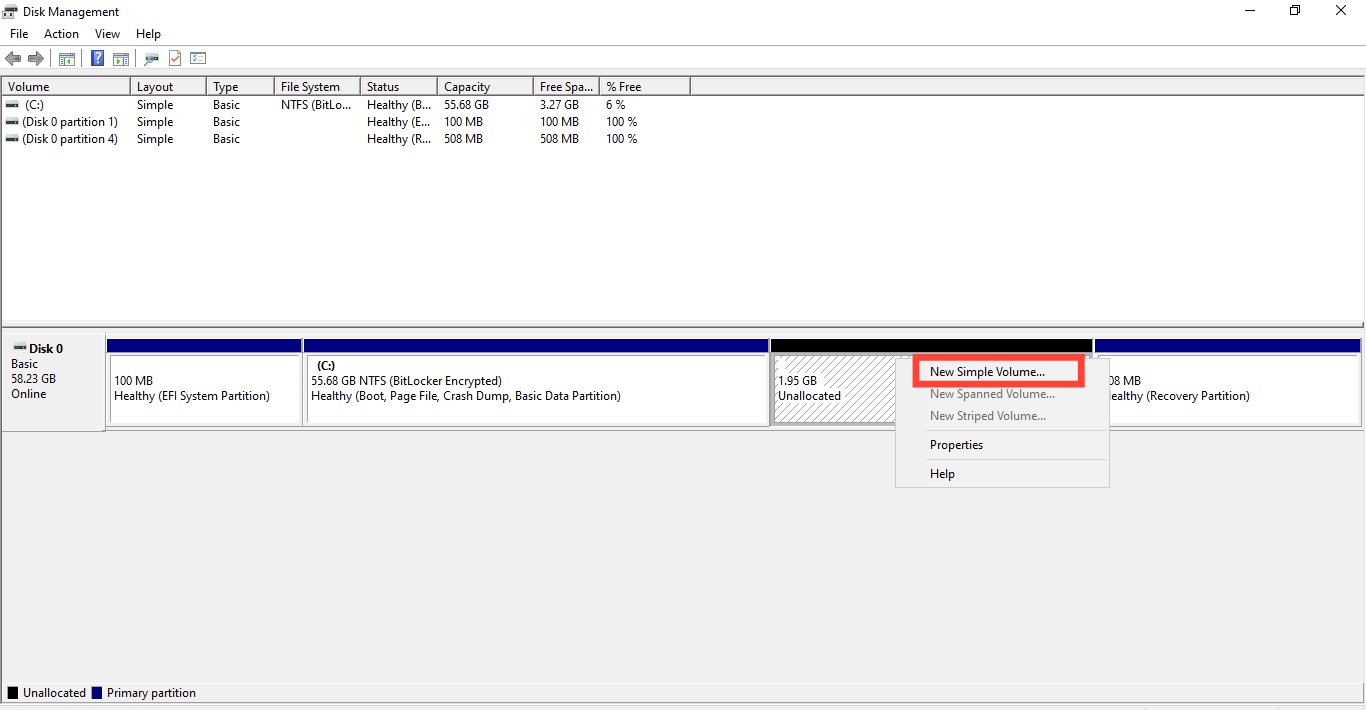
Step 6. Once the space you entered becomes unallocated, right-click it
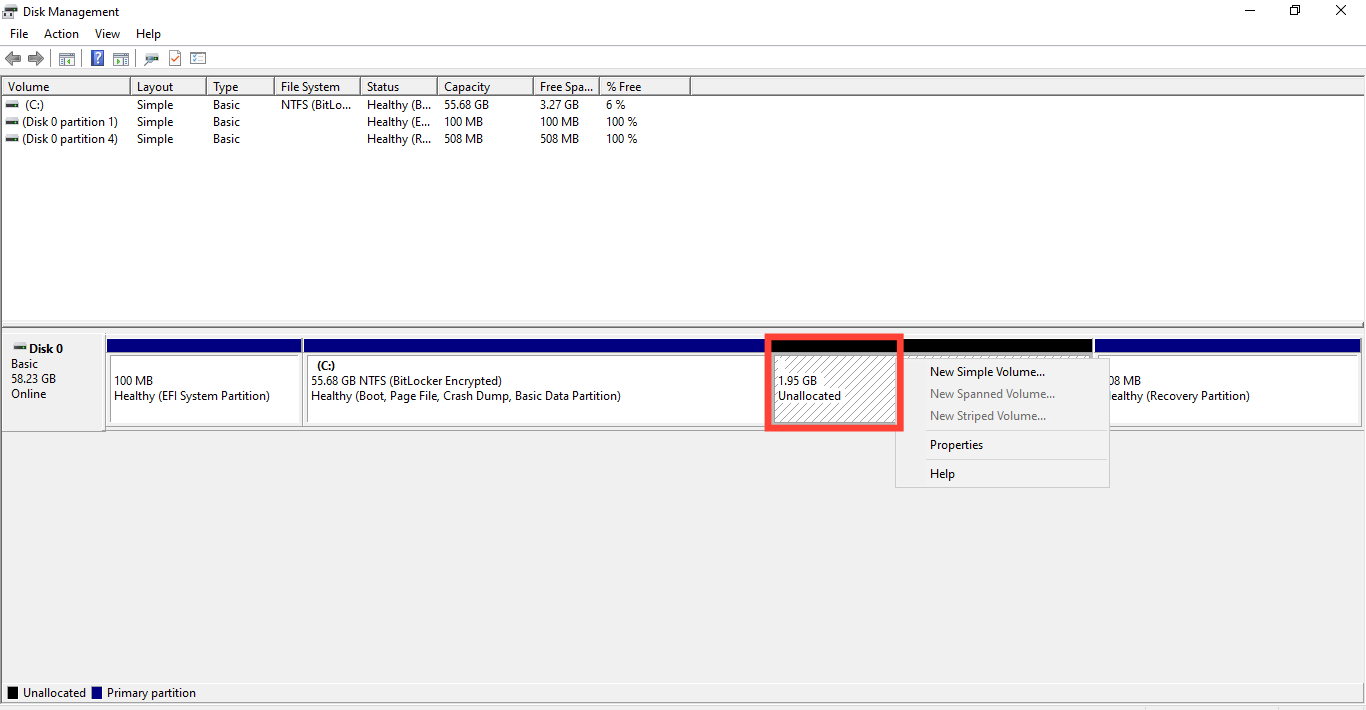
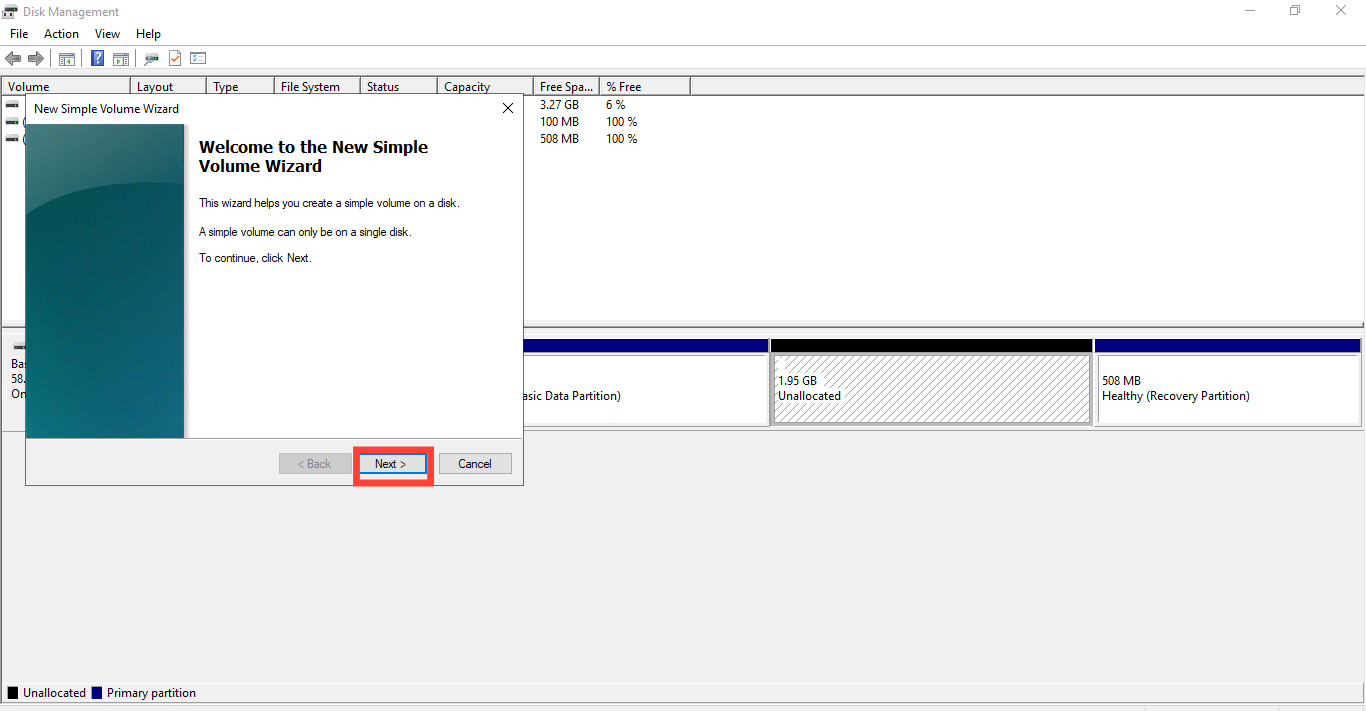
Step 7. Select “New Simple Volume” and follow the prompts
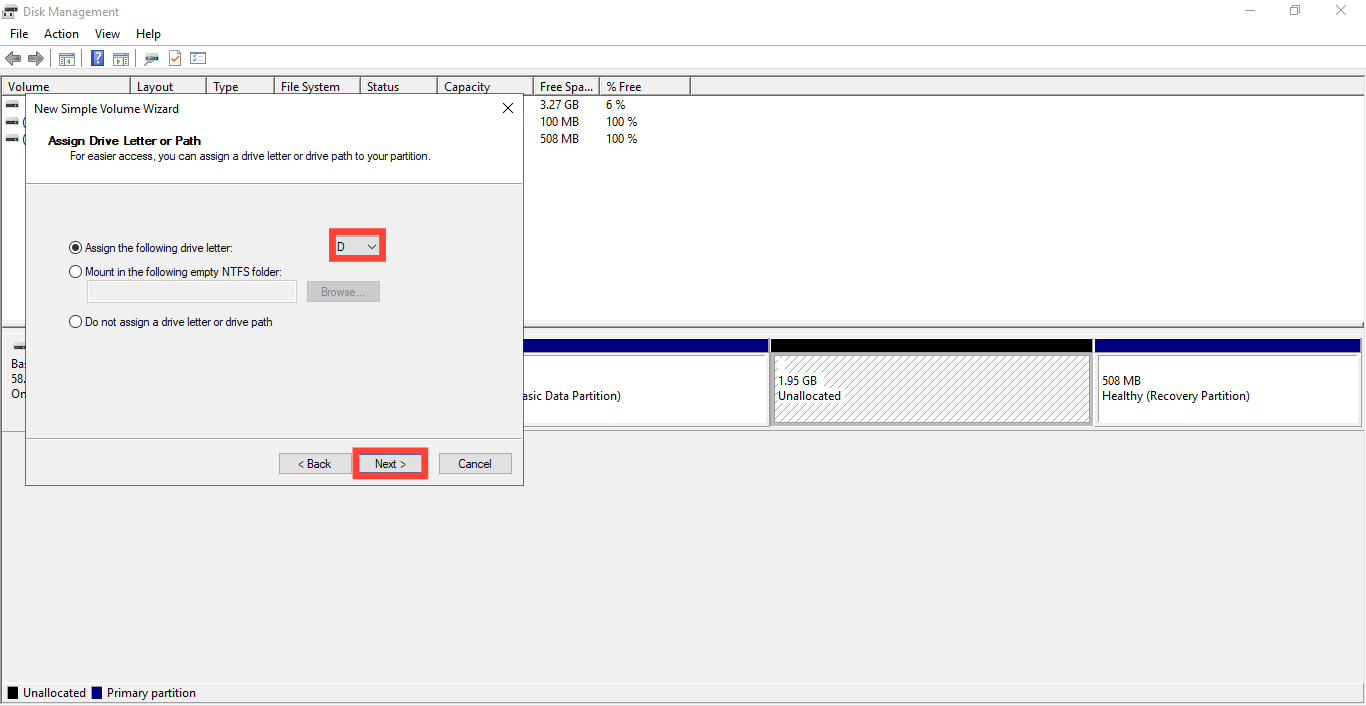
Step 8. You can select a letter of your choice to name the drive, and click "Next."
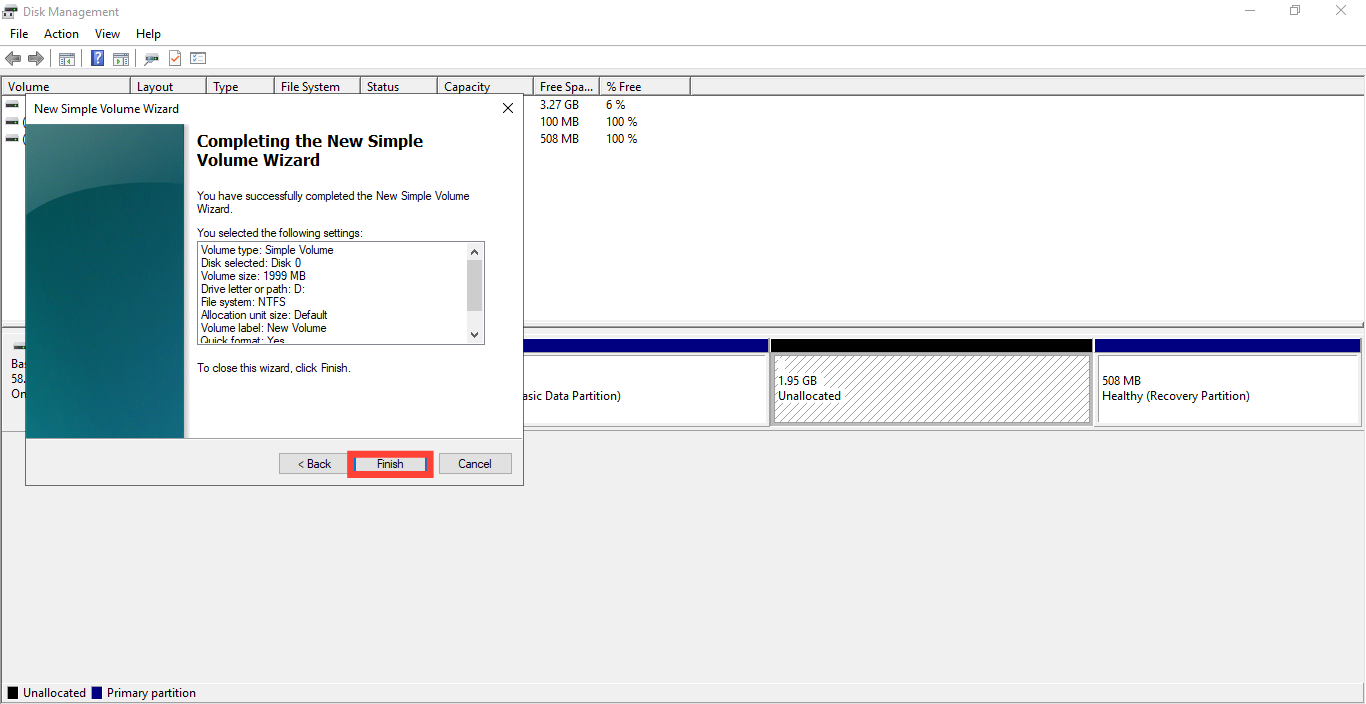
Step 9. Choose a file system (usually NTFS) and tap "Next". After that, click "Finish".

Now that you’ve got a new partition—a completely separate section of your drive—that works like its own storage unit. You’ll see it show up in File Explorer with its own drive letter (like D: or E:), ready to use.
You can keep important files here, install a second OS, or use it to back things up in case of system failure.

Conclusion
Making use of partitions makes it easier to keep important files safe, install a second OS, or set up a backup space in case your system fails.
However, if your PC has limited storage, creating multiple partitions can backfire. Splitting the drive too much might leave you with not enough space where you need it, especially for system updates or large software.
So, before trying to make a partition, think about how much space each section really needs.
Image credit: David Adubiina/Techloy.com


