How to annotate your photos using Screenshot HD tool on Windows PC
This helps you to maintain precision when sharing images for instructional and communication purposes.

As a writer, having annotating tools can help refine your content, making it clear and concise, especially if you frequently share images for instructional, presentation, or communication purposes.
While most annotating tools are not free or user-friendly, Screenshot HD is a free user-friendly annotation tool designed to capture high-definition screenshots directly from your PC screen. It offers various functions that allow you to edit, markup, and enhance your photos, making your images more informative and visually appealing.
This guide will teach you step-by-step how to access and use Screenshot HD to create clear instructional content.
Step 1: Download and Install Screenshot HD
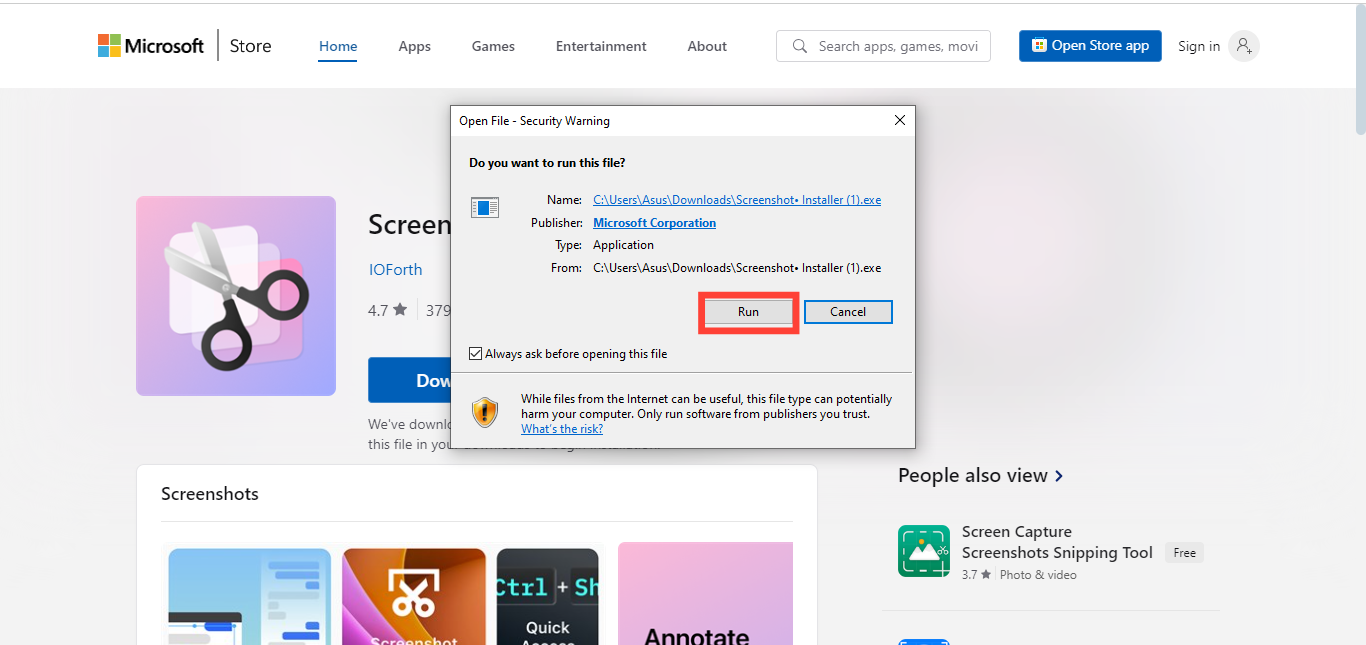
Go to the Screenshot HD page on the Microsoft App Store and click Download Screenshot HD. Install the application by tapping “Run” to complete the installation process.
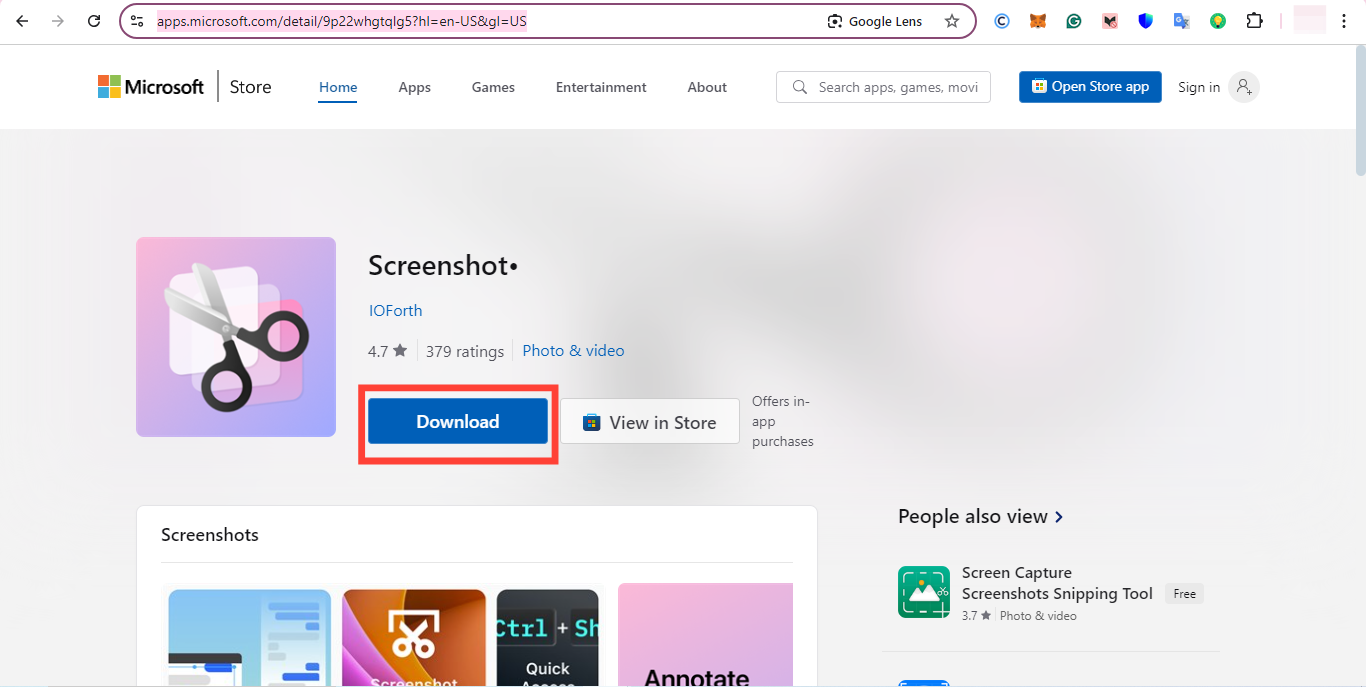
Step 2: Capture a Screenshot or Open an Existing Image
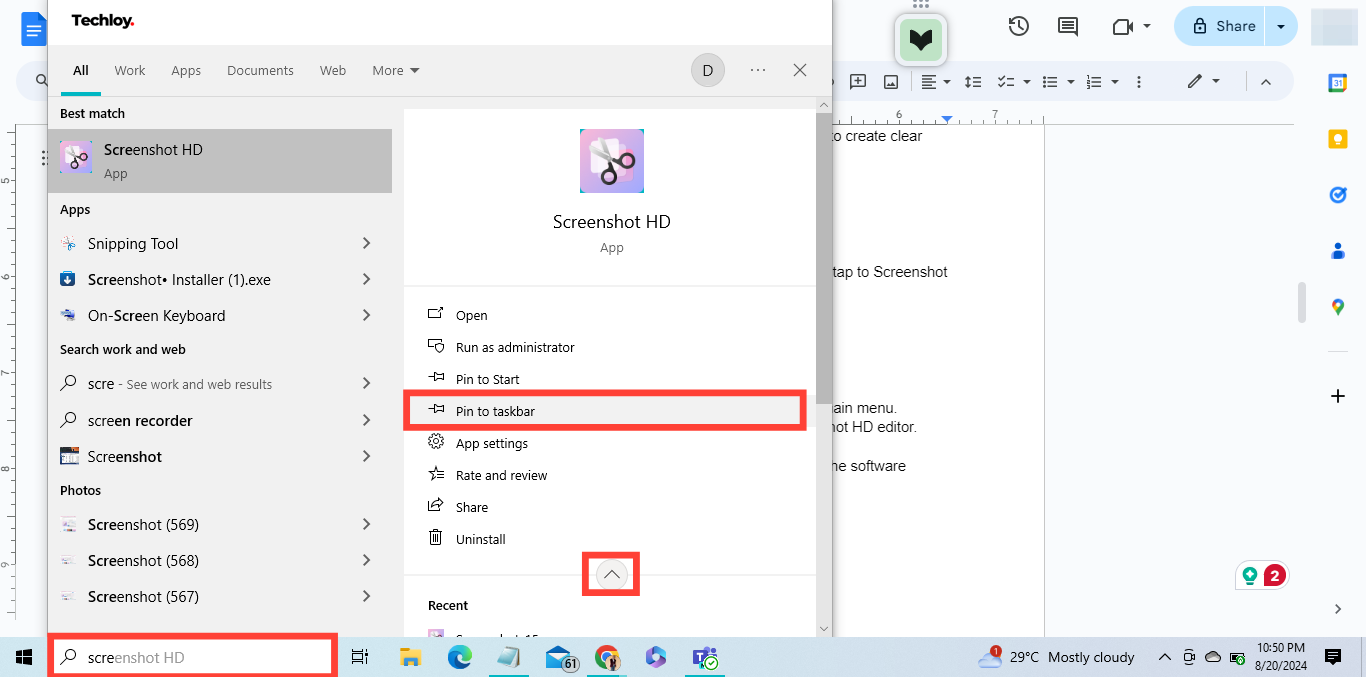
Once Screenshot HD is installed, in the search box at the left corner search for Screenshot HD and tap on the dropdown arrow to add it to your taskbar for easy access. Next, click on "Ctrl +Alt +S" to screenshot the area of the image you wish to capture. The captured image will automatically open in the Screenshot HD editor.
Step 3: Start Annotating Your Image
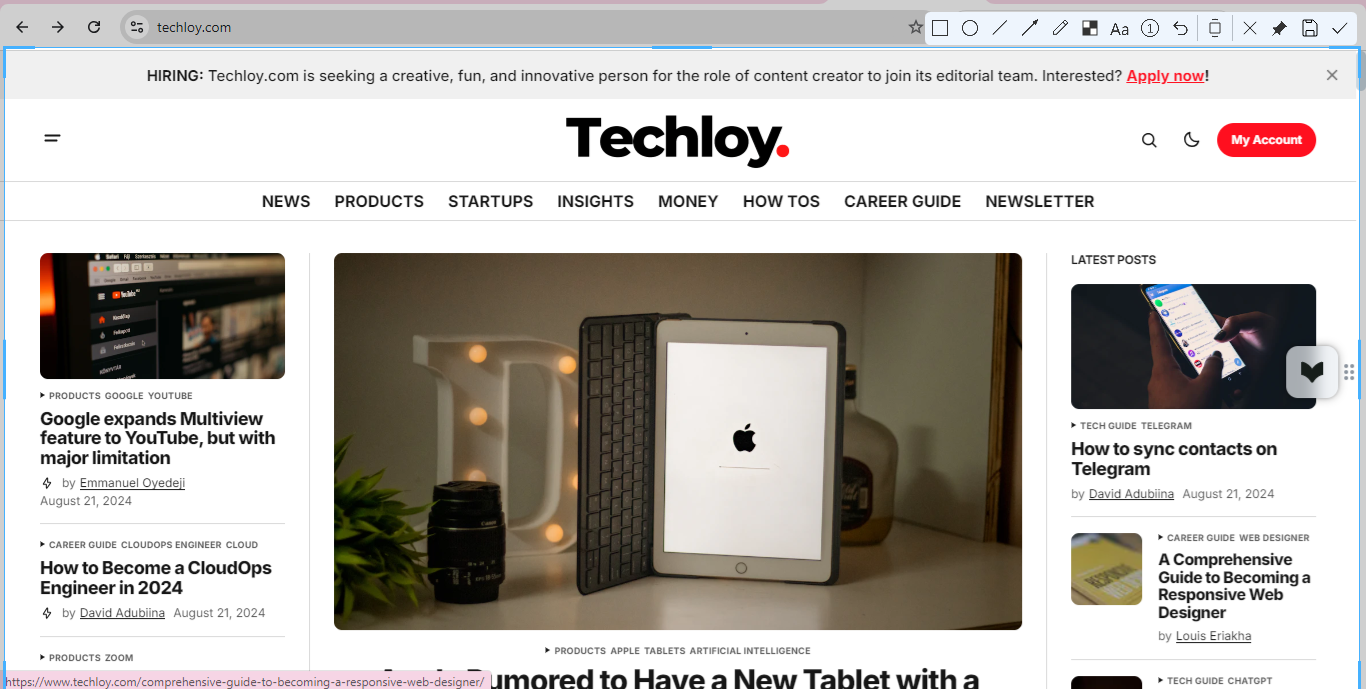
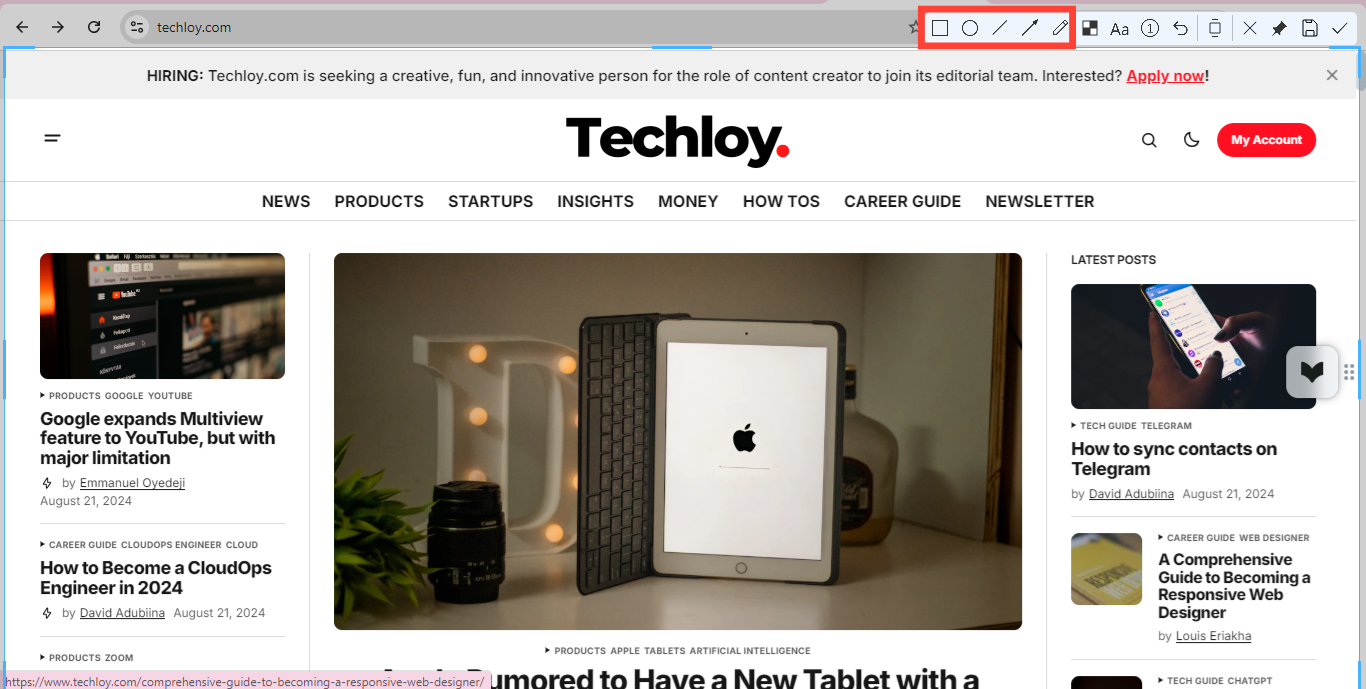
With your image open in Screenshot HD, you can begin adding annotations. Select different shapes like rectangles, circles, or arrows from the toolbar. After that, click and drag on the image to draw the shape. You can adjust the size, border thickness, and color as needed.
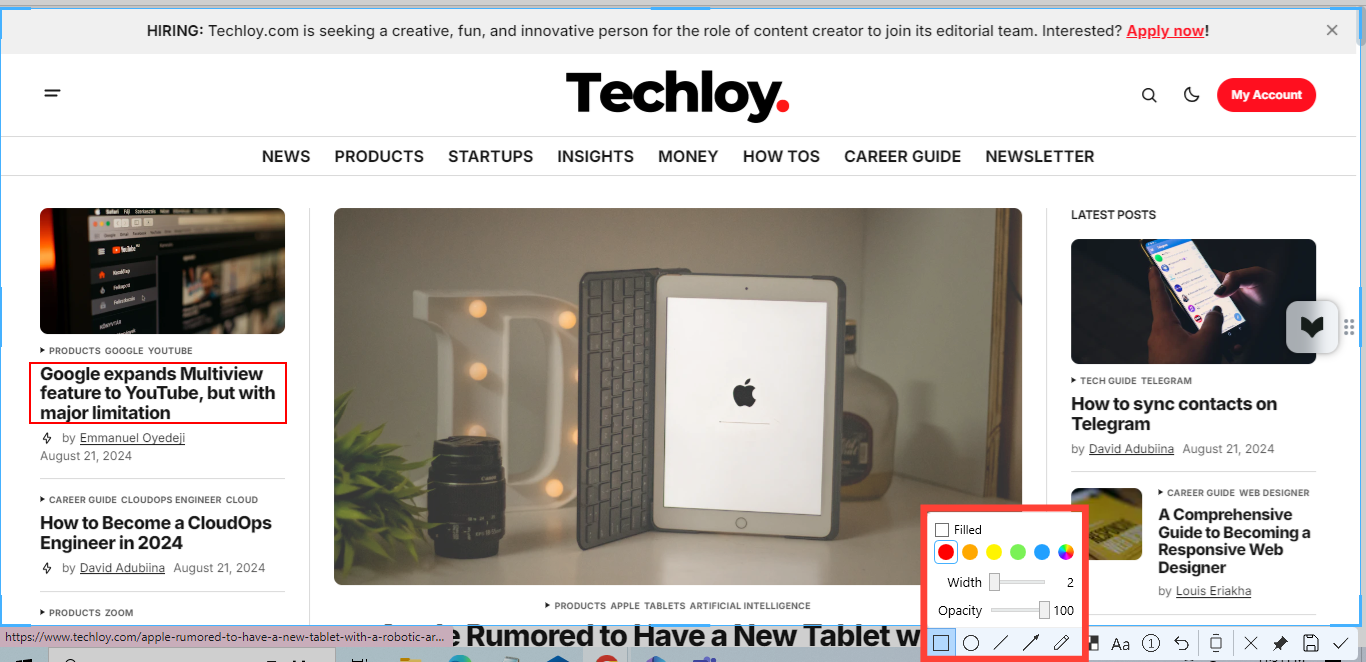
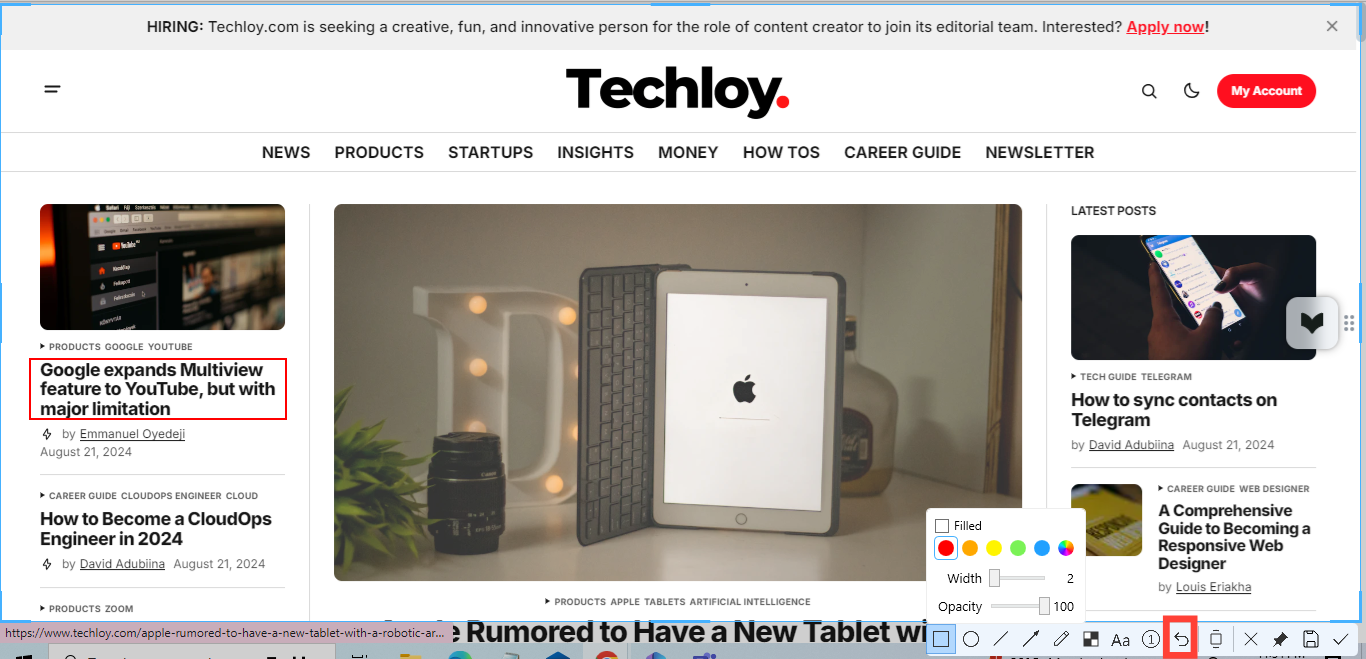
If you make a mistake, you can easily undo it using the "Undo" button or redo an action using the "Redo" button.
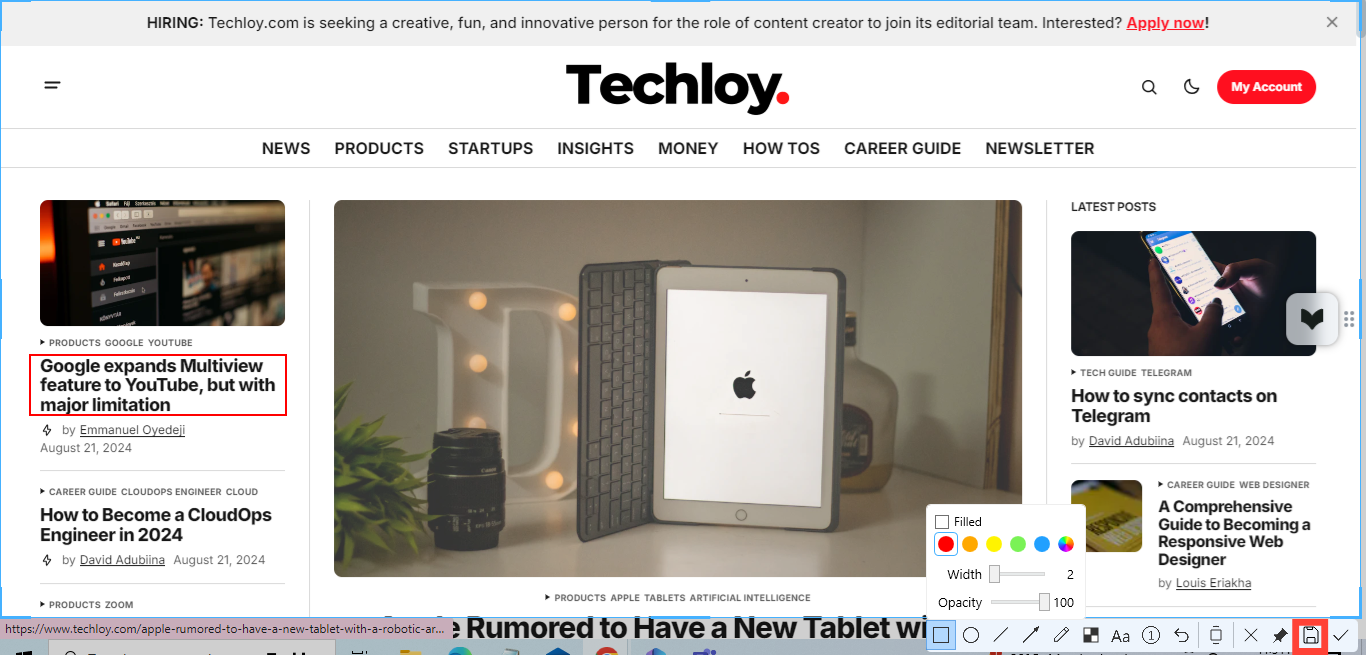
Once satisfied with the annotations, click the "Save" icon to save your edited image.
Step 4: Save and Share Your Annotated Image
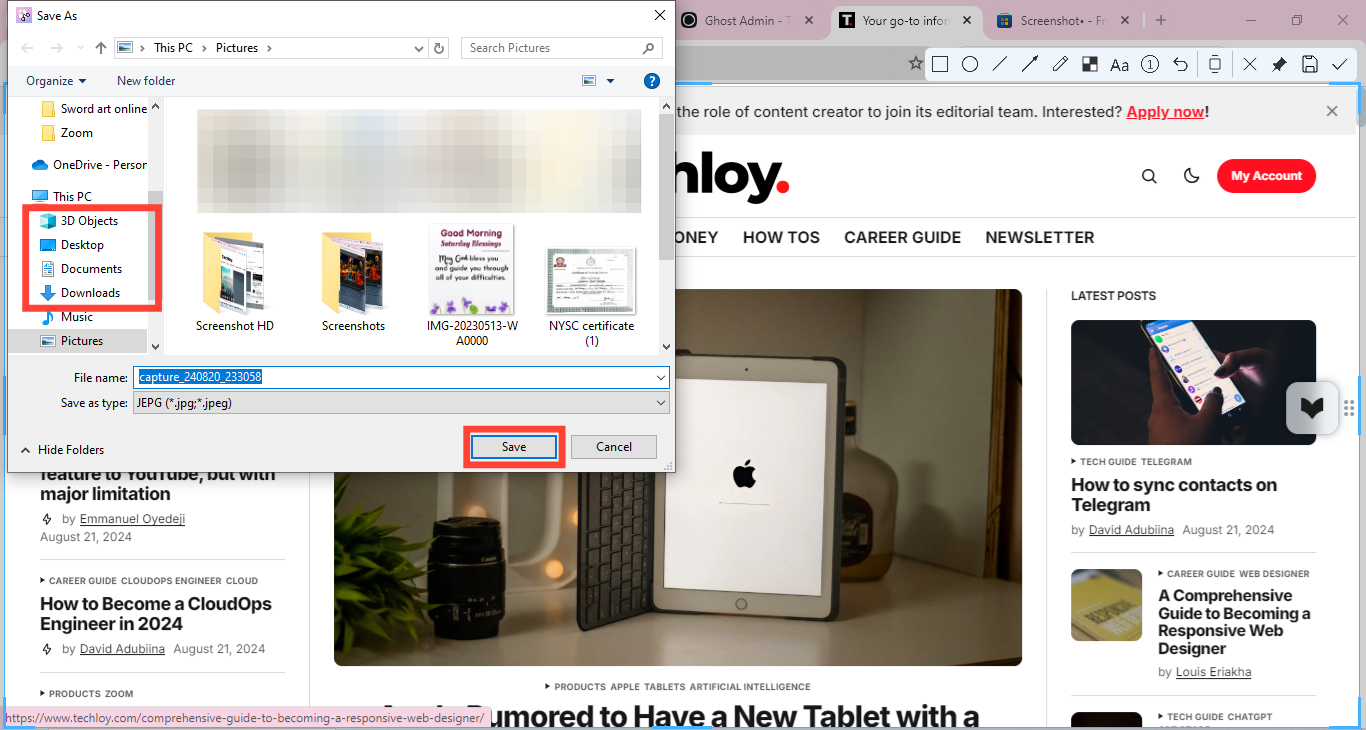
After you've clicked the "Save" icon, select the destination for the image on your PC where you can easily access it later.
Conclusion
Annotating your photos using Screenshot HD is a straightforward process that can enhance clarity and storytelling effect in your visual content. Whether you’re creating tutorials, giving feedback, or simply making your images more informative, the tools provided by Screenshot HD will make your work easy and efficient.
Implementing the instructions in this guide will allow you to enhance your images while maintaining precision.


![Transfer WhatsApp from Android to iPhone Without Factory Reset [Step-By-Step Guide] post image](/content/images/size/w800/2025/02/wtsp-1.png)
