

If you play games on your Windows 11 PC, even just occasionally, you might have noticed your system struggling to keep up during intense moments. Maybe a notification pops up at the worst possible time, or your game lags just as you're about to score.
That’s where Game Mode comes in. Microsoft built it specifically to optimise your system for gaming by shifting resources to your game, reducing background interruptions, and improving responsiveness.
It sounds great, right? And for many people, it is. But not every setup reacts the same way. Some users report smoother performance with it on, while others, especially those with certain AMD configurations, notice the opposite.
That’s why it’s important to know not only how to turn it on, but also how to disable it if it’s not doing you any favours. Whether you game casually or competitively, a few quick changes in your settings can help you get the experience you want.
Steps to Enable or Disable Game Mode in Windows 11
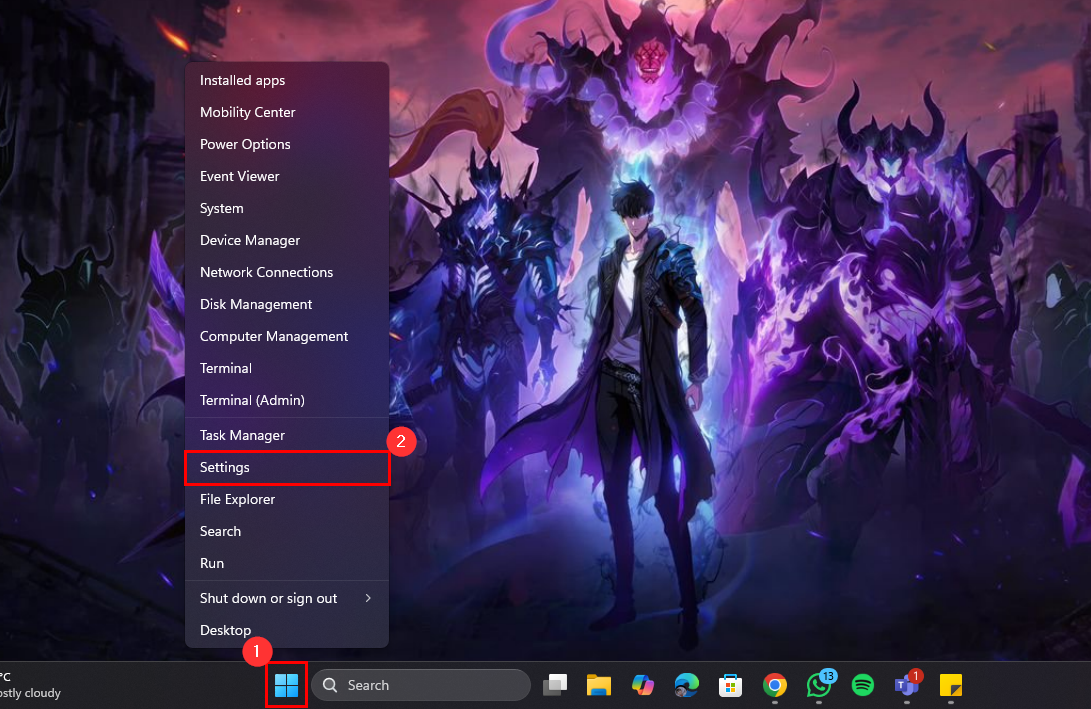
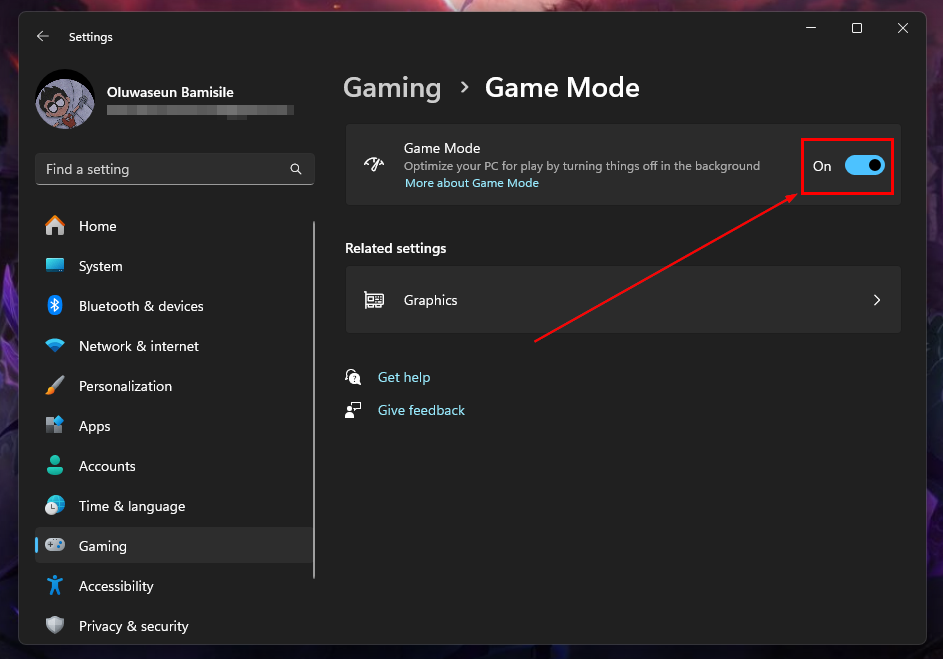
Step 1: Right-click the Start button on the taskbar and select "Settings"
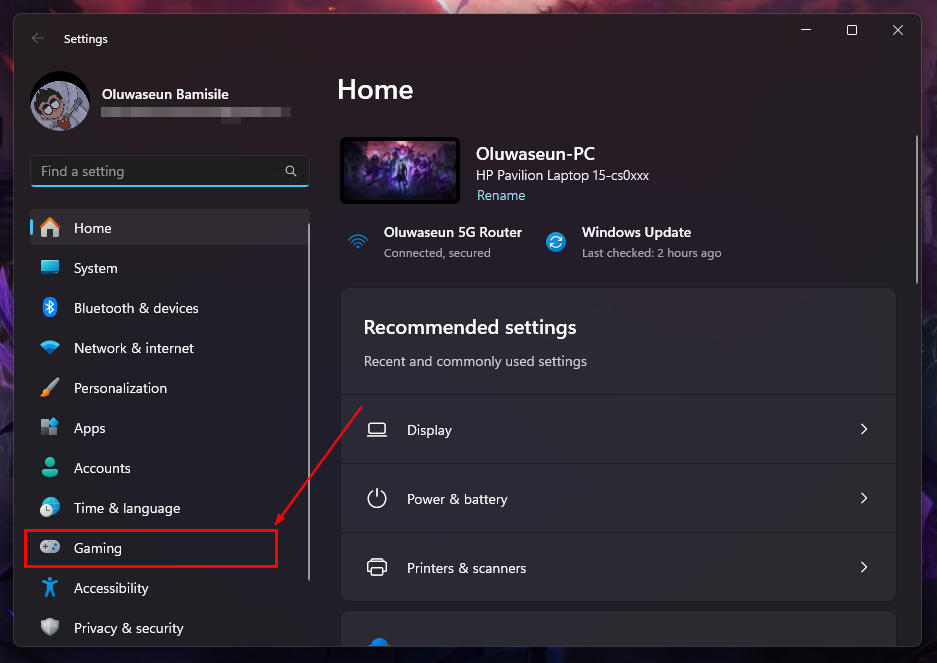
Step 2: Select "Gaming" from the sidebar
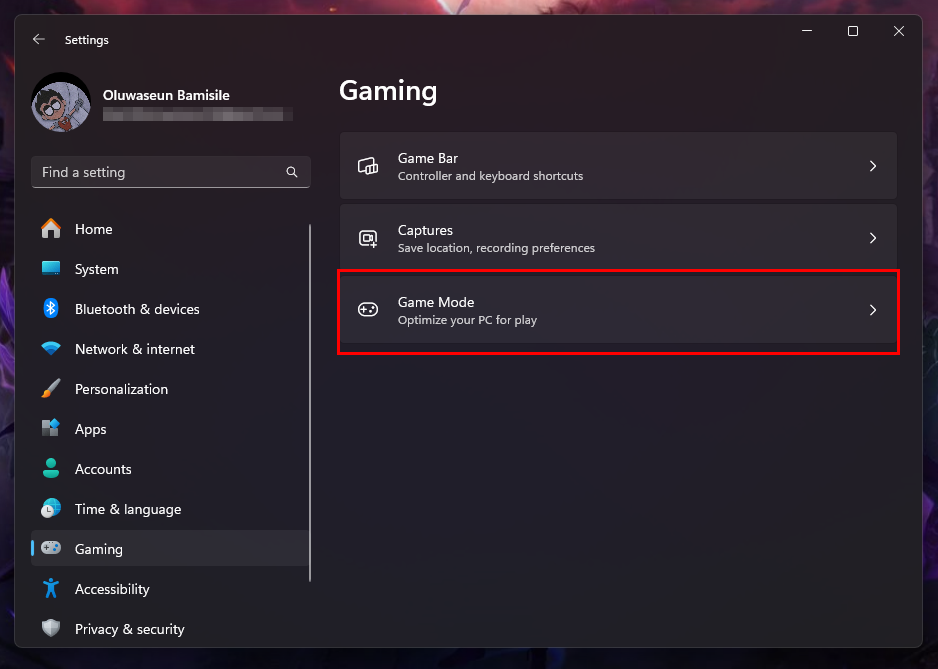
Step 3: Now, click on "Game Mode"
Step 4: From here, you can toggle the switch to On to enable or Off to disable

Conclusion
Game Mode is one of those features that’s easy to overlook but surprisingly powerful when used correctly. If your system is modern and relatively free of bloat, turning Game Mode on can help you get the most out of your hardware, especially during those high-pressure, graphics-heavy moments. It ensures fewer interruptions, steadier performance, and a more immersive experience.
But if you’ve noticed strange behaviour, frame drops, or compatibility issues, turning Game Mode off might actually improve things. It’s completely optional and reversible, and you can adjust it based on the game, your hardware, or even your mood.
Image credit: Oluwaseun Bamisile/Techloy.com


