If you've ever found yourself frustrated with network issues—whether it's trouble connecting to Wi-Fi, frequent drops, or just general instability—you're not alone. I've been there too, staring at that spinning Wi-Fi icon, wondering why my connection keeps dropping.
One day, I stumbled upon a solution that turned out to be surprisingly simple: resetting my network settings. Windows 11 makes it easy to reset all your network settings, which can often resolve a host of connectivity problems. Let's discuss how you can do it.
Steps to Reset Network Settings
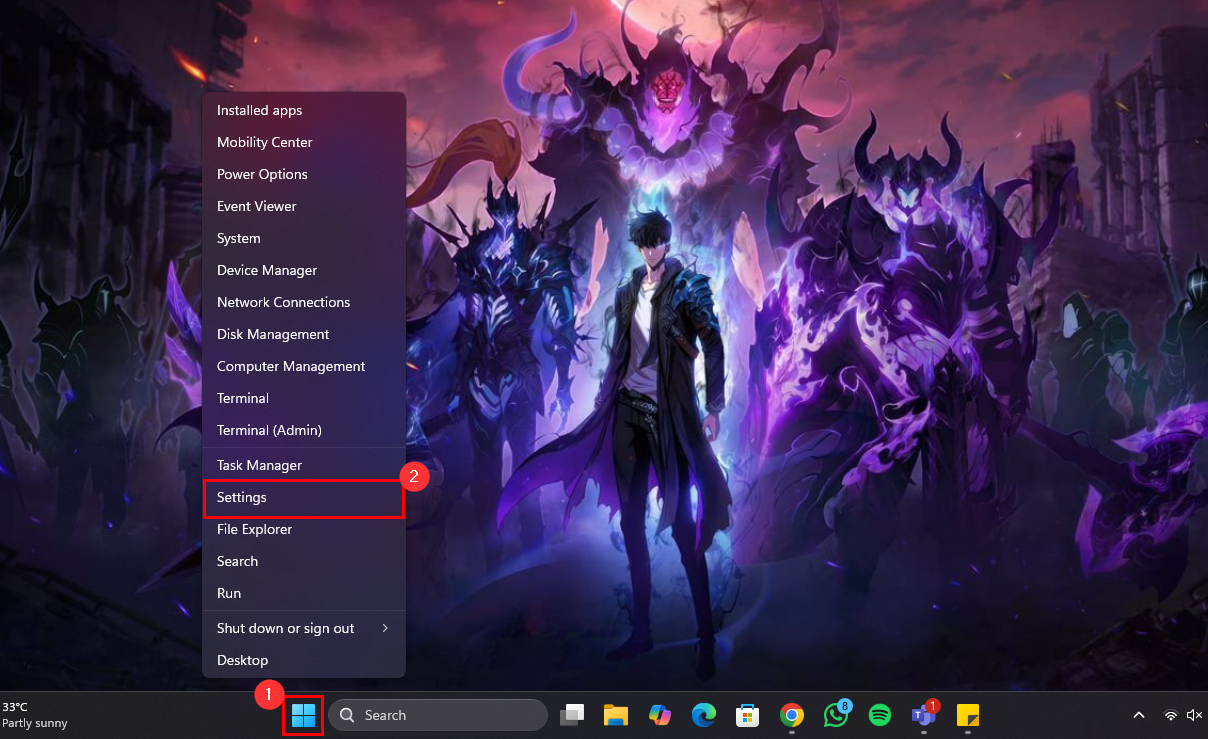
Step 1: Right-click the Start button and select "Settings" from the displayed options
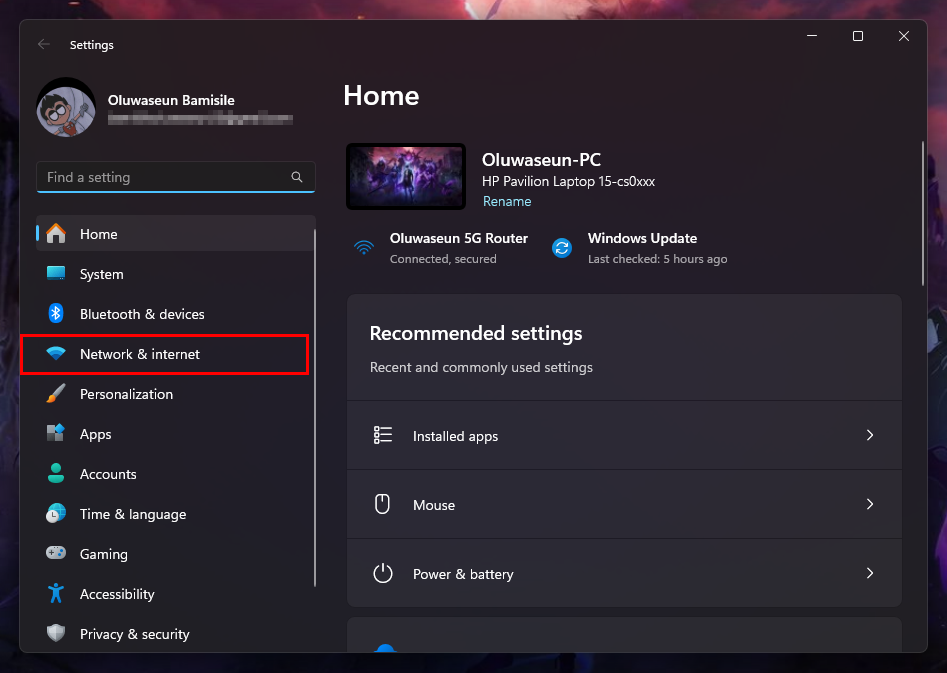
Step 2: Click "Network & Internet" among the options on the left pane
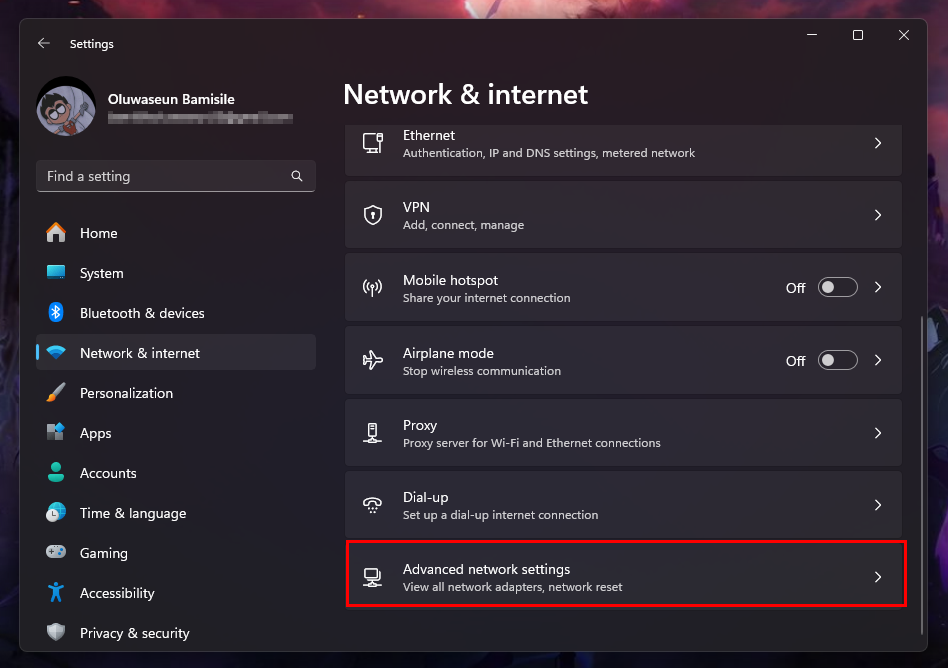
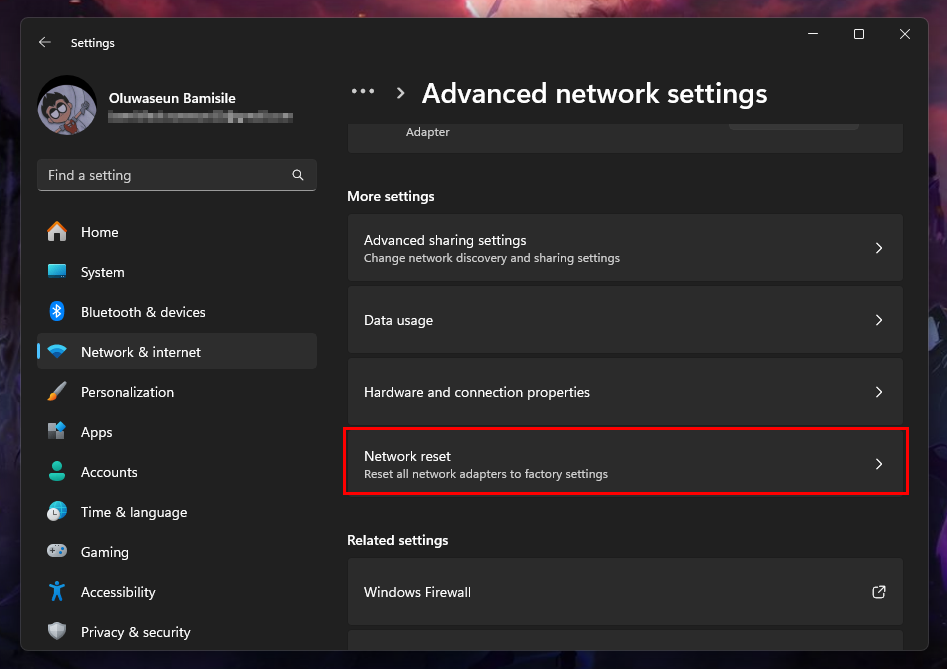
Step 3: Now, on the right pane, select "Advanced Network Settings"
Step 4: In the Advanced Network Settings section, find and click on "Network Reset"
Step 5: Click the Reset Now button
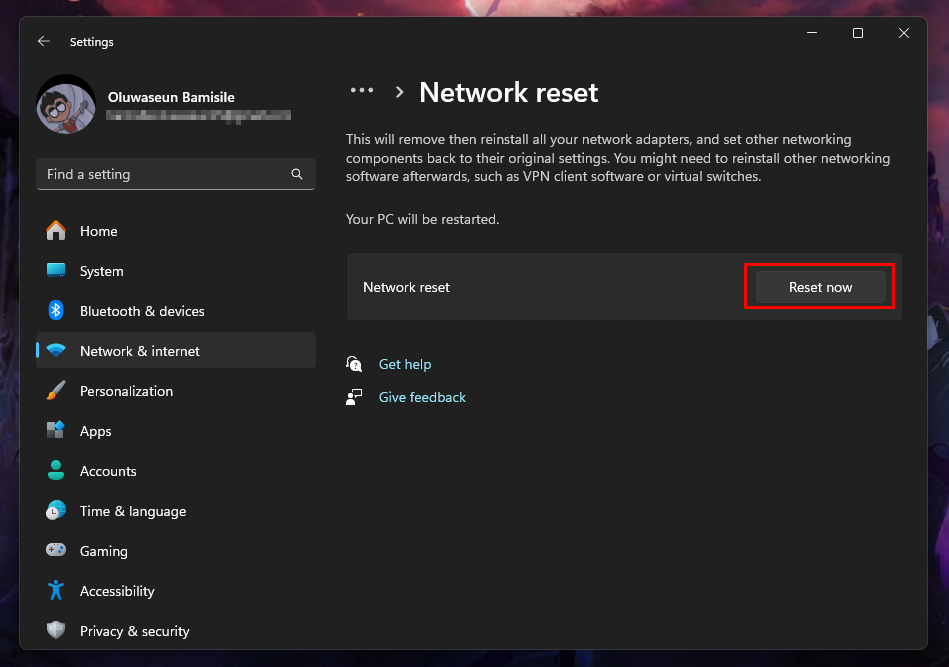
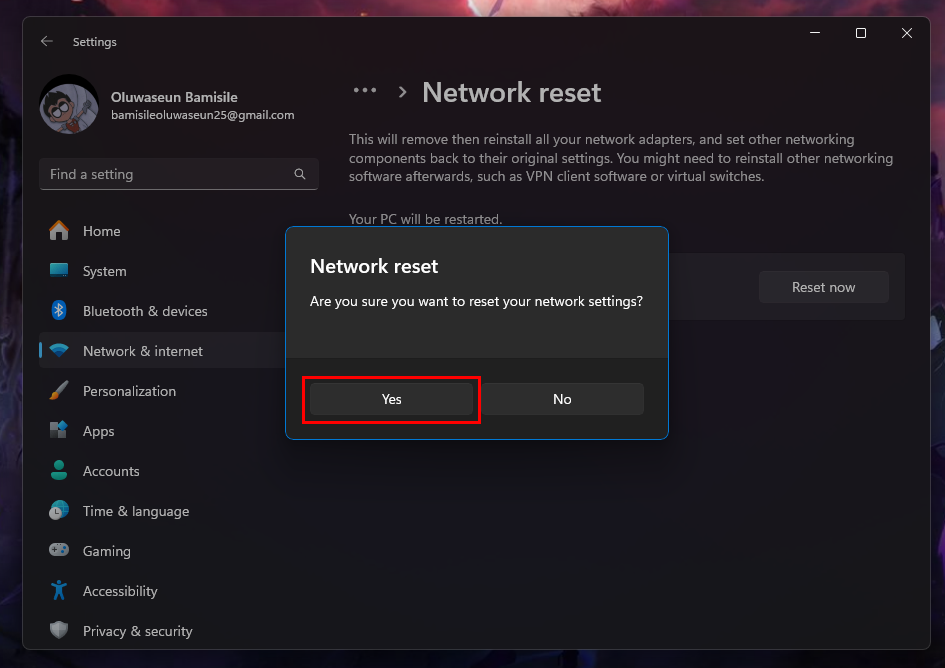
Step 6: You'll be prompted to confirm the action. Click "Yes" to confirm. Windows 11 will then begin the reset process, which may take a few moments. Once it's done, your network settings will be restored to their default state
Conclusion
Resetting your network settings in Windows 11 is a pretty simple process that can resolve many common connectivity issues. By following these steps, you can quickly get your network back to a clean state and troubleshoot any lingering problems. Whether you're dealing with frequent drops or just want a fresh start, this tool is worth knowing.