Got a brilliant idea mid-walk, a lecture too good to miss, or a meeting you’d rather not scribble through? Instead of replaying your voice notes on loop, why not turn them into clean, searchable text? Whether you’re a student, a journalist, or just someone who loves staying organised, your iPhone now makes transcription incredibly easy.
With the iOS 18.1 update, Apple quietly introduced a native transcription feature right inside the Voice Memos app. If you’re using an iPhone 12 or newer, you can now transcribe any voice recording automatically, no extra apps or subscriptions needed. Just hit record, and your iPhone will handle the rest.
It’s a small update, but one that could seriously change how you capture and revisit important audio. Here's how to do it.
How to Transcribe Voice Recordings to Text on iPhone
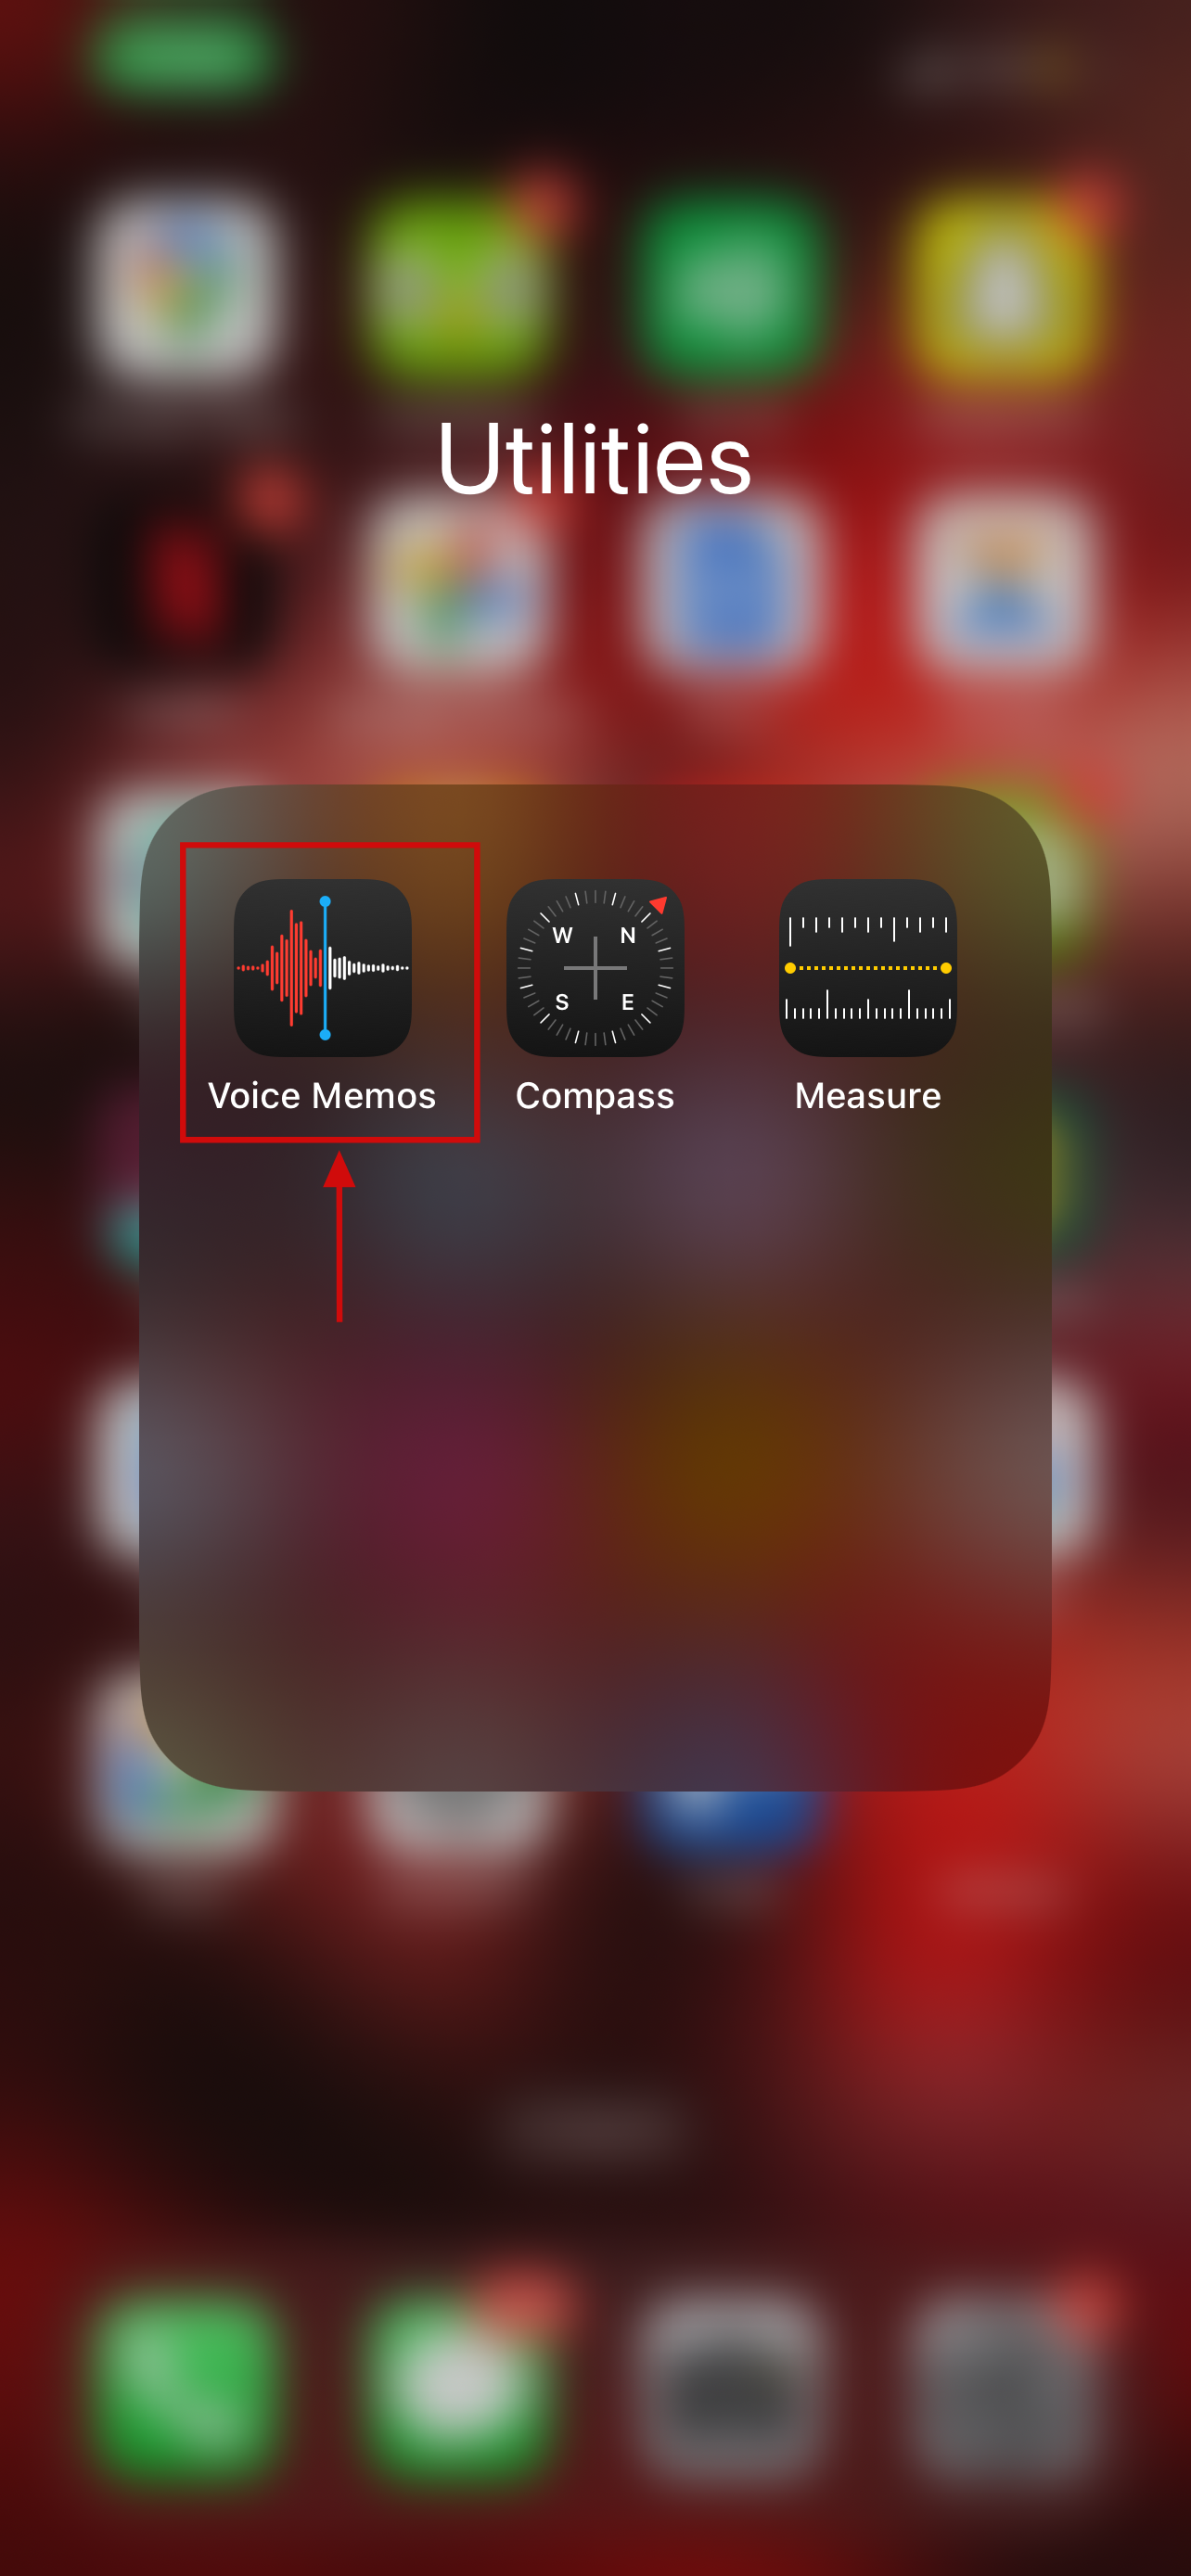
Step 1: Open the Voice Memos app from the Utilities folder on your home screen on your device
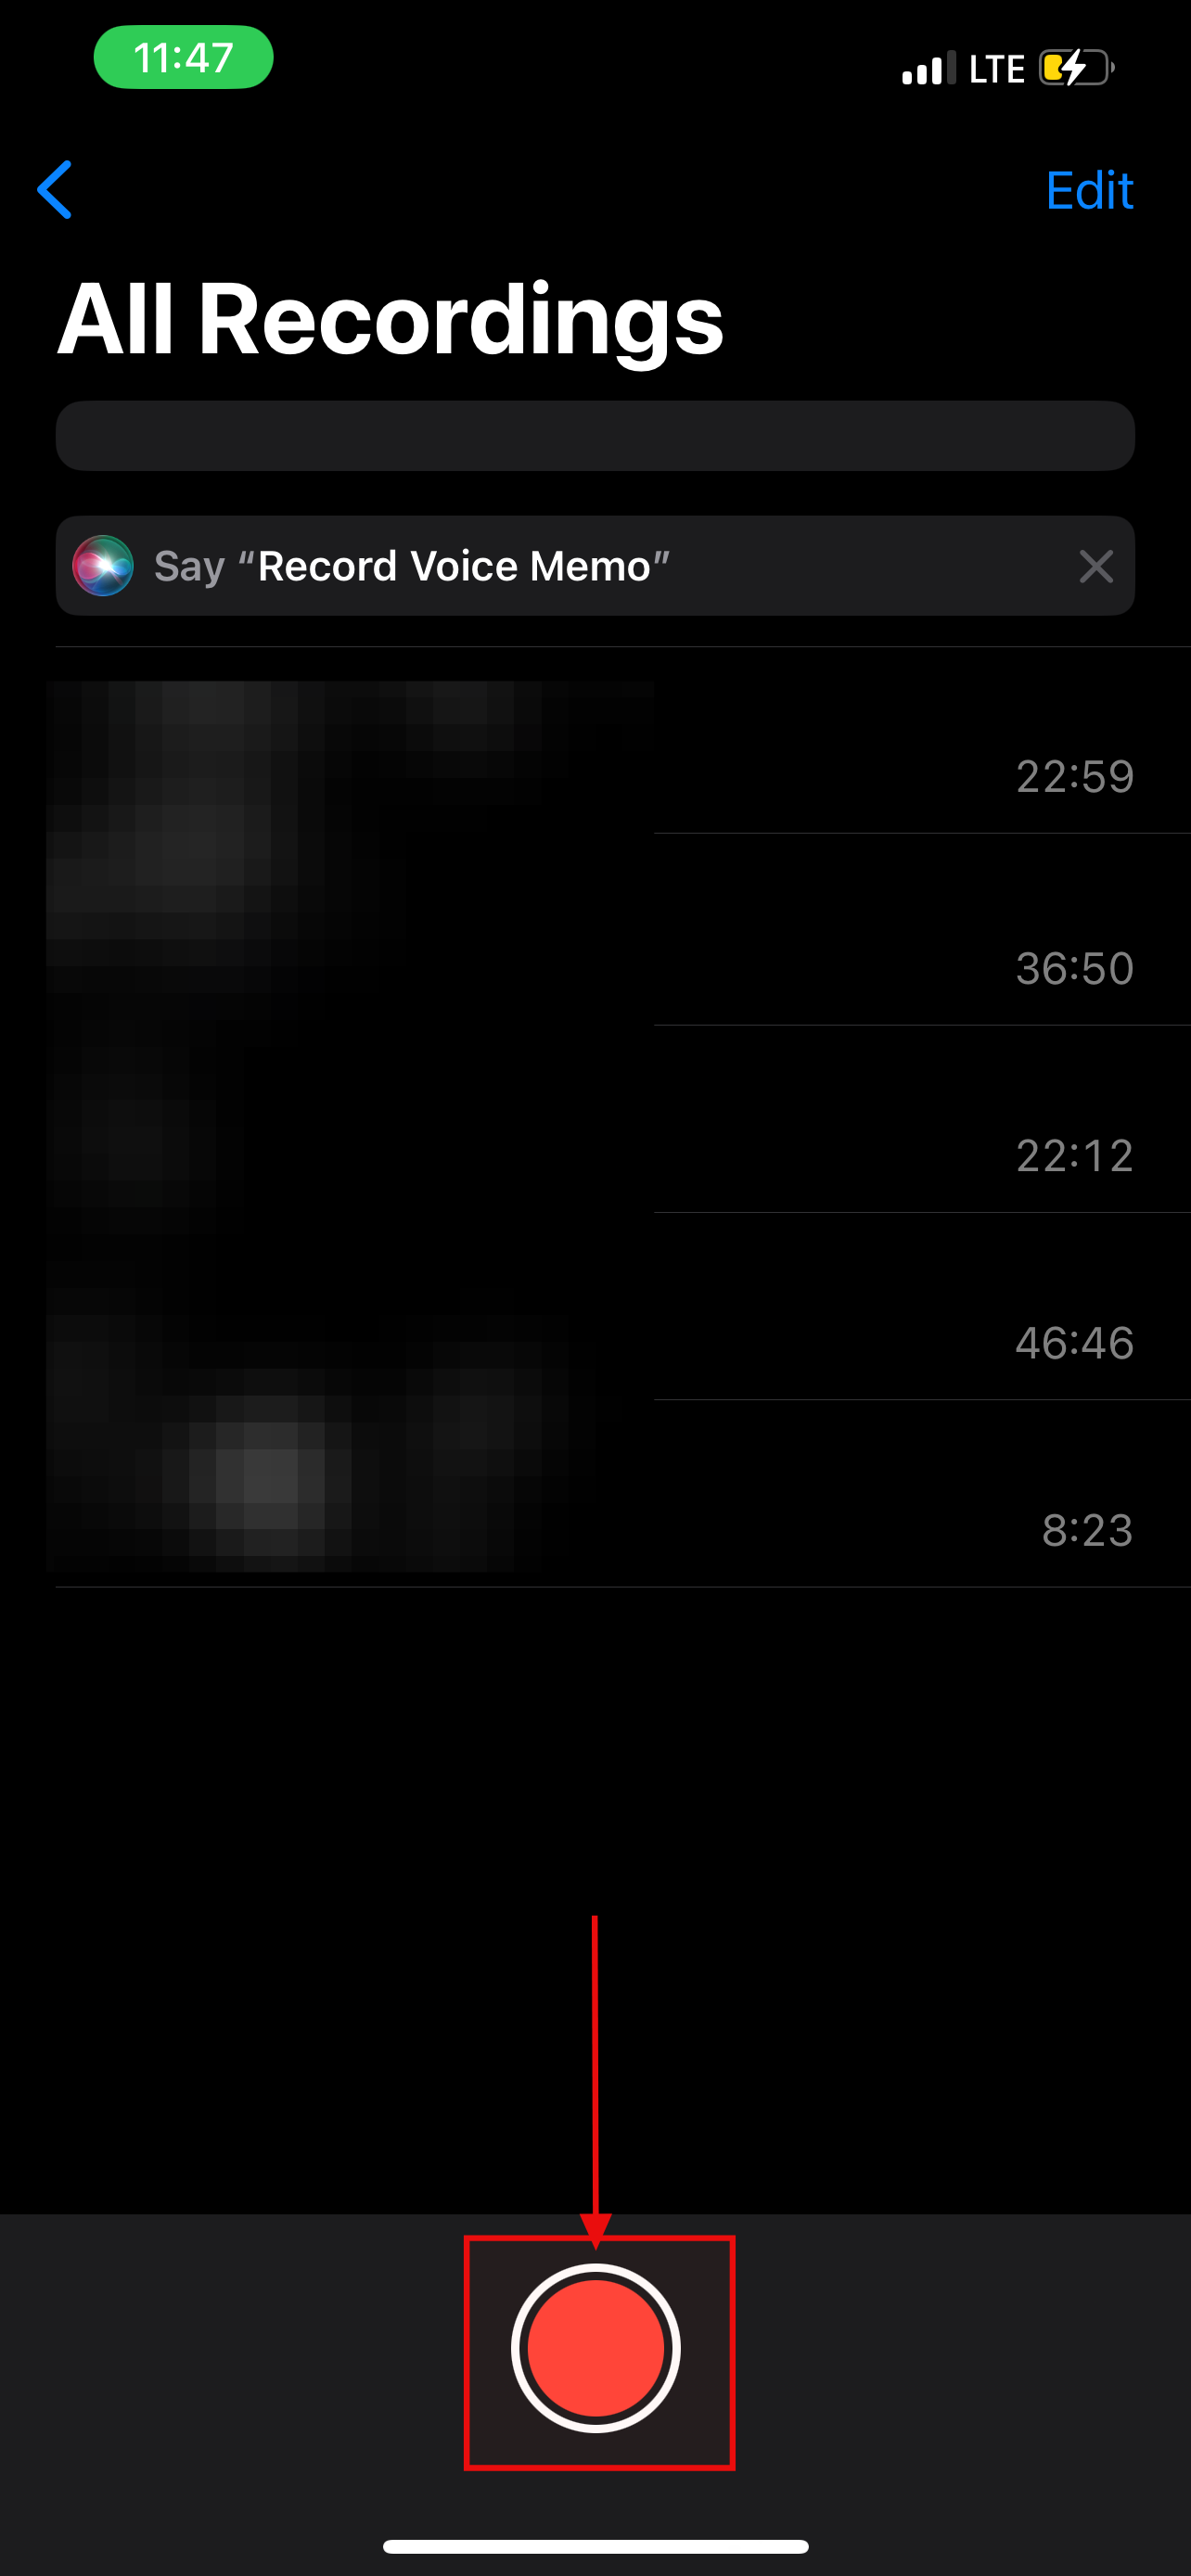
Step 2: Click on the big red circle button at the bottom of your screen to start recording
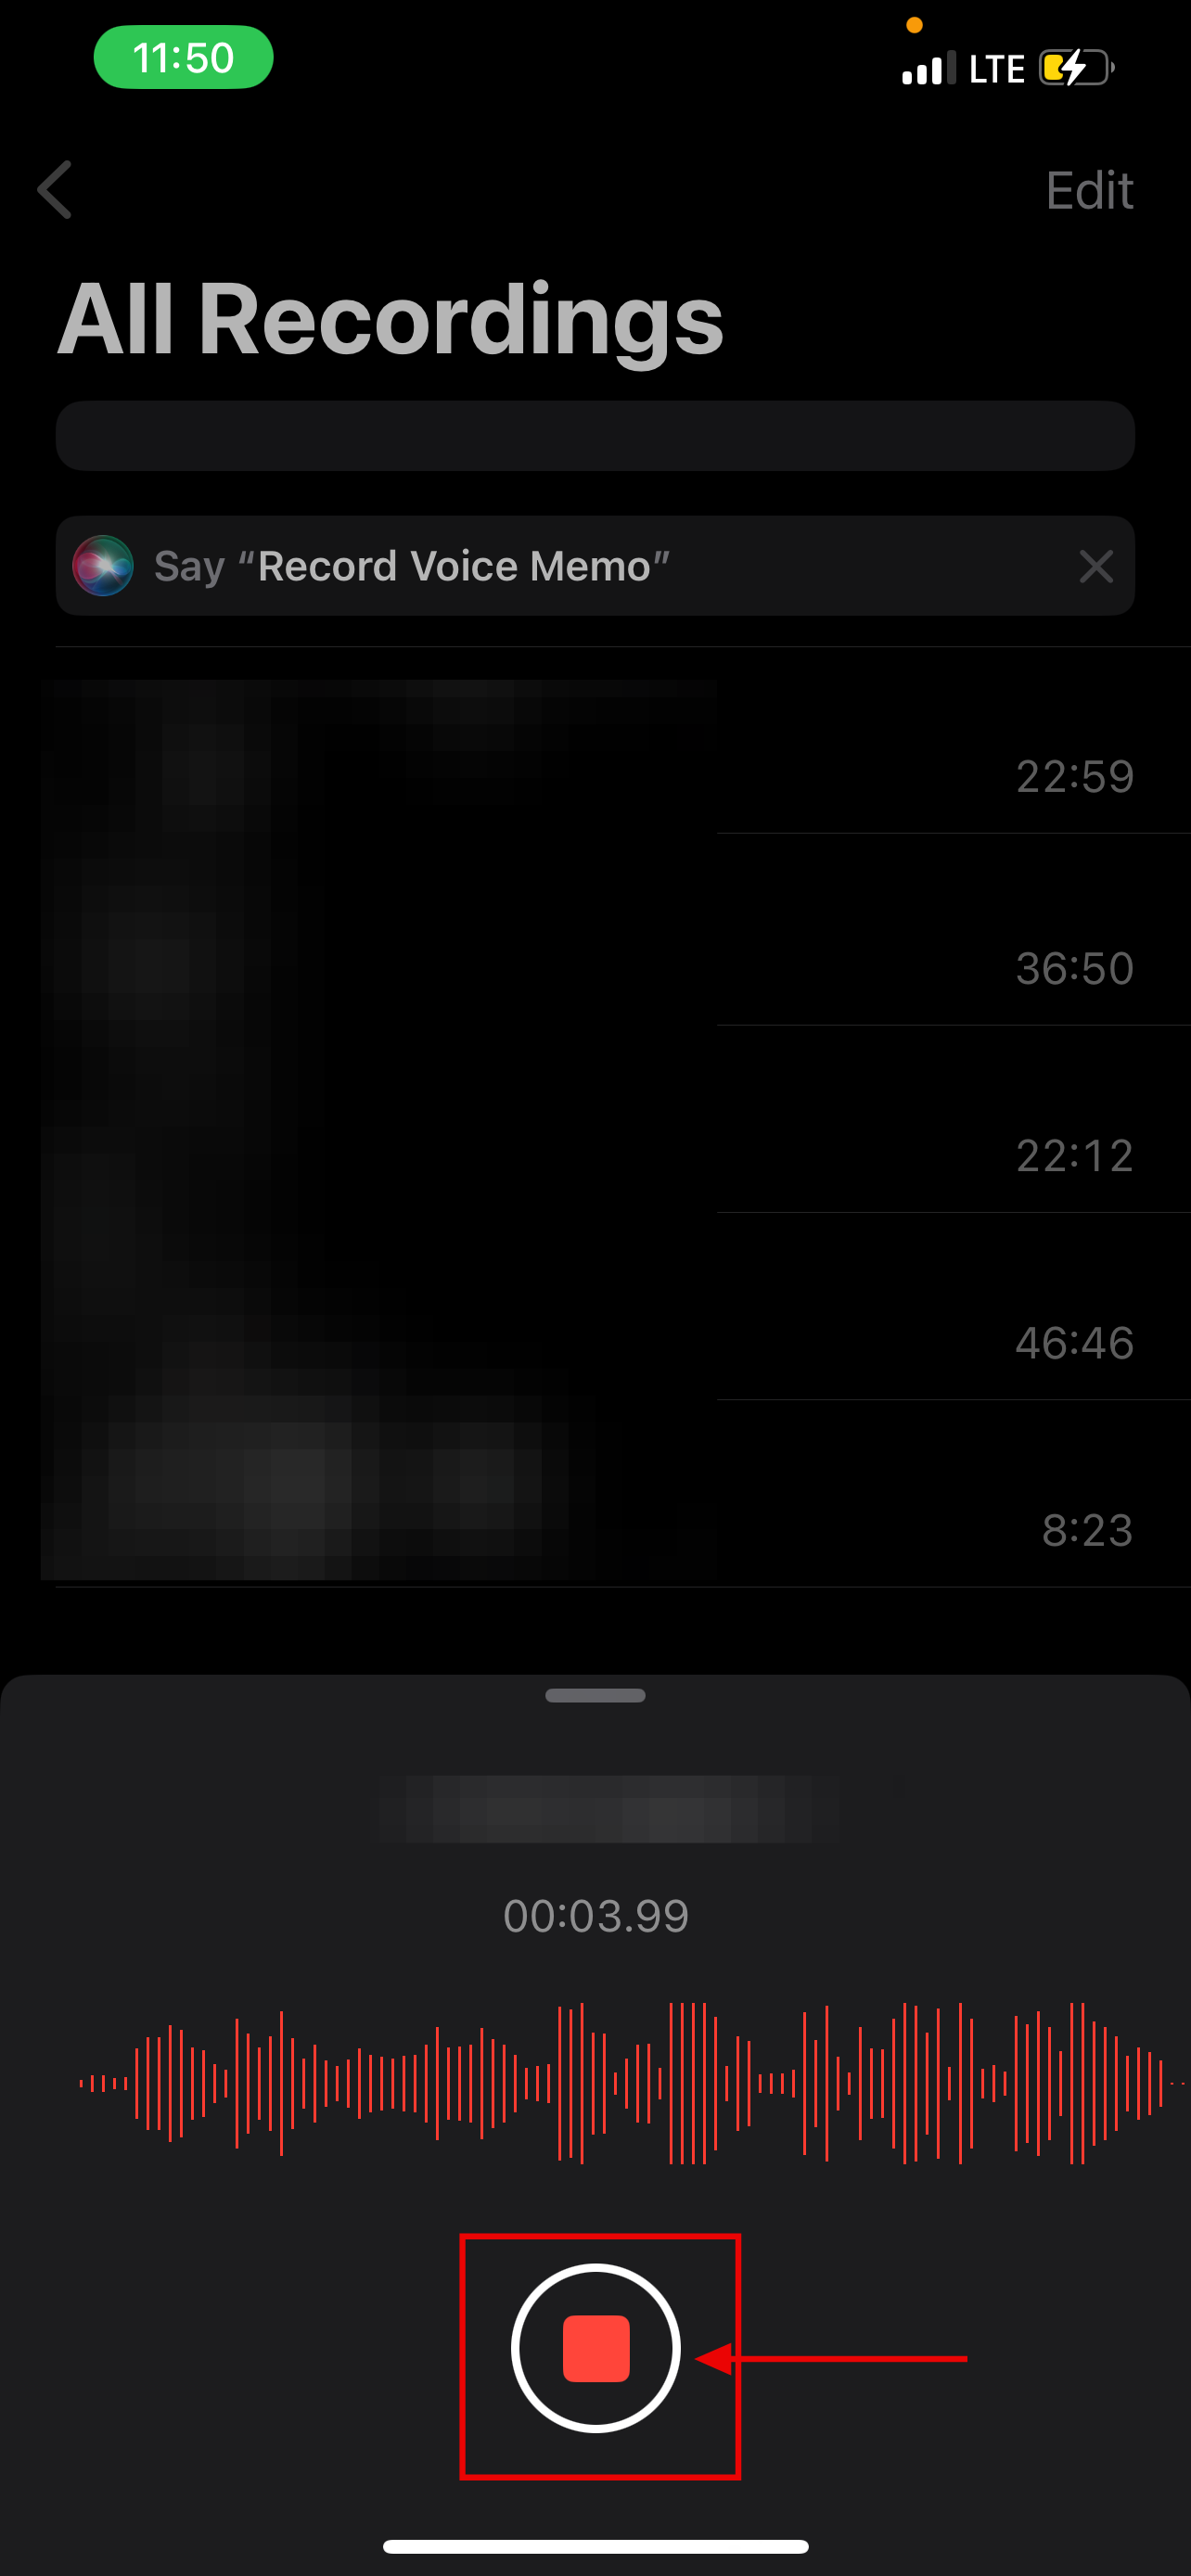
Step 3: Click on the square red button at the bottom of your screen to stop the recording
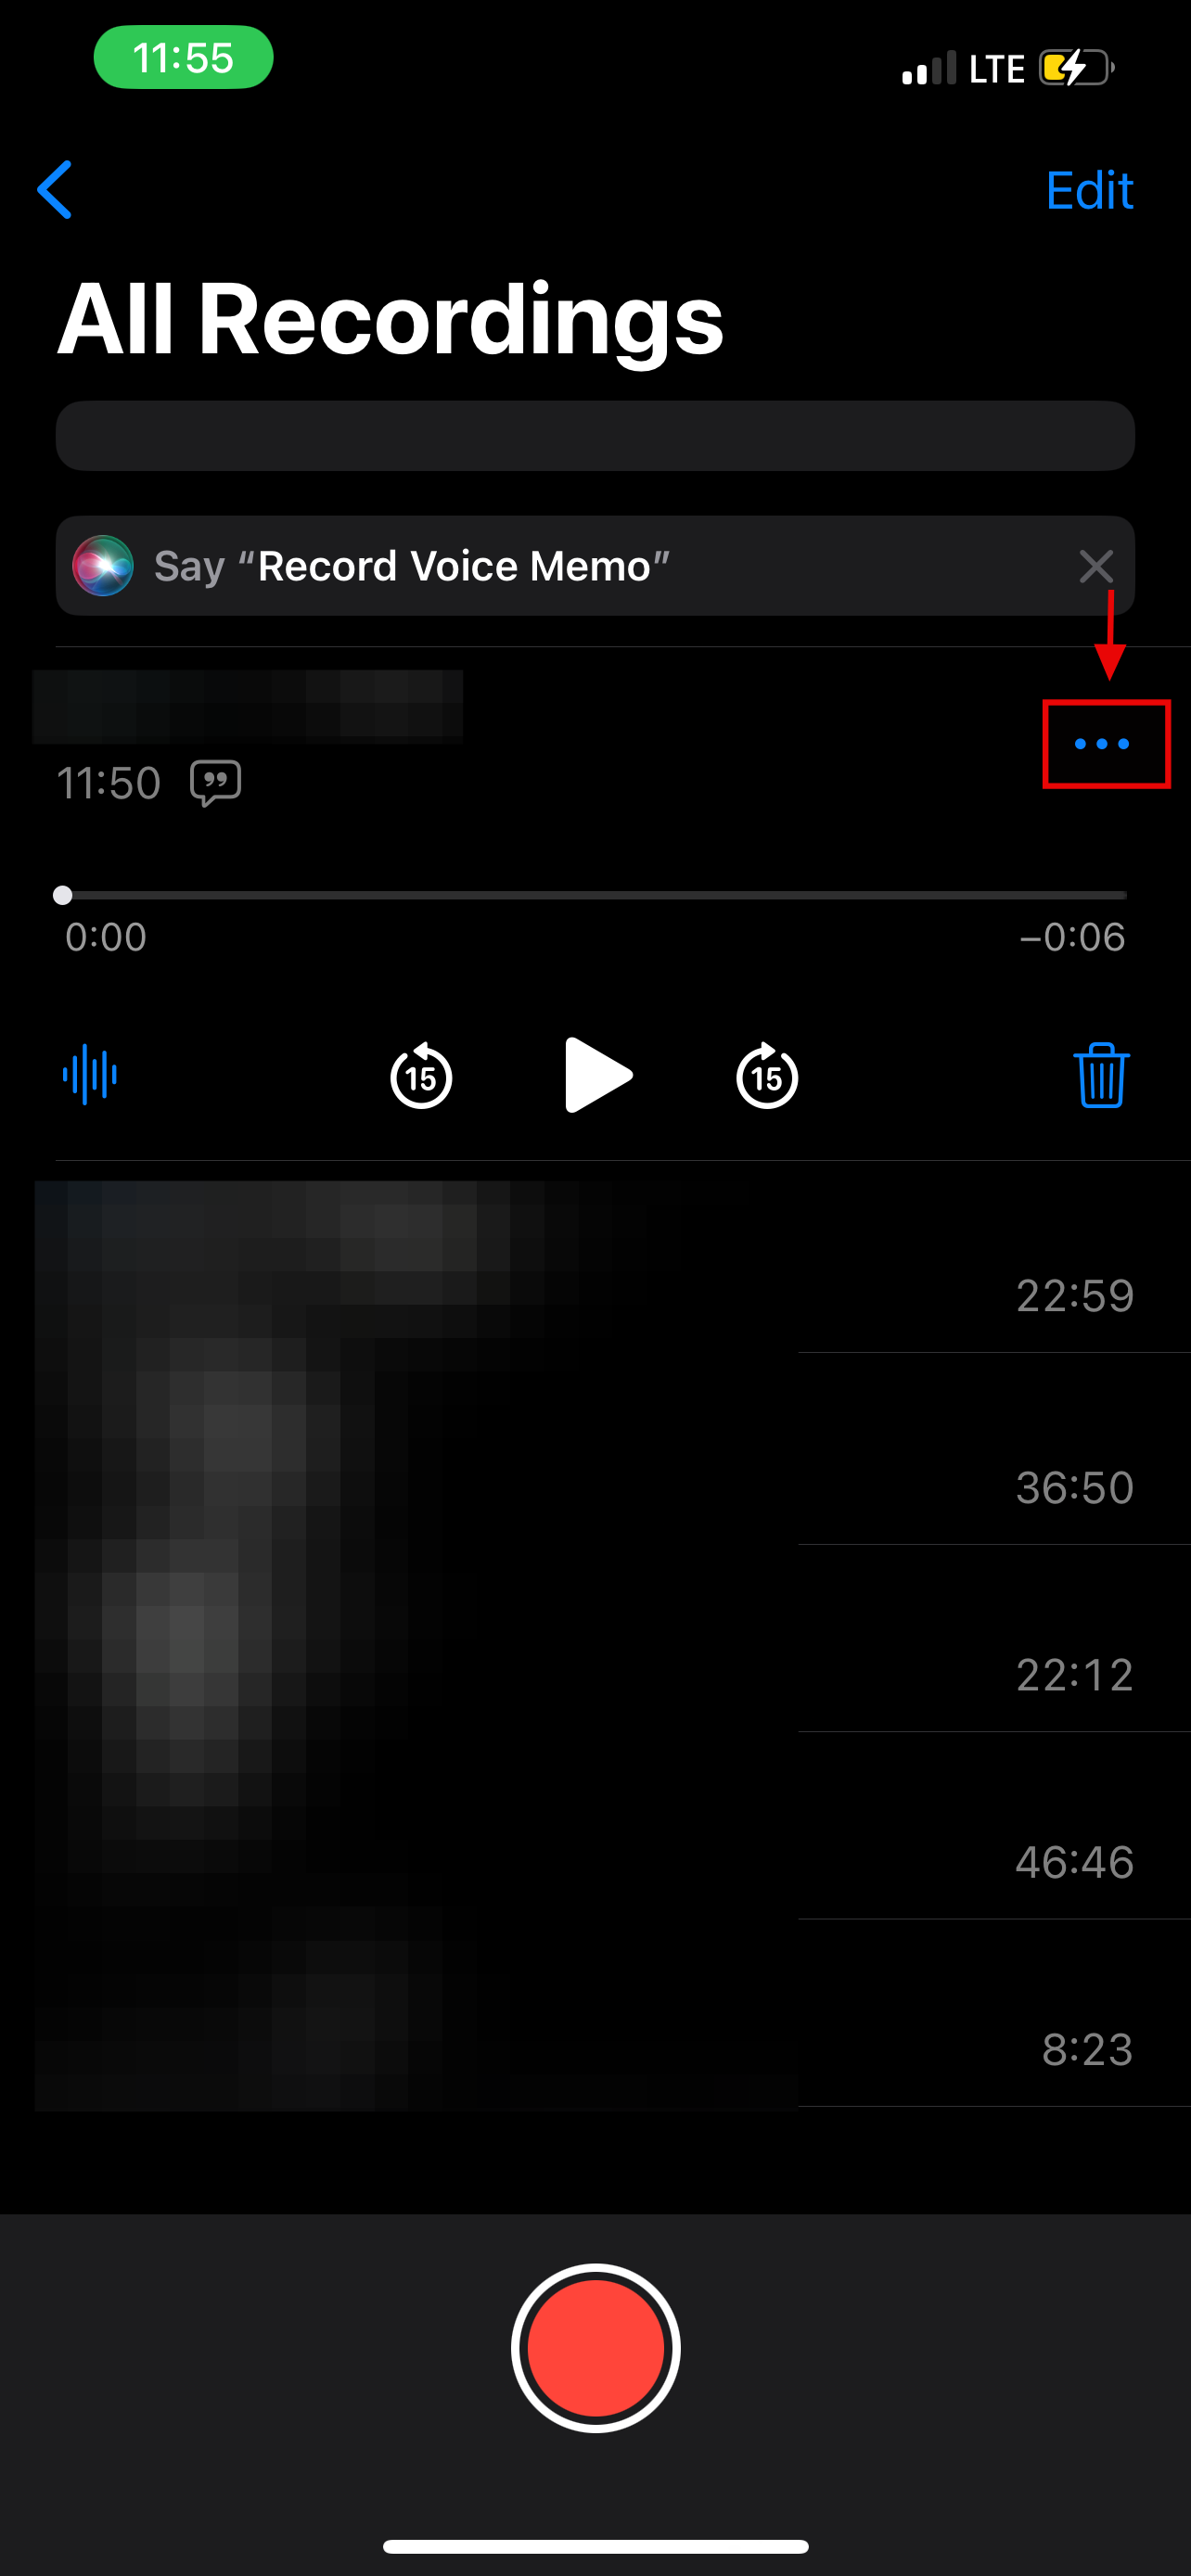
Step 4: Select the recently recorded audio, then click on the three horizontal dots on the right-hand side
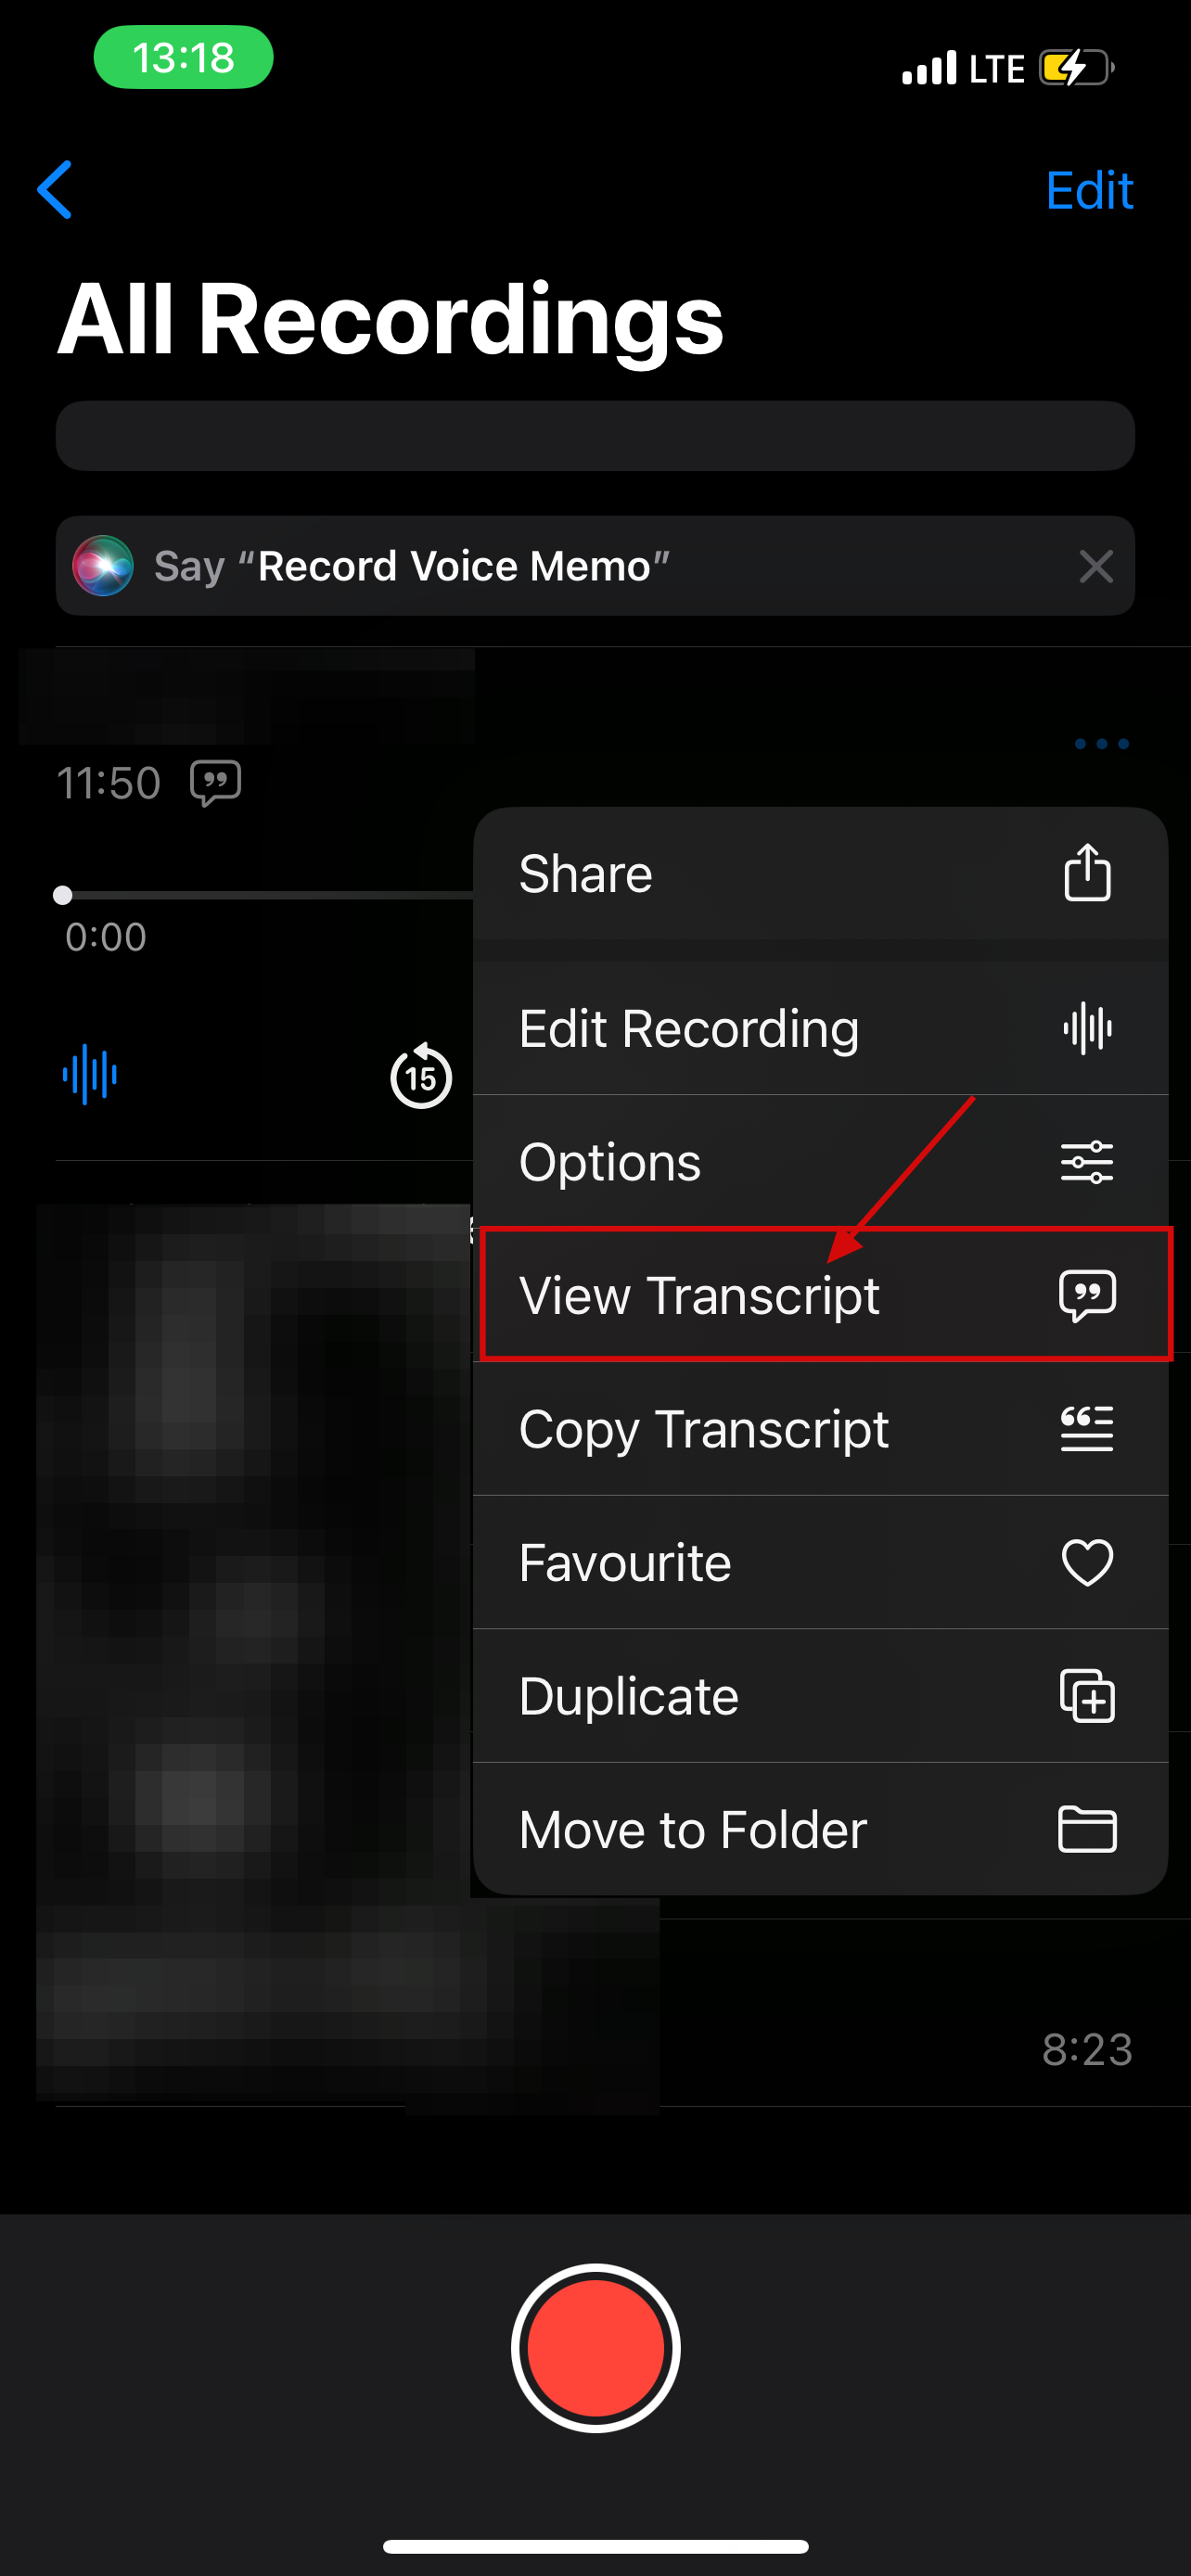
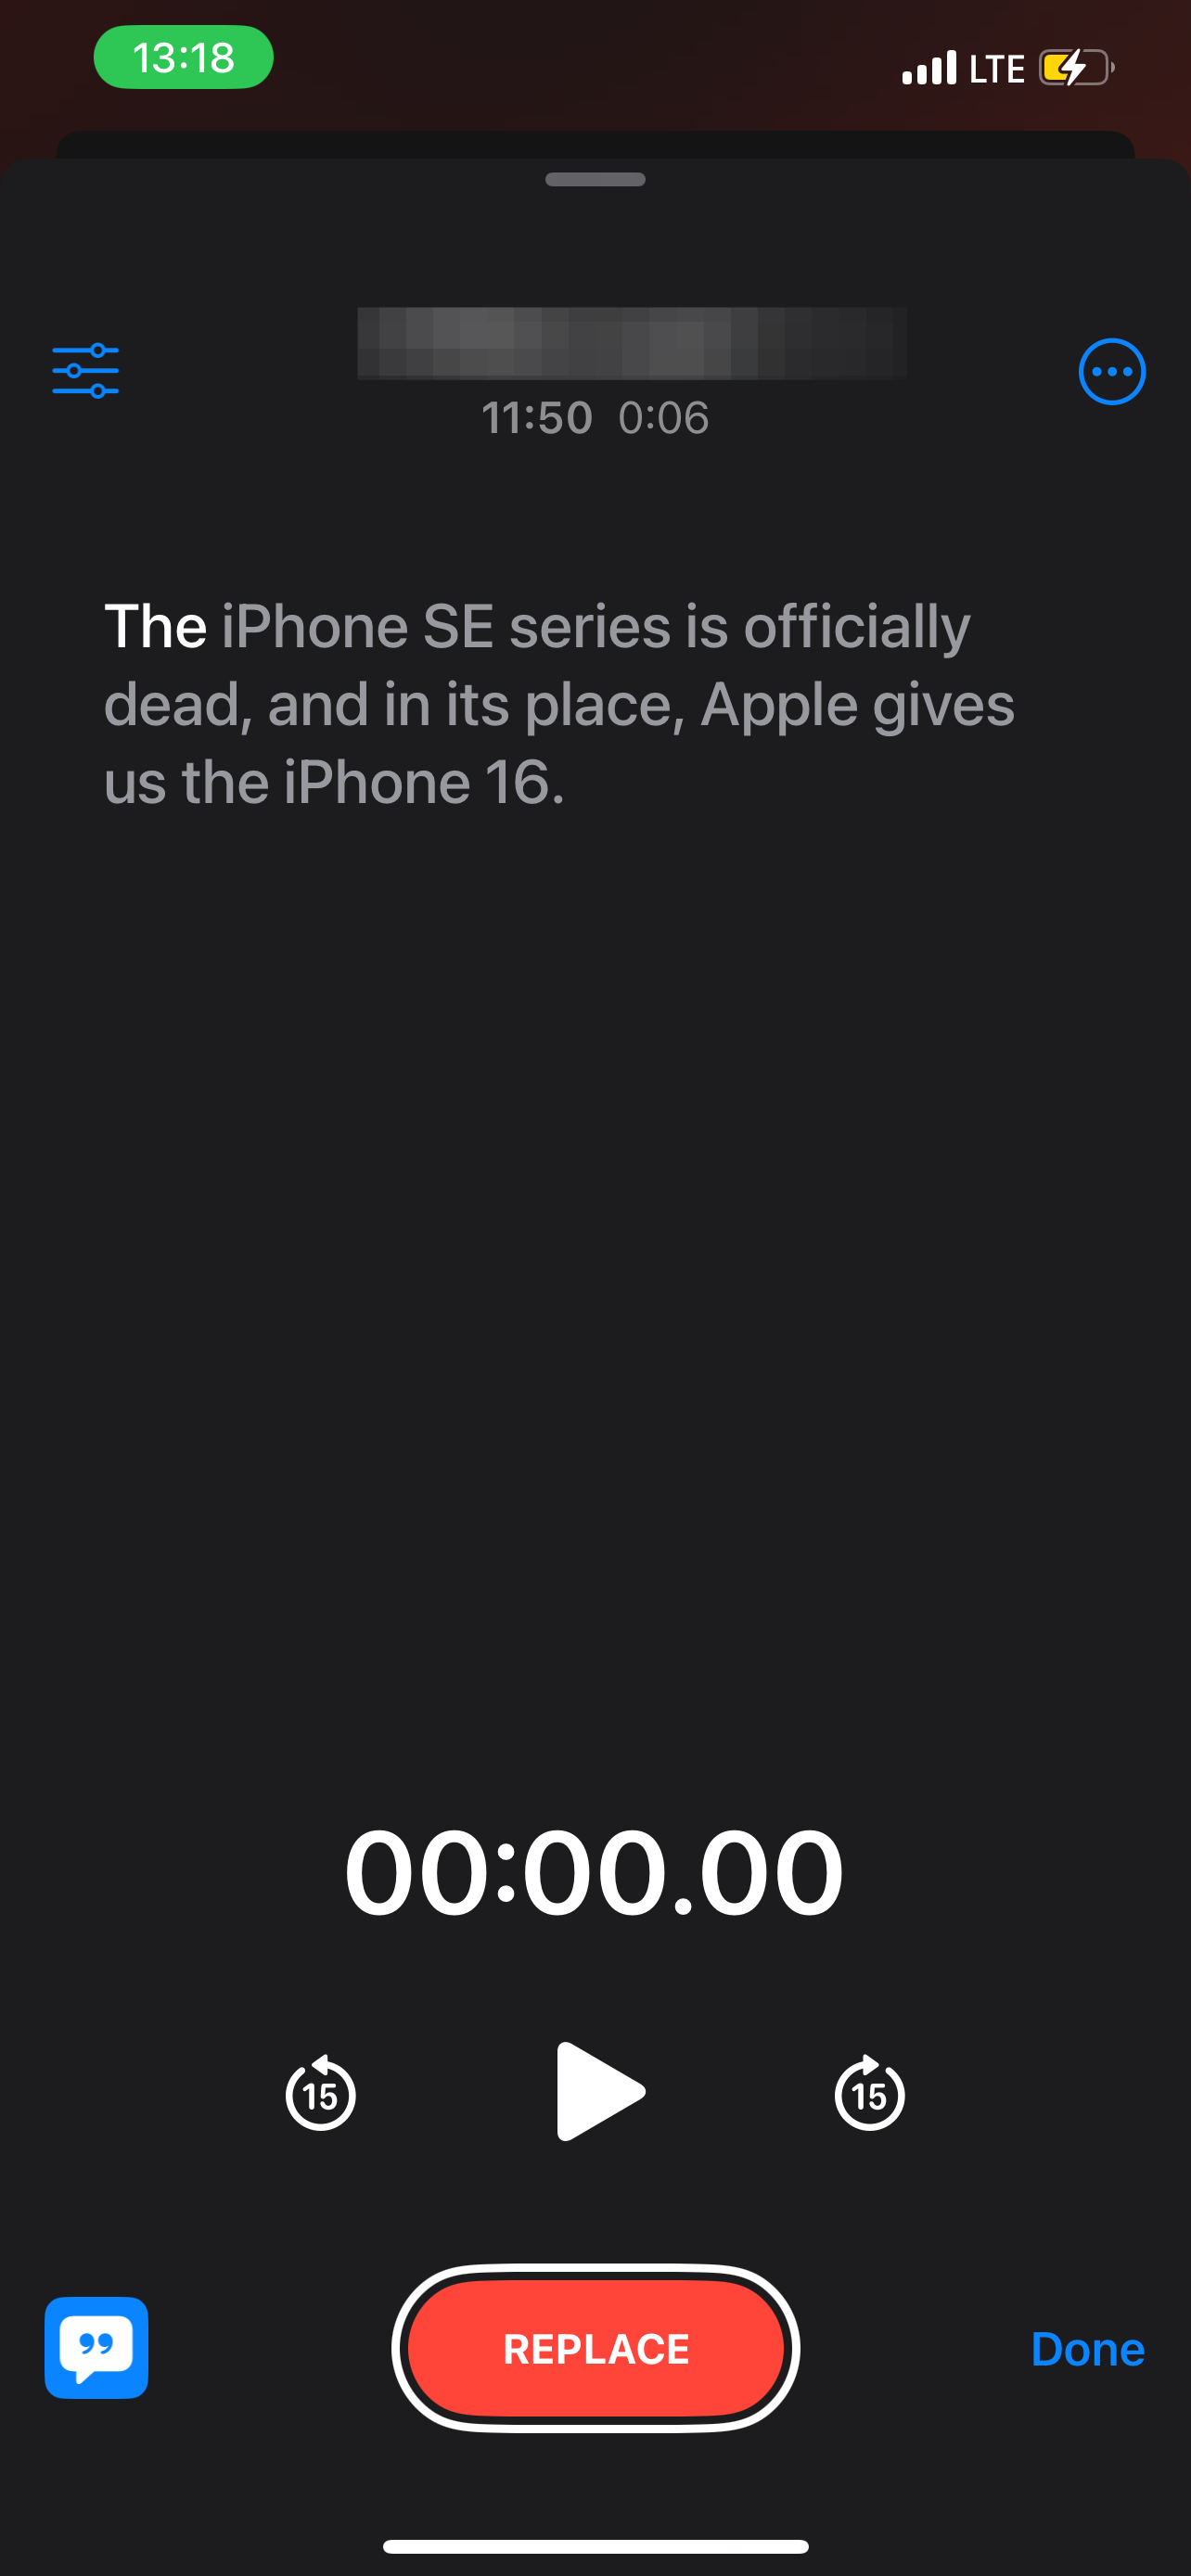
Step 3: Select View Transcript to see the text translation
Conclusion
With Apple’s built-in transcription feature, turning your voice recordings into readable text is now easier than ever, no third-party apps, no extra fuss. Whether you’re taking notes hands-free, documenting ideas on the go, or just saving yourself the hassle of typing, this iOS feature helps you work smarter. Give it a try, you might never go back to manual note-taking again.