

We all know how memory-hungry Chrome can be. Open a few tabs here, a few YouTube videos there, maybe toss in a couple of Google Docs, and before you know it, your computer fan’s going full blast and everything starts to slow to a crawl.
It’s one of Chrome’s longest-standing annoyances: performance dips because it chews through your RAM like it’s unlimited. But finally, Google built a solution right into the browser—Memory Saver.
Memory Saver is a smart performance feature in Chrome that automatically frees up memory from tabs you aren’t using. Instead of letting every tab sit in the background consuming resources, Chrome pauses them until you come back.
That means your system stays faster, your active tabs stay responsive, and you can still work with as many open tabs as you want, just without the lag. In fact, Google claims the Memory Saver feature is designed to reduce memory usage by up to 40%. Here's how to enable the feature on your Chrome browser.
Steps to Activate Memory Saver on the Chrome Browser
Step 1: Click the three-dot menu in the upper-right corner of the Chrome browser
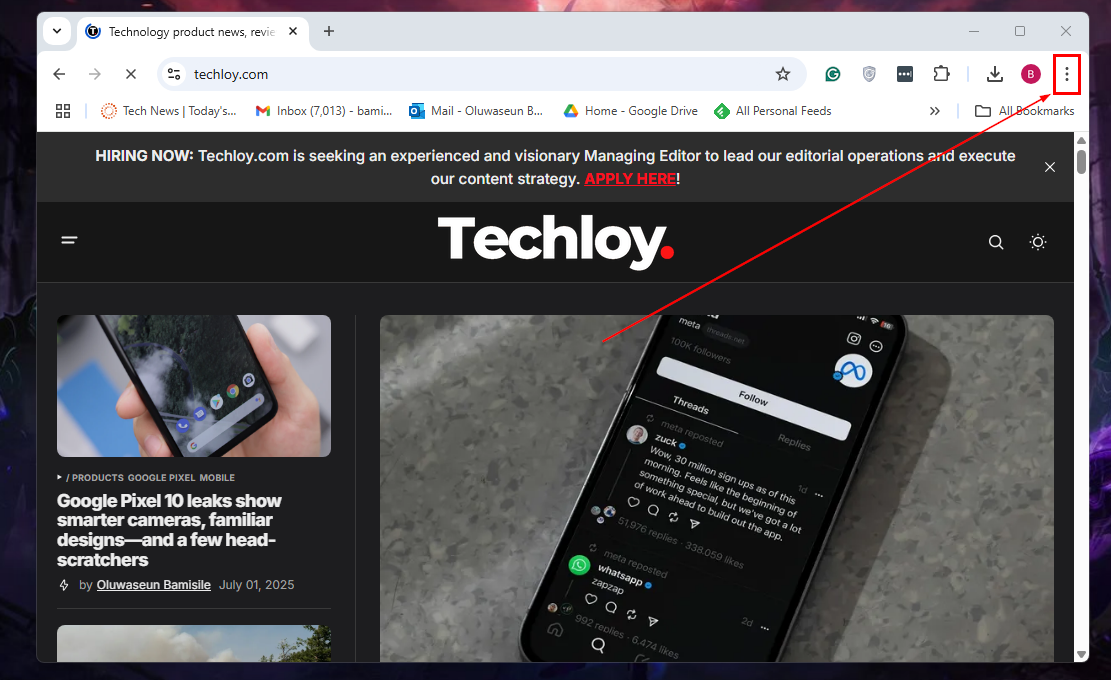
Step 2: Select "Settings"

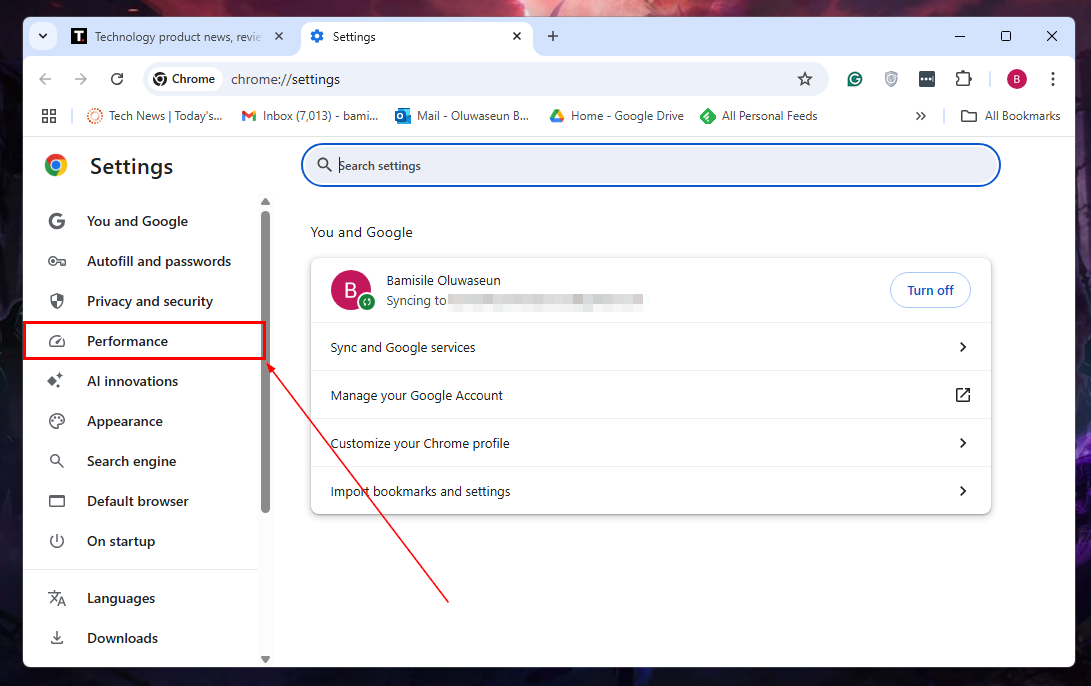
Step 3: On the left sidebar, select "Performance"
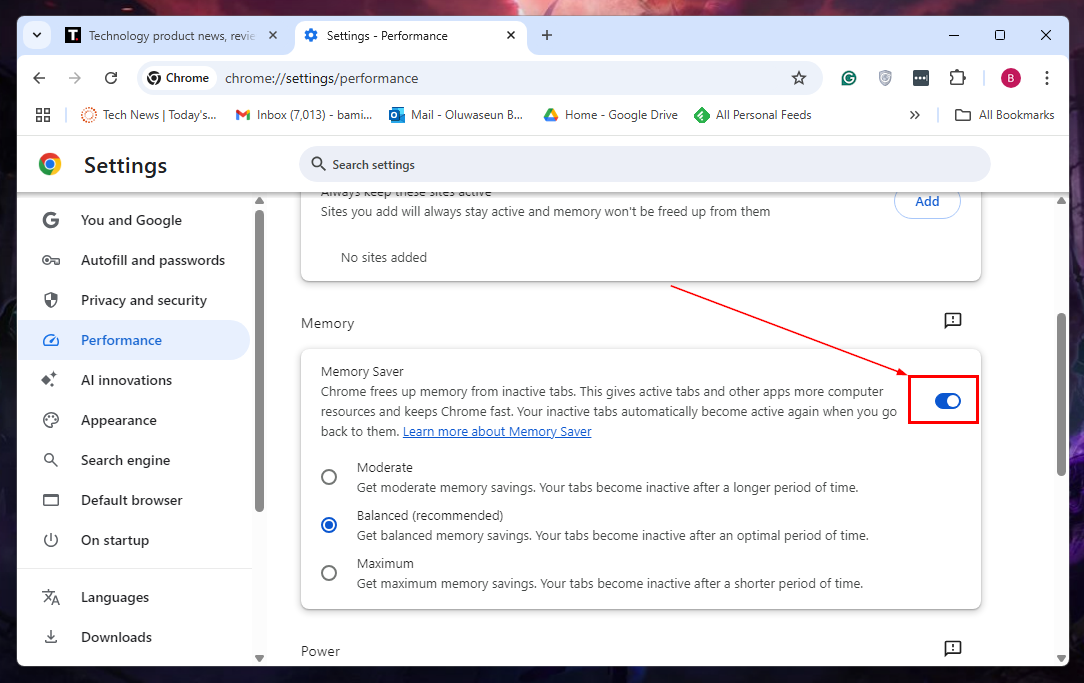
Step 4: Under the Memory section, switch on the Memory Saver toggle
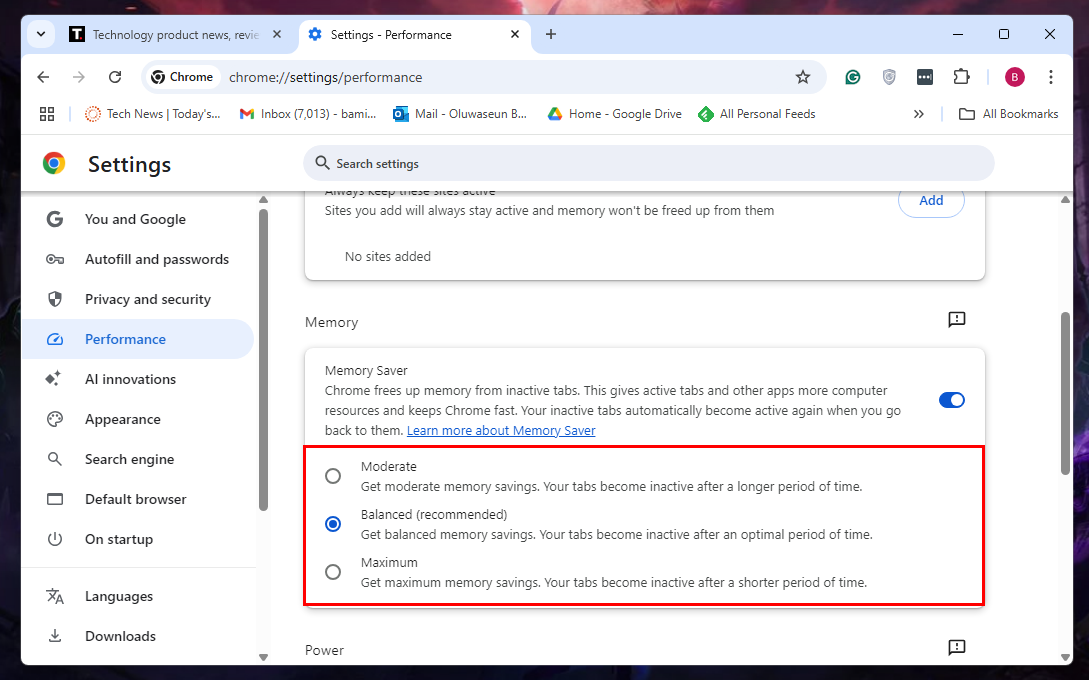
Step 5: You can go on to adjust the Memory Saver performance. However, setting the performance on "Balanced" is recommended

Conclusion
Chrome’s Memory Saver is one of the most effective ways to tame the browser’s notorious RAM appetite. It gives you the freedom to browse with as many tabs as you need, without constantly sacrificing performance or system stability. And best of all? It’s built right in—no extensions or extra tools required.
So if you've ever found yourself deep in a tab jungle with a laggy browser and a slowing system, Memory Saver is a feature worth turning on. It’s one of the easiest Chrome settings to enable for a smoother, faster browsing experience.


