

I used to wonder why Chrome would slow down or act glitchy after a while—pages wouldn’t load properly, or my extensions would get weirdly unresponsive. Turns out, a lot of that came down to one simple thing: cache buildup.
Chrome stores bits of data (images, scripts, etc.) from websites you visit so it can load them faster next time. That’s the cache. However, over time, all that stored data can accumulate and get corrupted, resulting in your Chrome browser messing up.
In that case, clearing the cache often fixes the problem. It's like giving Chrome a quick reboot without losing your bookmarks or settings. Let me breakdown how you can do it.
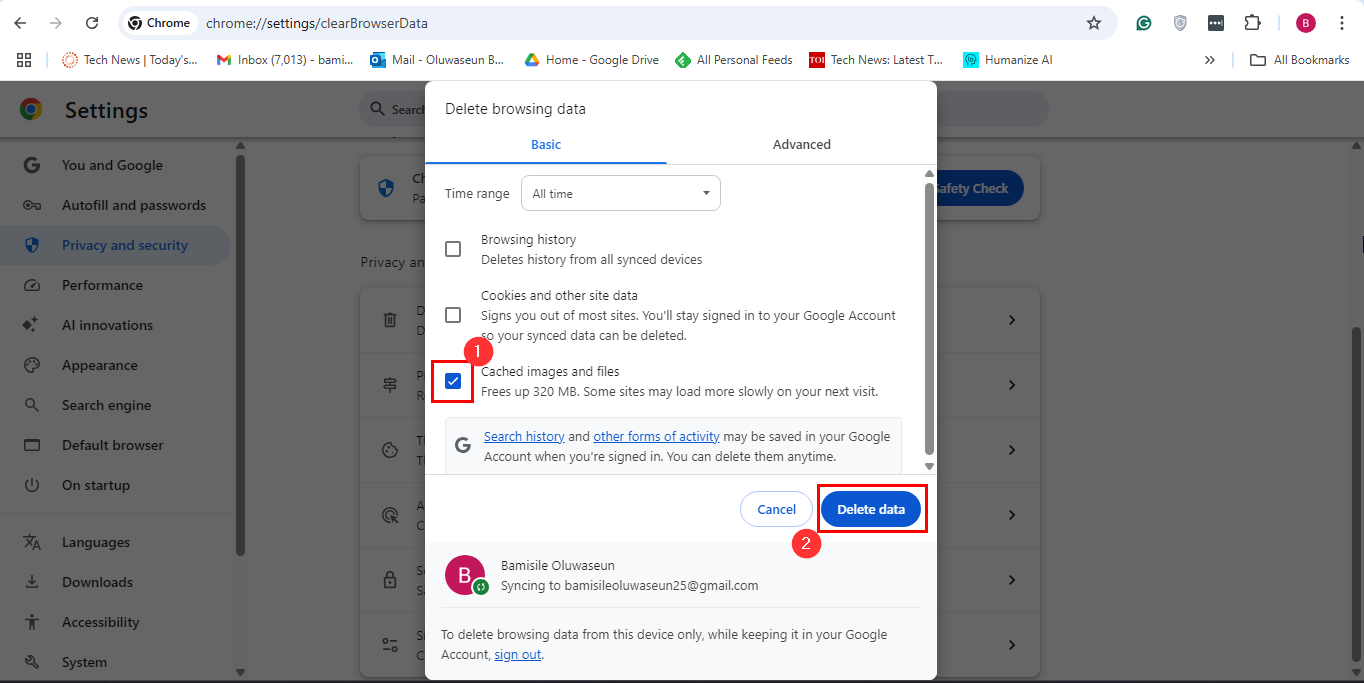
Steps to Clear Cache on Chrome
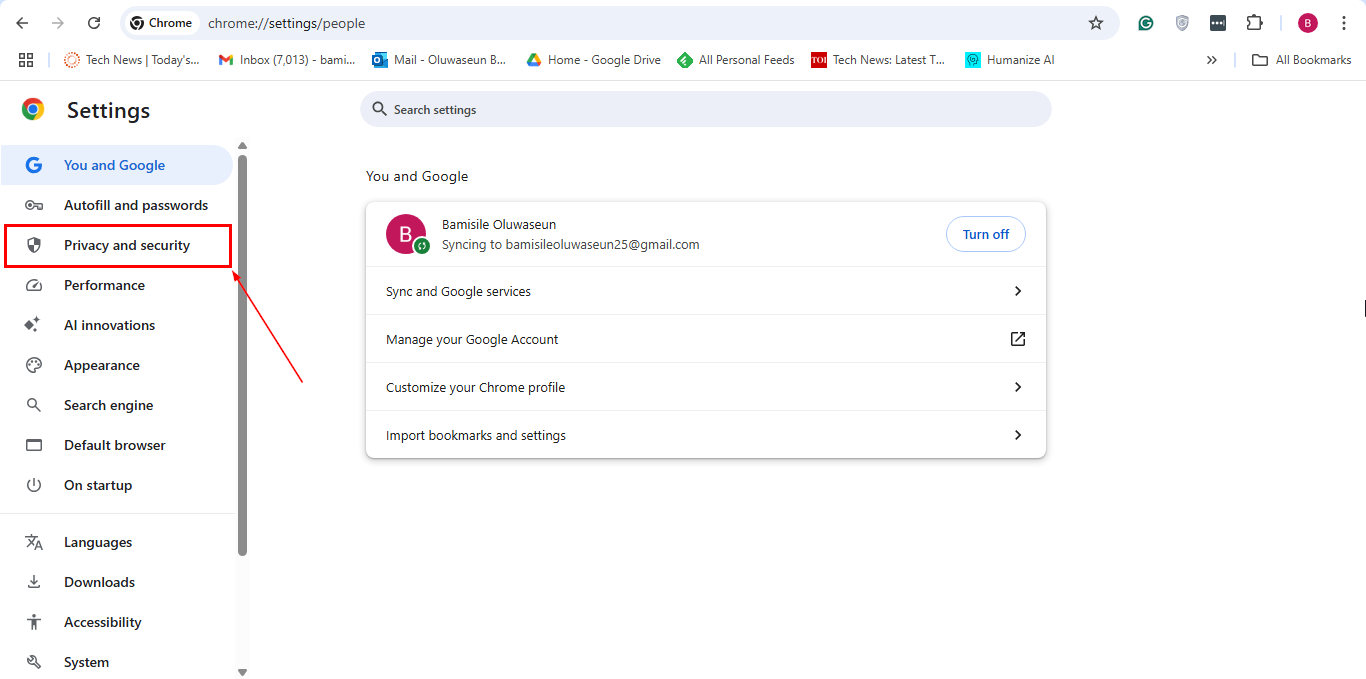
Step 1: On the Chrome app, click the three-dot menu in the top-right corner and select "Settings"

Step 2: Switch to the Privacy and security tab
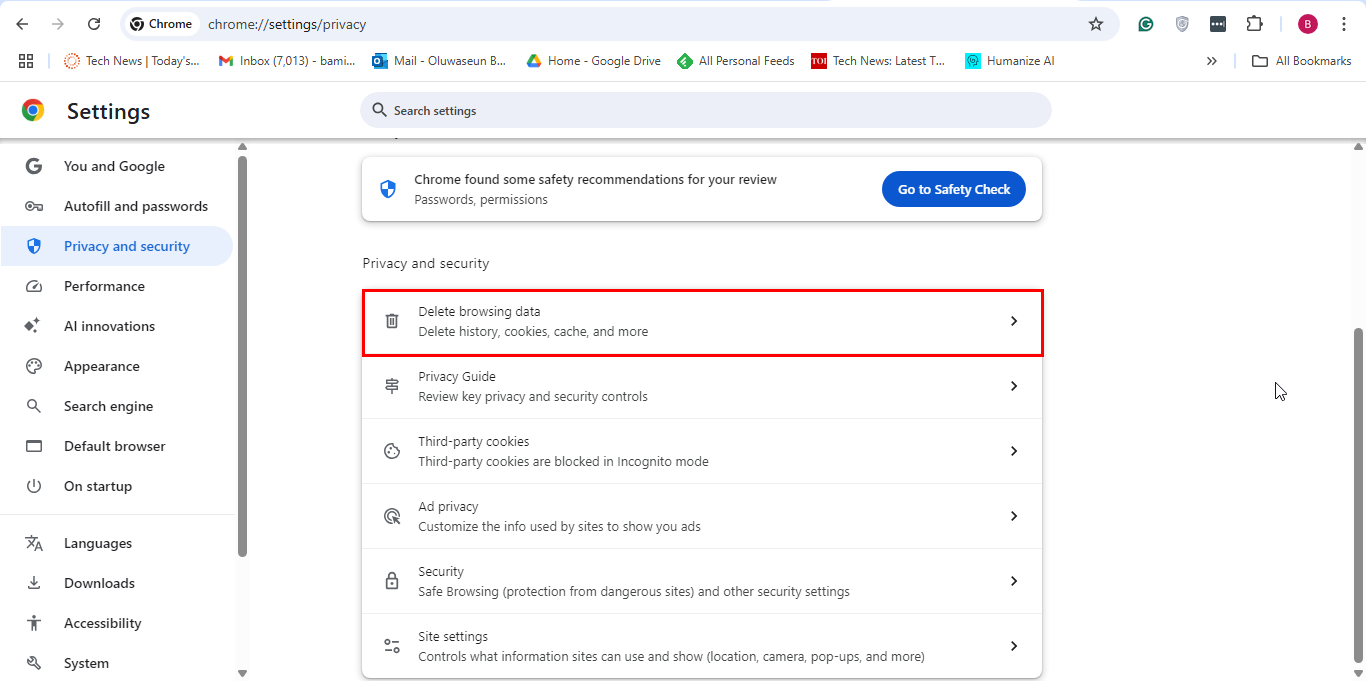
Step 3: Select "Delete browsing data"
Step 4: Click the Time range dropdown and select "All time"
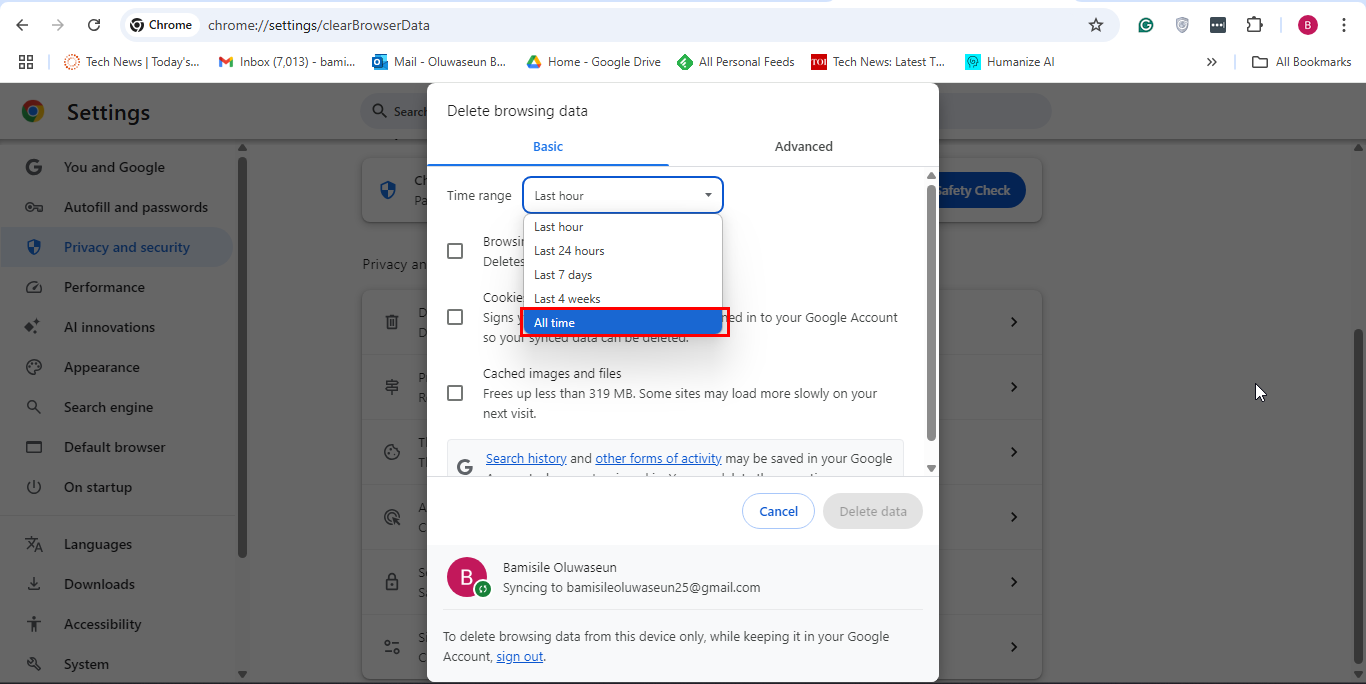
Step 5: Finally, check the Cached images and files checkbox and click the "Delete data" button. Hence, the cache data on your Chrome browser will be deleted
Conclusion
Clearing your cache in Chrome is a quick, effective way to keep your browser running smoothly. It fixes glitches, speeds up performance, and helps websites load the way they’re supposed to. It only takes a minute, and it’s one of those small tech habits that pay off big over time.
If you’ve been dealing with slow loads or strange site behavior, clearing your cache might be all you need to get things back on track.
Image Credit: Oluwaseun Bamisile/Techloy.com


