

One of the first things I noticed after upgrading to Windows 11 was how sleek everything looked—but on my then smaller laptop screen, every inch of space counted. The taskbar, while useful, was constantly sitting there taking up room I really wanted for the apps I was working in.
Whether I was editing photos, reviewing documents side-by-side, or just trying to make the most of a compact display, I found myself wishing for a bit more breathing room.
That’s when I discovered the option to automatically hide the taskbar. It’s one of those simple settings that instantly gives you more screen real estate without sacrificing functionality. If you want to make the most out of every pixel on your screen, this is an easy win.
Steps to Hide the Taskbar
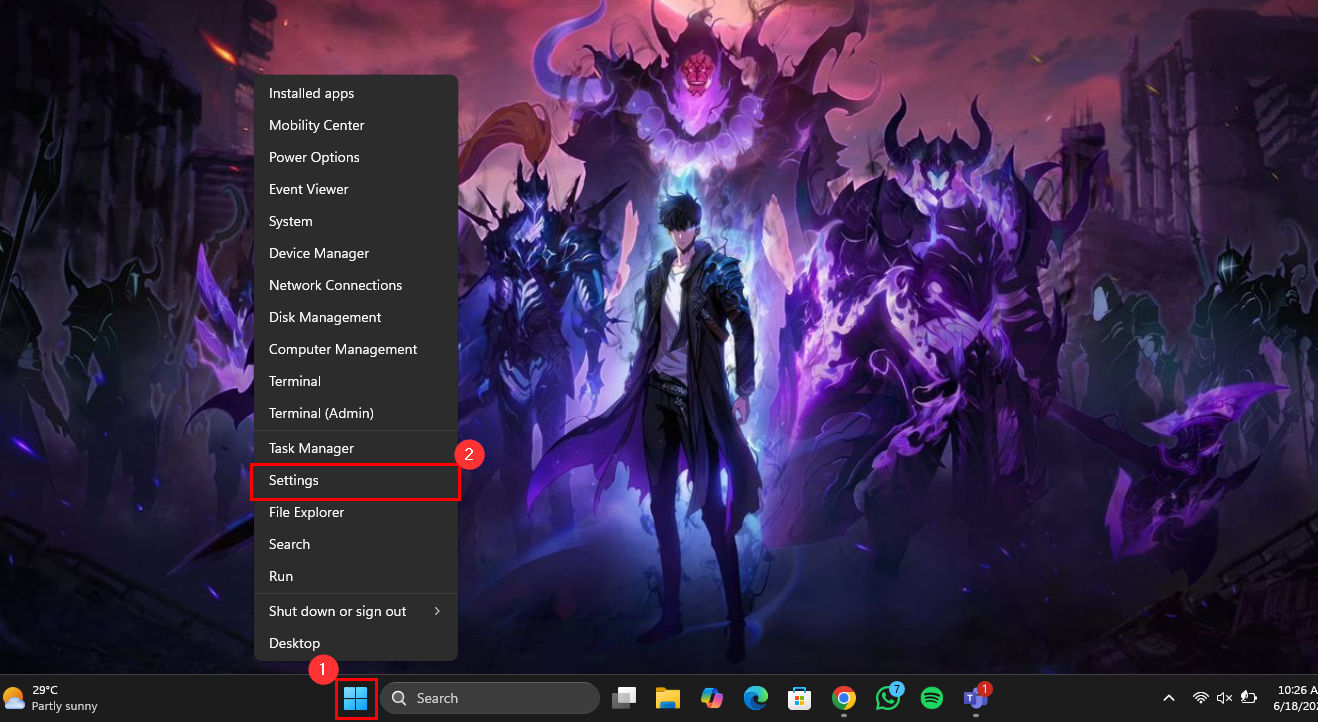
Step 1: Right-click the Start button and select "Settings"
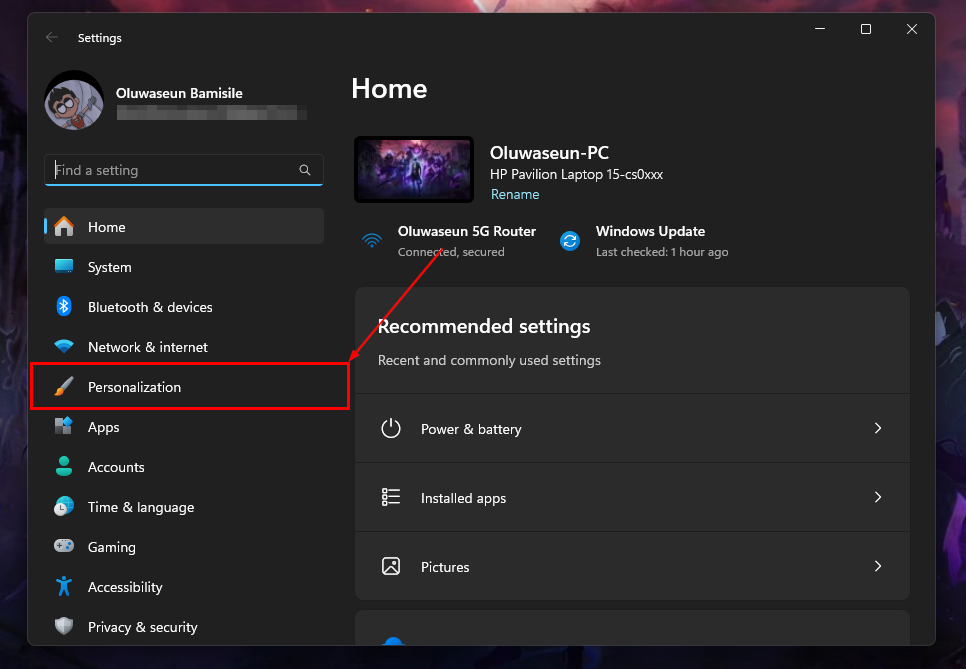
Step 2: Select "Personalization" on the left pane
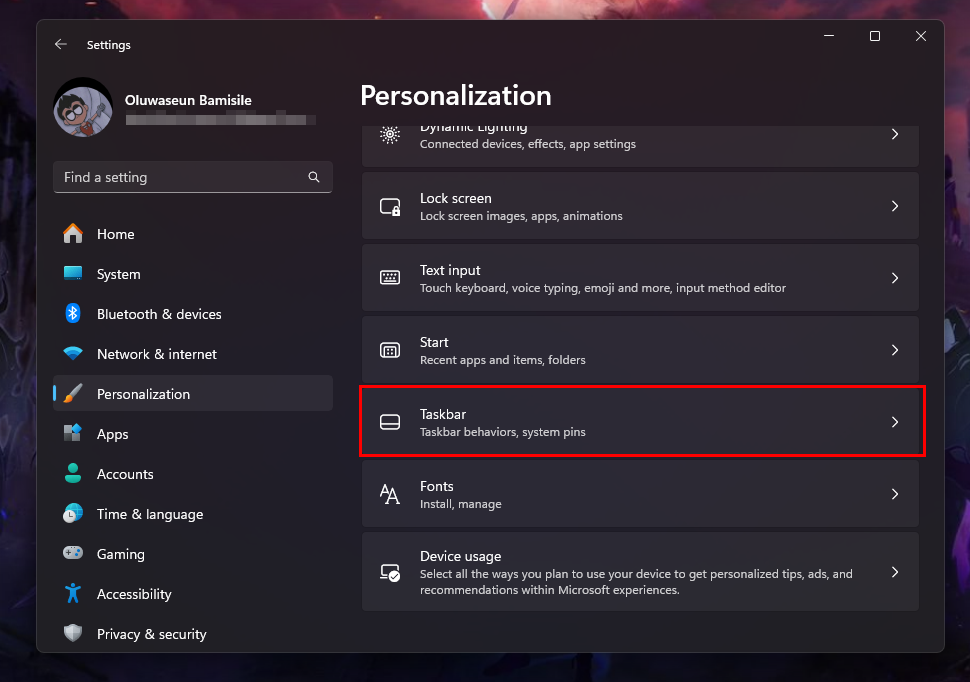
Step 3: Scroll down a bit and click on "Taskbar"
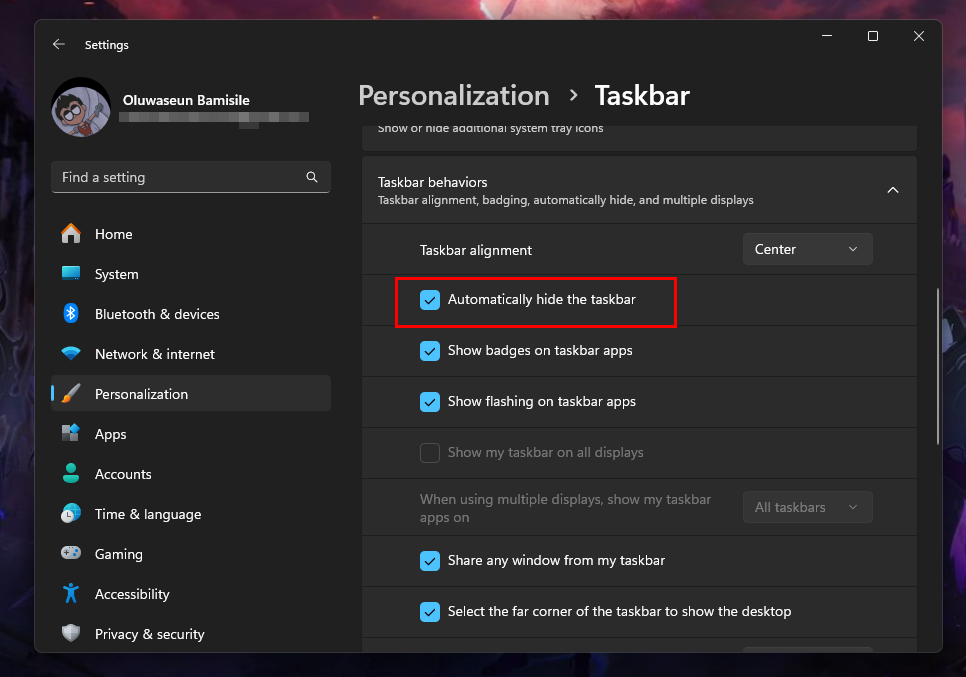
Step 4: Now, select "Taskbar behaviors"

Step 5: Finally, check the box labelled “Automatically hide the taskbar”. Hence, the taskbar will hide when not in use and appear when you move your cursor to the bottom of the screen

Conclusion
If you’re working with a smaller screen or just prefer a cleaner, more spacious desktop, hiding the taskbar in Windows 11 is one of the simplest ways to reclaim visual space. It clears the clutter without taking away the convenience—your taskbar is always just a hover away.
Regardless of what you're doing, that extra inch at the bottom of your screen makes a surprising difference. It’s a small tweak, but one that can make your workspace feel less cramped and more efficient.


