

You may need to convert a JPEG image file to a PNG file to make it compatible with a specific program or platform. Luckily, macOS has got you covered with a built-in converter that can quickly change the file format of common image files.
Although it only allows you to convert to JPEG, PNG, and HEIF, it still gets the job done. You can also convert from other file formats, which is super useful. By converting an image file, you can ensure that it is compatible with a wider range of devices, applications, or systems and that it retains its quality and resolution.
How to Convert Image Files on a MacBook
- To access Quick Actions for an image file on your Mac, simply locate the file in Finder, then right-click on it.
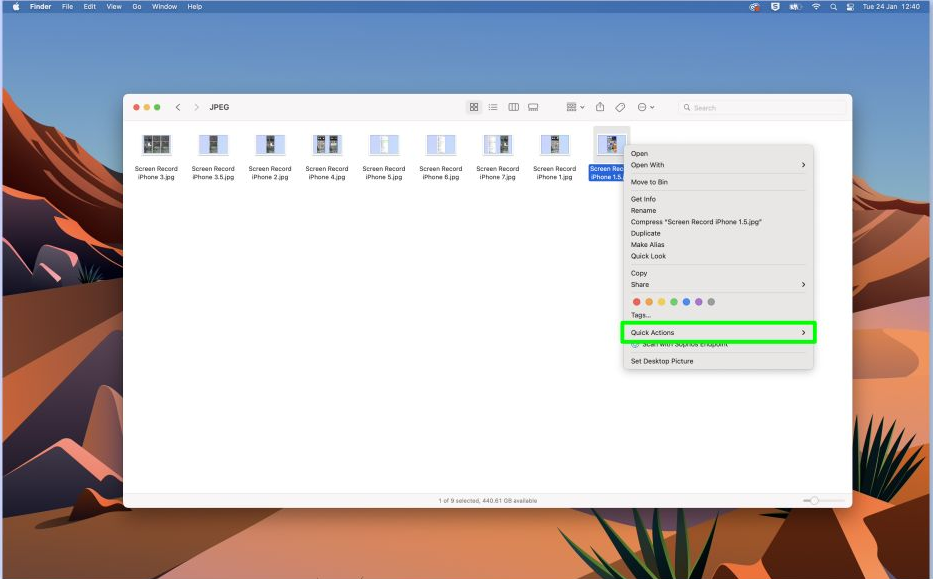
2. Click Convert Image
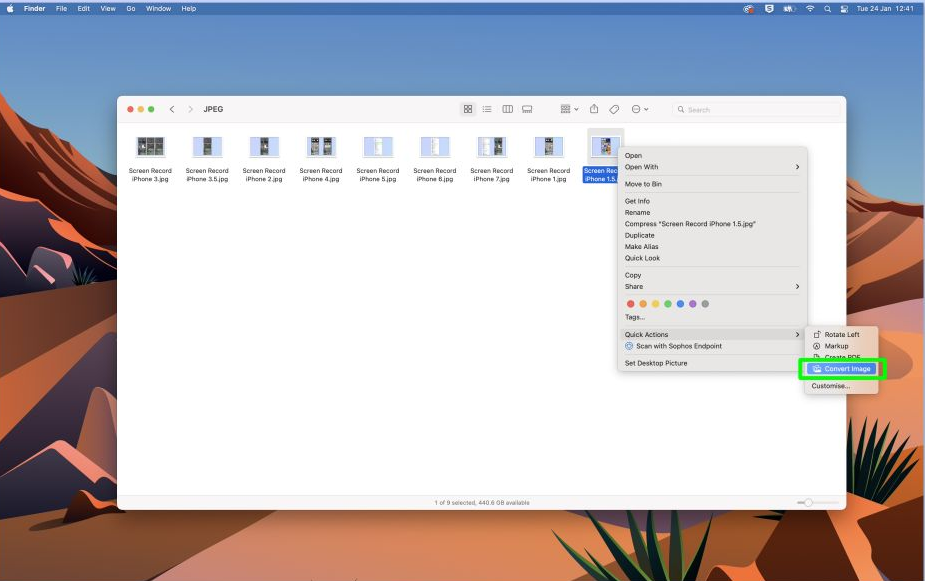
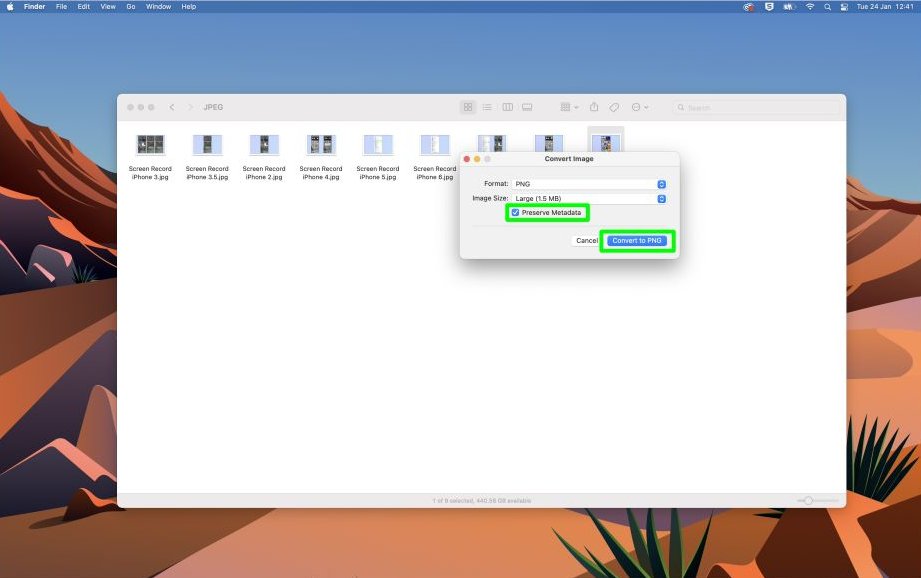
3. Once you've selected the image file you want to convert on your Mac, a conversion dialog box will appear on your screen.

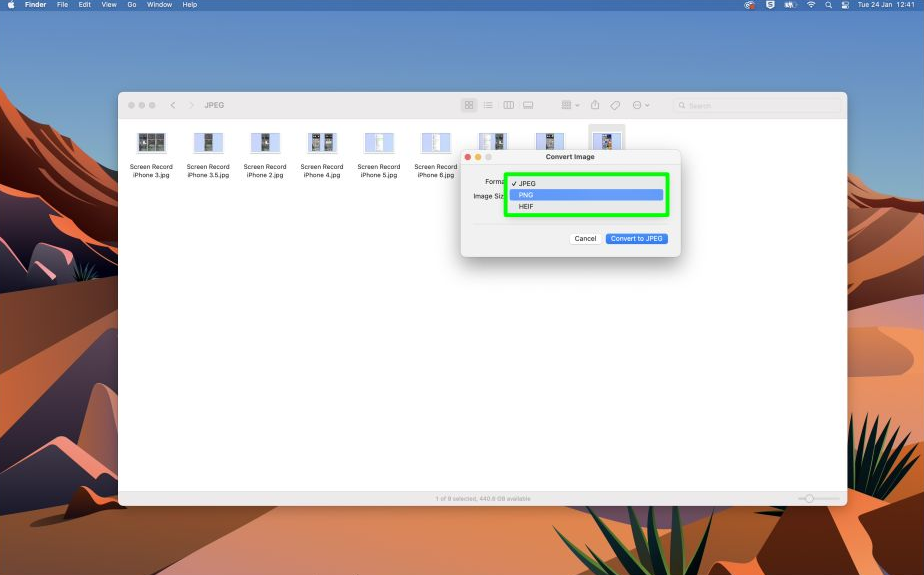
4. To select the output file format for your image conversion, click on the Format field within the conversion dialog box. This will display a list of available file formats that you can convert your image file to. You can choose from popular formats like JPEG, PNG, and HEIF, depending on your specific needs.
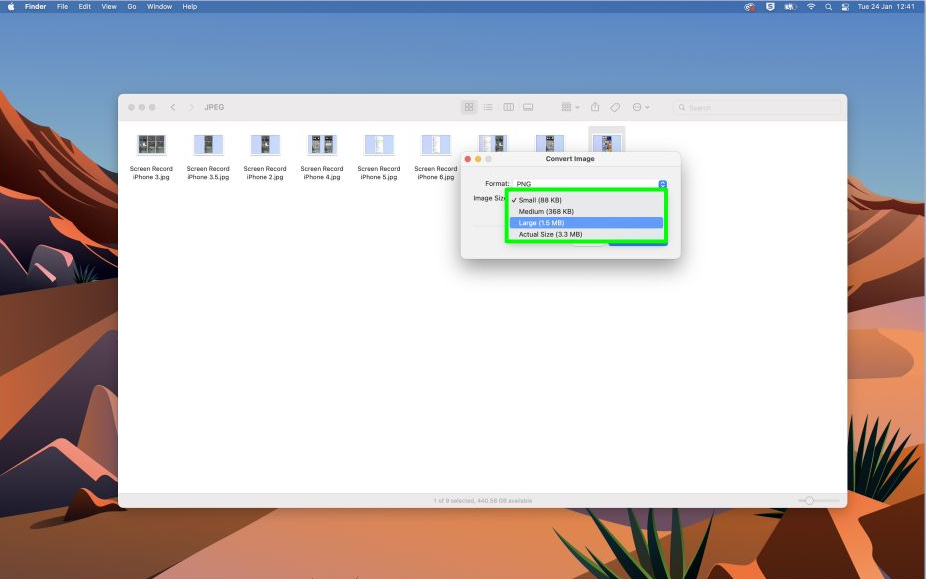
5. To select the desired image size for your conversion, click on the Image Size field within the conversion dialog box. This will display a list of available image size options that you can choose from.
6. To retain the metadata of an image file during conversion on a Mac, check the Preserve Metadata box in the conversion dialog box. This retains important information such as the date, location, and camera settings used to capture the image. After making your selections, click Convert to [Selected Format] to start the conversion process. The converted file will retain the metadata, if applicable while having the selected file format and size.
Conclusion
Converting images on a Mac is a quick and easy process that can be done using the built-in image conversion tool, saving you time and effort. Since the image conversion tool is built into the Mac operating system, there is no need to download or purchase any additional software.
Image Credit: Future


