

In the era of smartphones and digital photography, capturing precious moments with our iPhones has become an integral part of our lives. Whether it's a breathtaking sunset, a fun family gathering, or a memorable vacation, our iPhones serve as repositories for countless cherished memories.
But, when it comes to organizing and storing these photos, it's often more convenient to have them saved on our computers. Transferring photos from an iPhone to a Mac allows for easier access, better organization, and the ability to edit or share them with others.
In this guide, we will explore methods to transfer photos from your iPhone to a Mac, ensuring that your memories are securely backed up and readily available on your computer.
How to Import Photos From Your iPhone to Mac
- Connect your iPhone to your Mac using a USB cable. This establishes a direct connection between the two devices, enabling photo transfer.
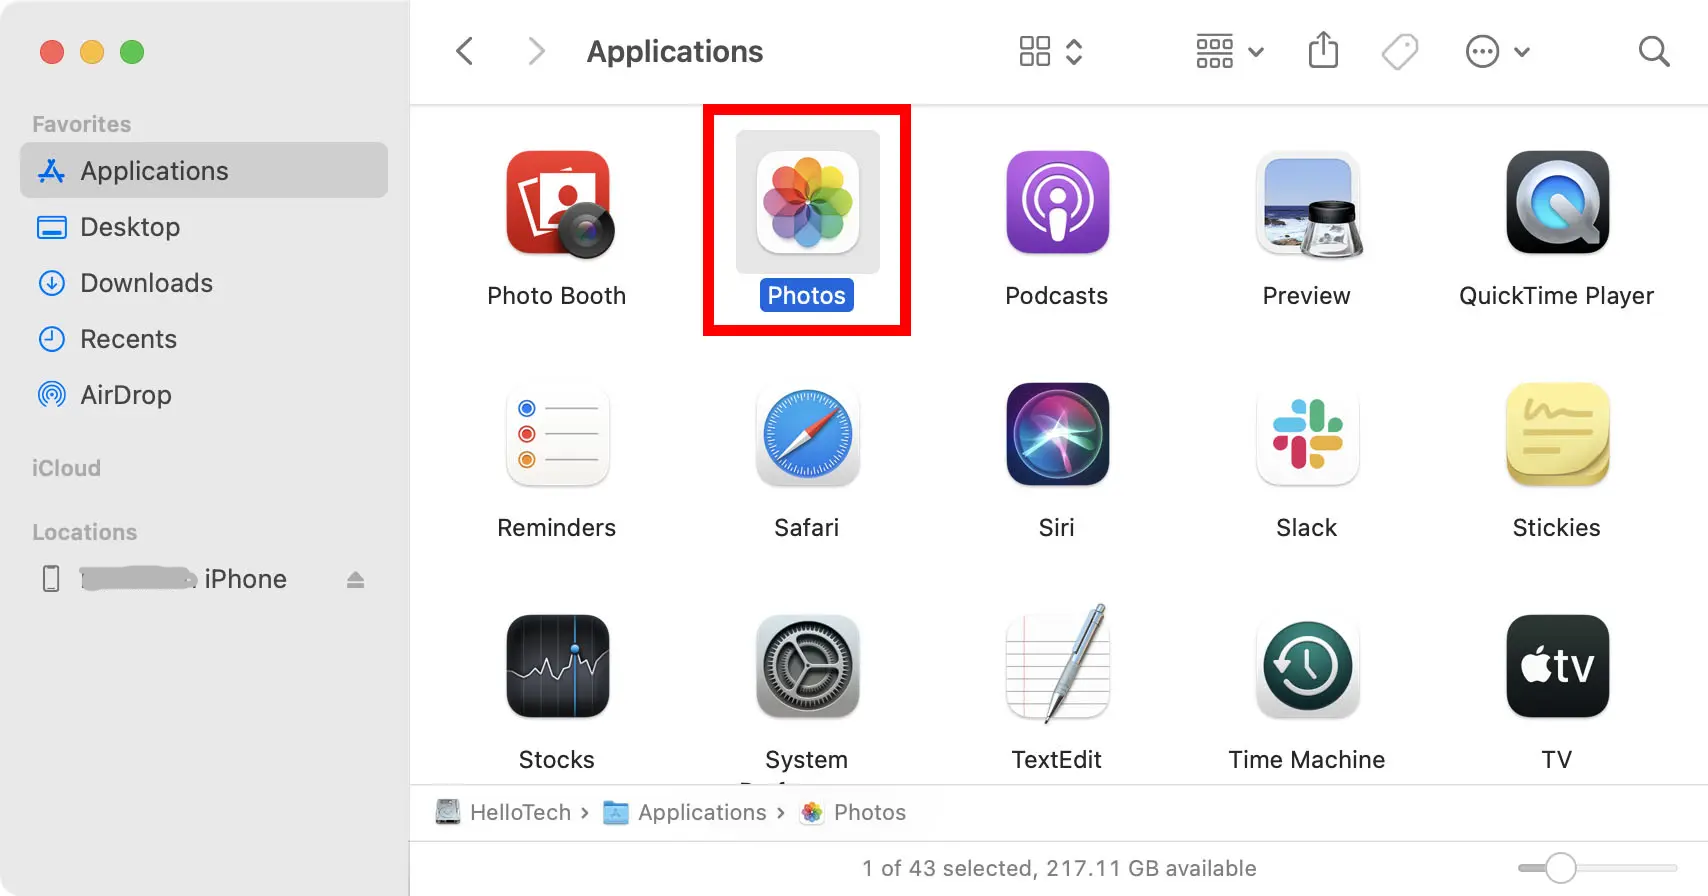
- Open the Photos app on your Mac.
To do this, right-click anywhere on your desktop and simultaneously press the Command + Shift + A keys. This action will take you directly to the Applications folder.
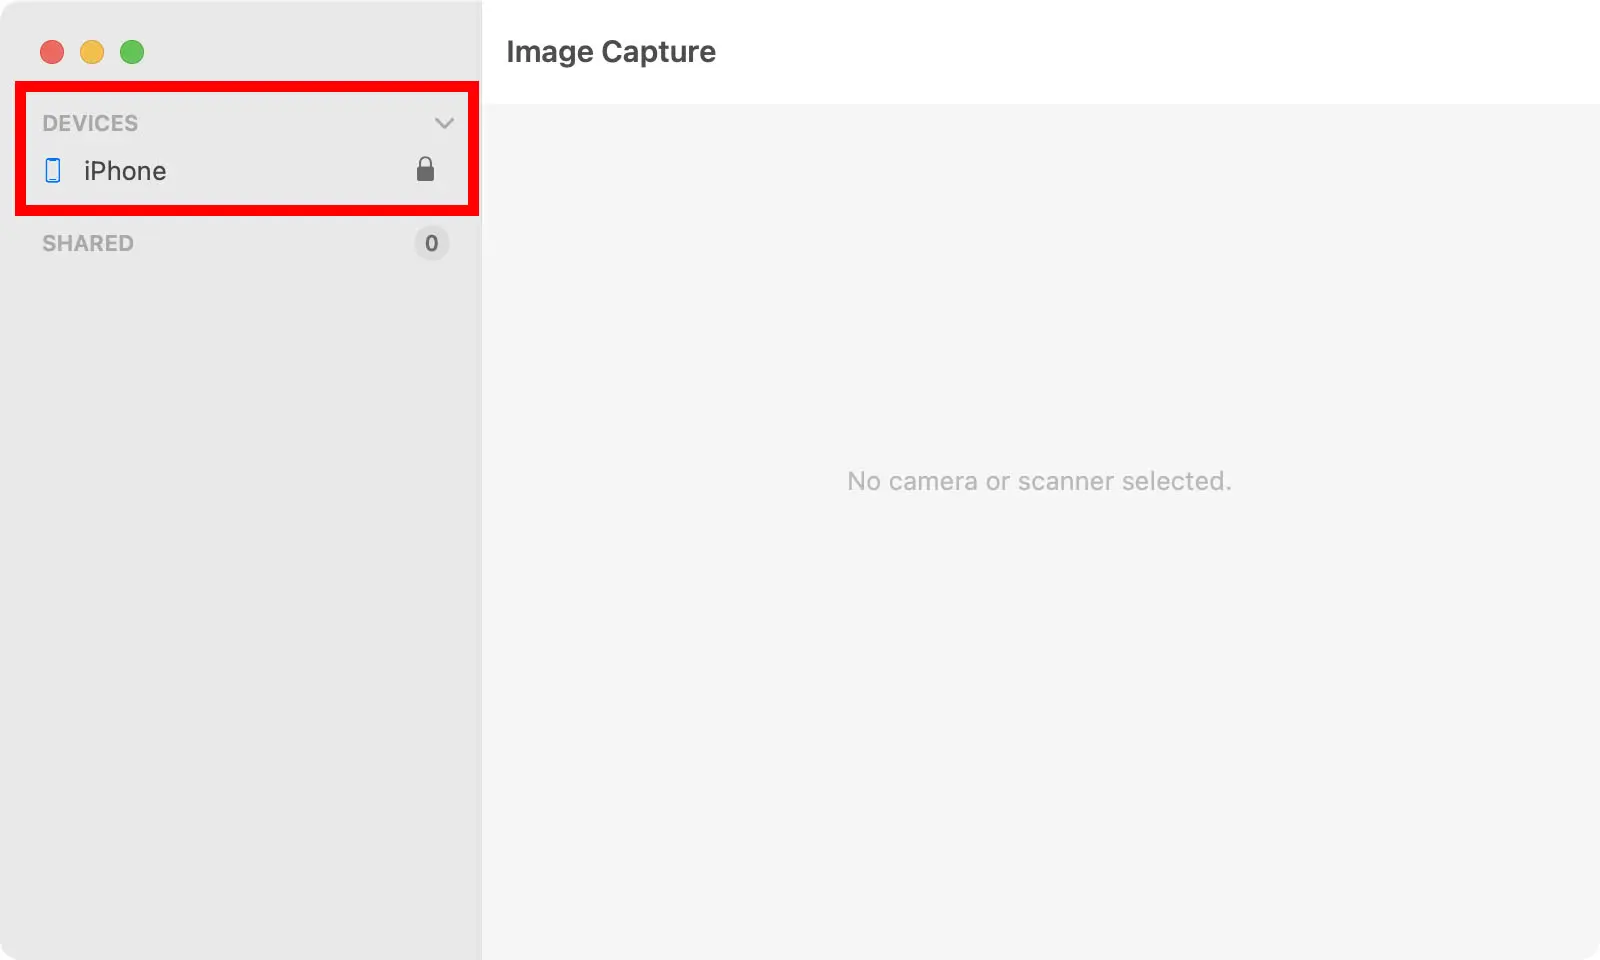
3. Next, locate and select your iPhone from the left sidebar under the Devices section.
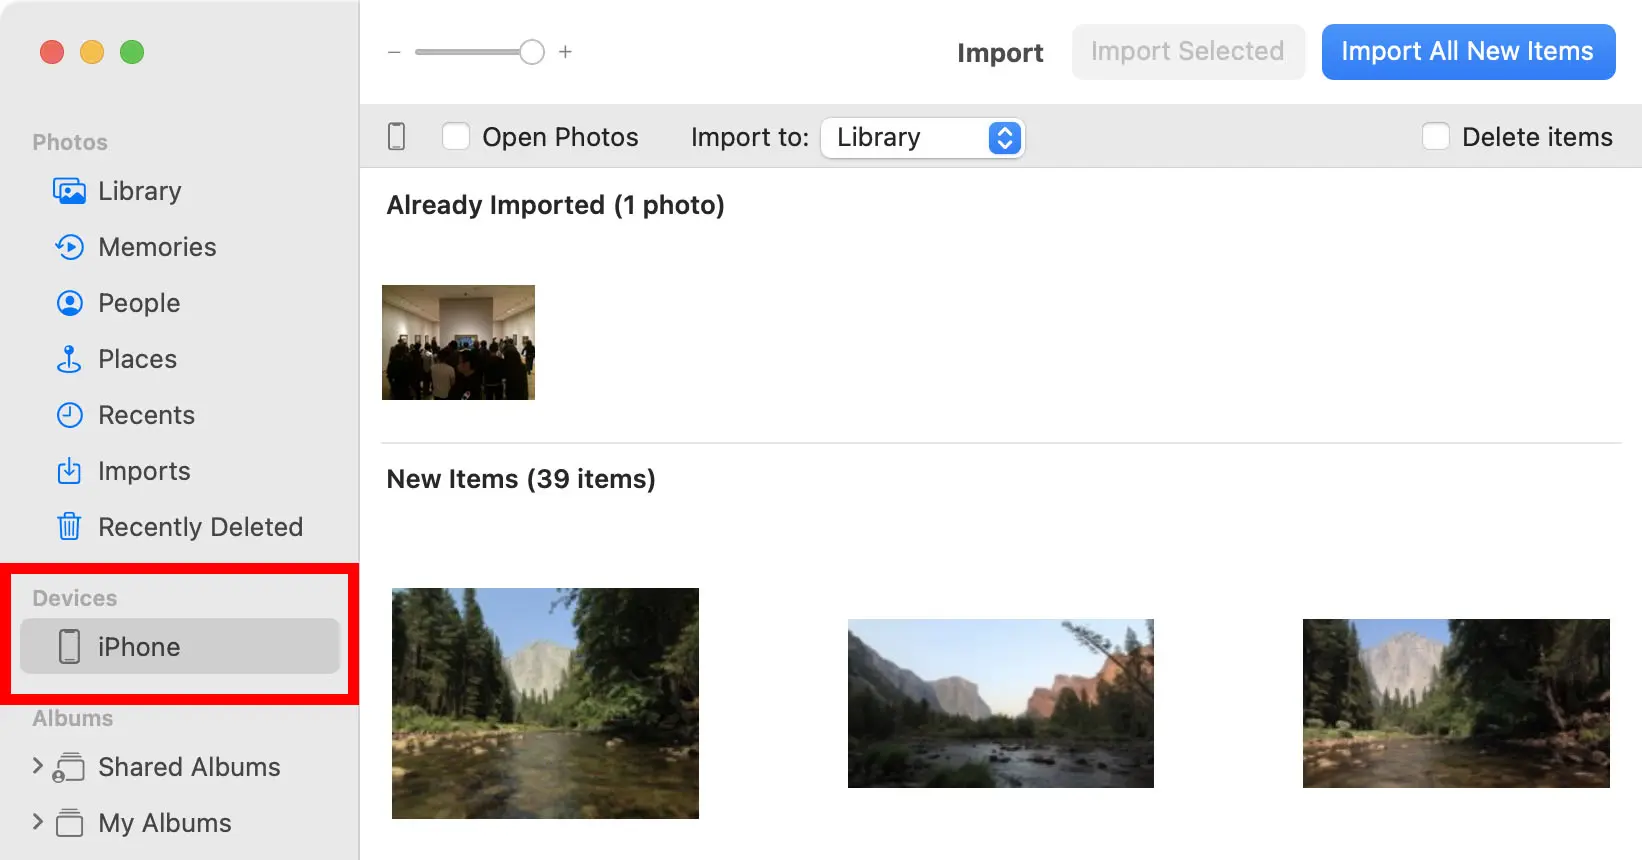
If the app fails to display your photos, ensure that you unlock your iPhone. Additionally, you may encounter a prompt asking you to trust this computer. In that case, simply tap Trust to proceed.
4. Next, you can choose which photos to import by selecting them individually or selecting Import All New Items option.
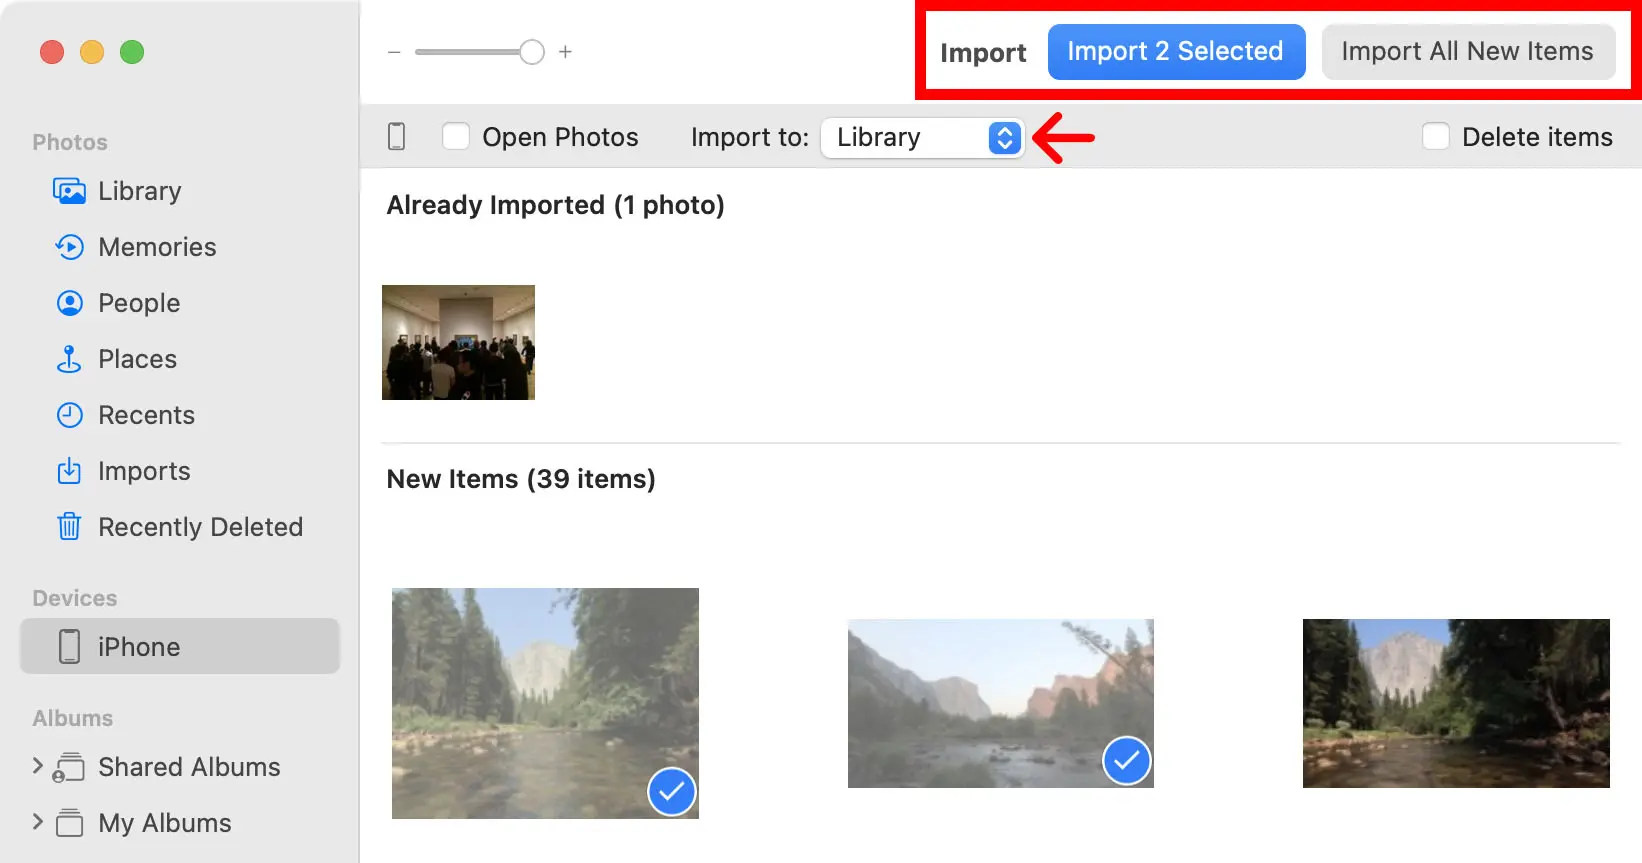
If you decide to select individual photos, simply click on them, and you'll notice a blue checkmark appearing in the bottom-right corner, indicating your selection but if you go with the Import All New Items option, it will sync any pictures that are not already present in the Photos app.
5. Finally, be patient and wait for the photos to finish importing before disconnecting your device.
Transferring Photos from Your iPhone to a Folder on Your Mac
- Connect your iPhone to your Mac using a USB cable.
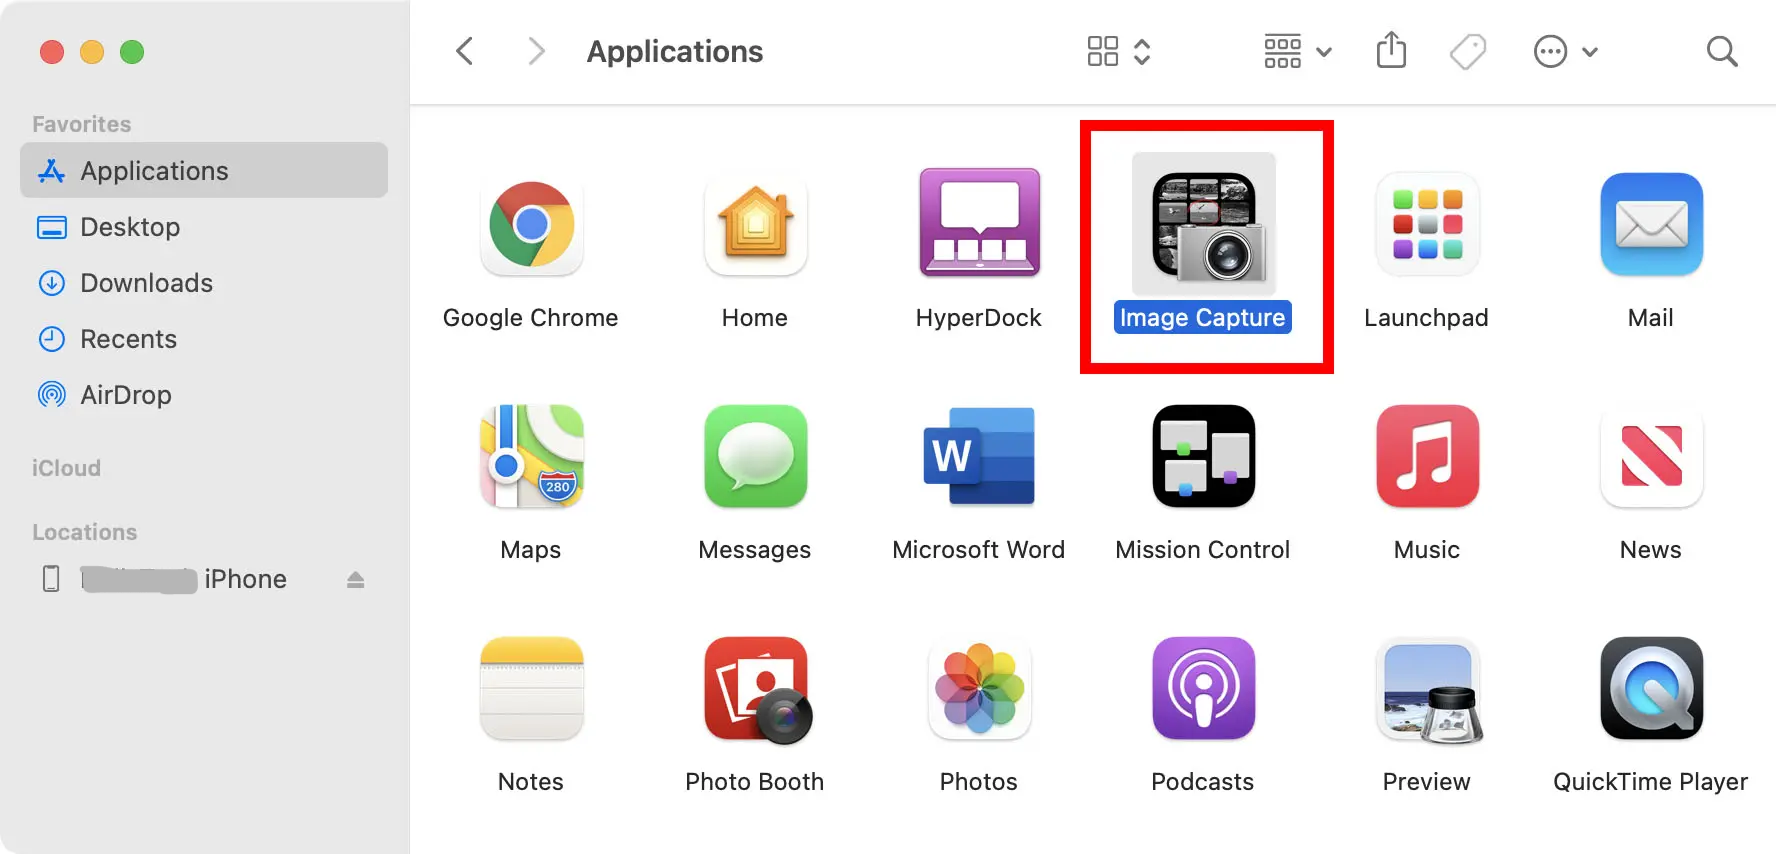
- Next, launch the Image Capture app on your Mac.
3. Next, locate and select your iPhone from the left sidebar in the Image Capture app. You will find it listed under the Devices section.
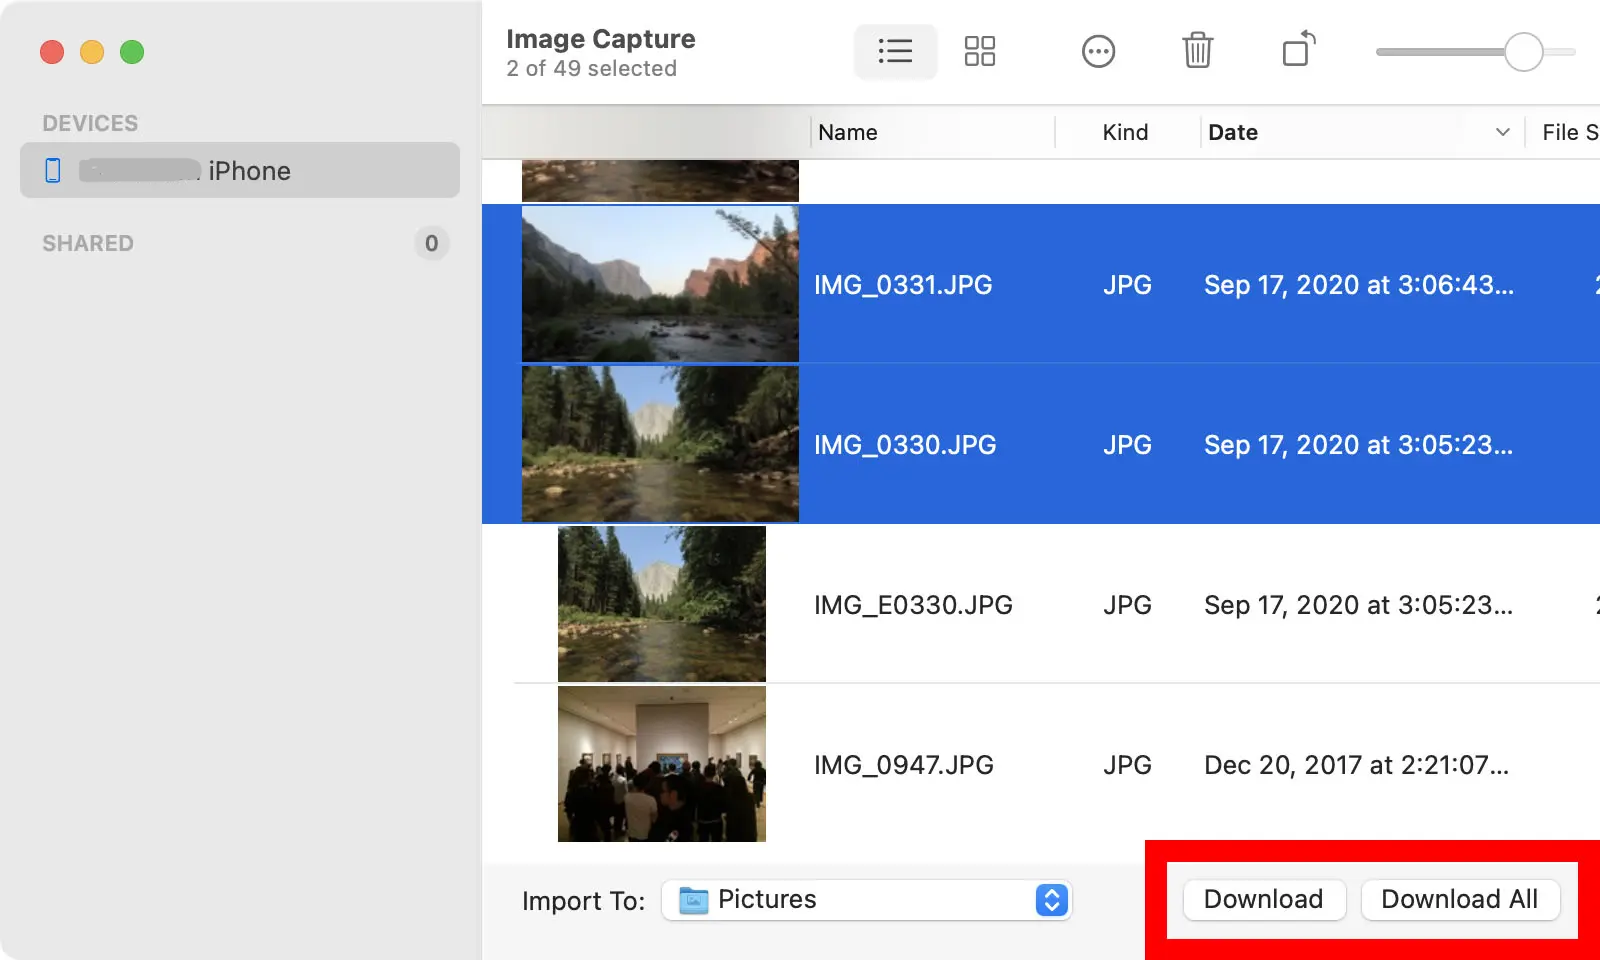
4. Then, choose the specific photos you wish to import.
You can select multiple photos by holding down either the Shift or Command keys on your keyboard while making your selections. However, if you prefer to transfer all the photos from your iPhone to your Mac, you can simply skip this step.
5. Finally, click on the Download button to initiate the transfer of the selected photos, or if you want to download all the photos, click on Download All.
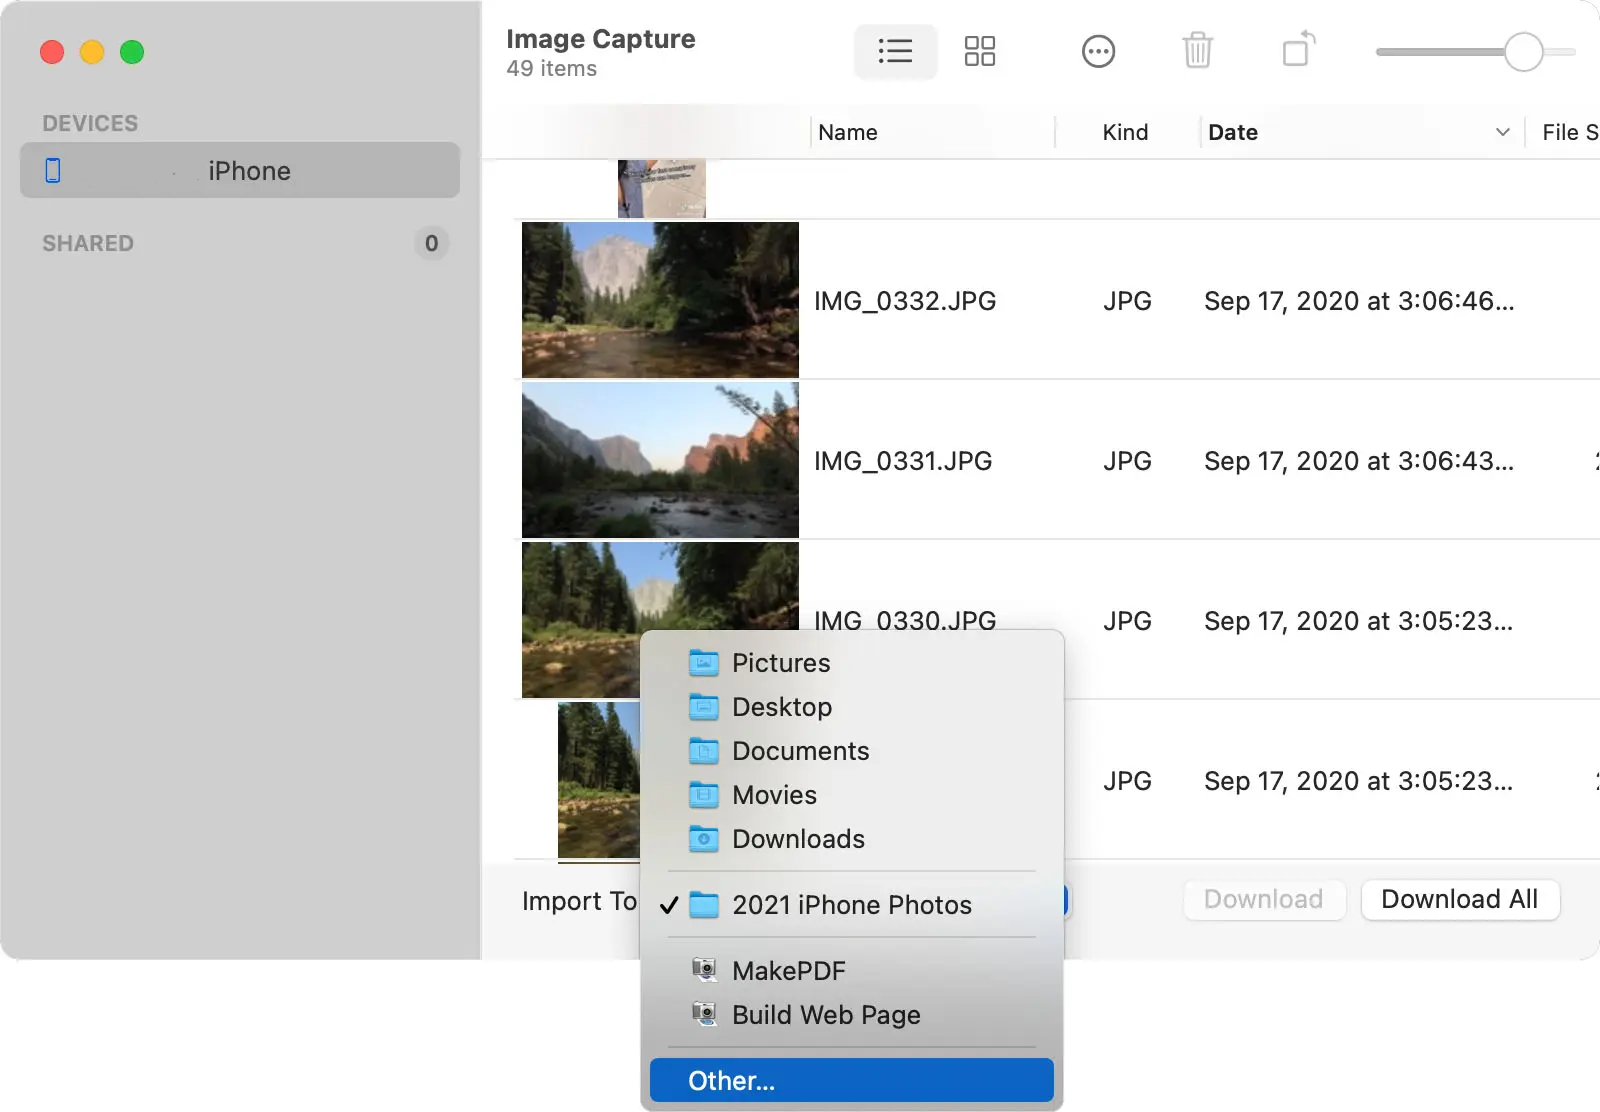
6. By default, Image Capture will save your photos to the Pictures folder on your Mac.
However, if you prefer to transfer your photos to a different folder, simply click on the drop-down menu next to Import To and select Other. This allows you to choose a specific destination folder of your choice for the photo transfer.
Conclusion
Transferring photos from your iPhone to your Mac is a simple and essential process to ensure your precious memories are safely stored and easily accessible. Throughout this guide, we explored various methods to accomplish this task, including using a USB cable and the Photos app, as well as the Image Capture app.
With these steps in mind, you're now equipped to seamlessly transfer your treasured iPhone photos to your Mac. Enjoy the convenience, flexibility, and peace of mind that come with having your memories backed up and readily available on your computer. So, go ahead and start preserving those special moments on your Mac today.
Image Credit: Hellotech


